SMU - Revised Tool Information, Procedures and Labor Times in Body Rear End

| Subject: | Revised Tool Information, Procedures and Labor Times in Body Rear End |
| Models: | 2000 Buick LeSabre |
This bulletin is being issued to replace the following in the Body Rear End sub-section of the 2000 Service Manual:
| • | Special Tools and Equipment |
| • | Compartment Lid Adjustment -- Rear (Includes Torque Rod Adjustment) |
| • | Hinge Replacement -- Rear Compartment Lid |
| In addition, please add the following information: |
| • | Torque Rod Replacement -- Rear Compartment Lid |
Revise the Special Tools and Equipment to read as follows:
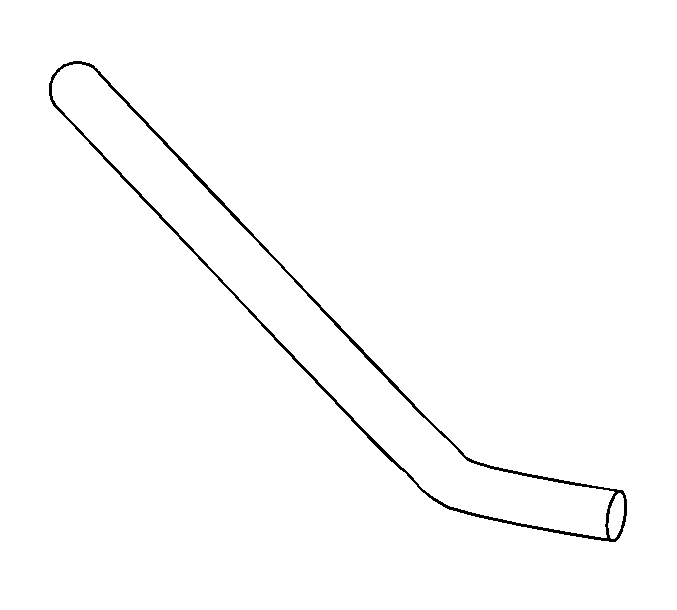
J 39384-10 Torsion Rod Adjustment Bar
Revise the Compartment Lid Adjustment -- Rear (Includes the Torque Rod Adjustment) to read as follows:
Tools Required
J 39384-10 Torque Rod Adjustment Bar
Front-to-Rear, Side-to-Side and Up/Down Adjustments
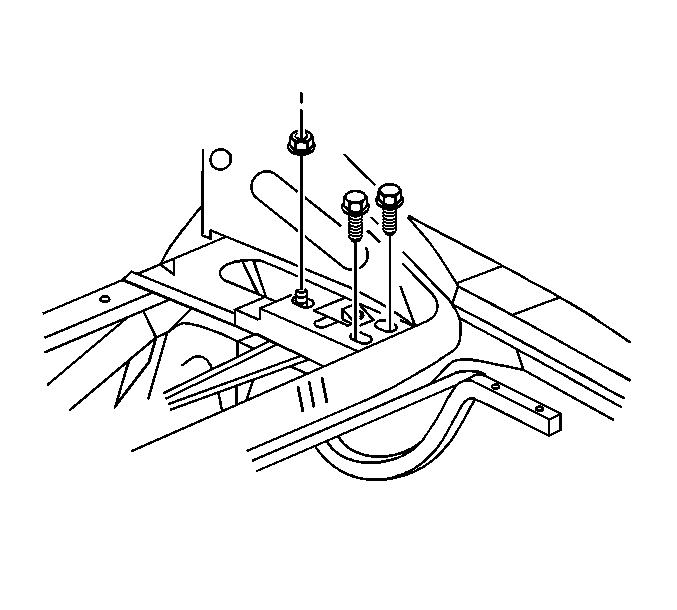
- Remove the rear shelf trim panel.
- Perform the front-to-rear lid adjustment at the hinge to rear shelf fasteners.
- Loosen the fasteners.
- Align the lid so as to achieve an equal 3 mm (1/8 in) gap around the entire perimeter of the rear compartment lid.
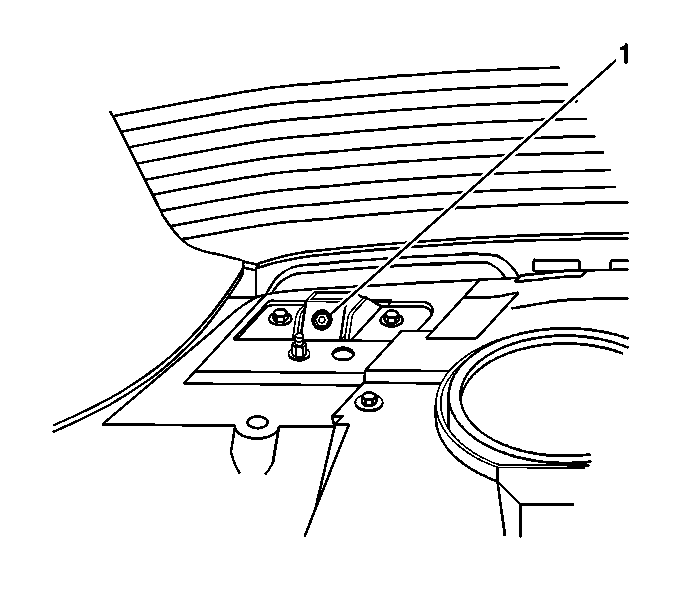
- The up and down adjustment at the front of the rear compartment lid is achieved by turning the adjustment screw (1) located on the hinge arms. This procedure is performed from inside the passenger compartment.
- Adjust the rear compartment lid flush with the rear quarter panels.
- The up and down adjustment at the rear of the rear compartment lid is achieved by turning the over-slam bumpers in and out.
- Adjust the rear compartment lid flush with the rear quarter panels.
Refer to Trim Panel Replacement -- Rear Shelf in the Interior Trim sub-section of the Service Manual.
Notice: Refer to the Fastener Notice in the Cautions and Notices sub-section of the Service Manual.
Tighten
Tighten the fasteners to 24 N·m (18 lb ft).
Torque Rod Adjustment
- Support the rear compartment lid.
- Remove the rear compartment trim, as necessary.
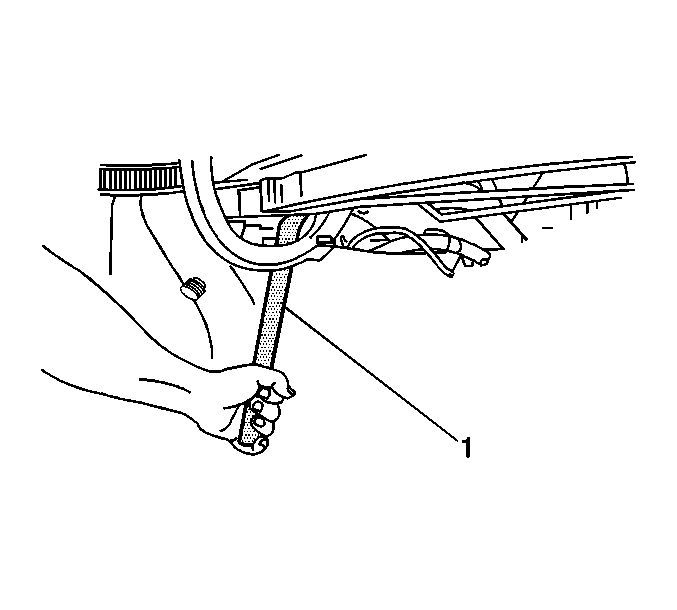
- Install the J 39384-10 to the end of the torque rod.
- Adjust the torque rods to one of three positions for the desired tension.
- Reposition the end of the torque rod in a higher notch in order to decrease the amount of effort needed to raise the lid.
Refer to Compartment Trim Panel Replacement -- Rear in the Body Rear End sub-section of the Service Manual.
Revise the Hinge Replacement -- Rear Compartment Lid to read as follows:
Tools Required
J 39384-10 Torque Rod Adjustment Bar
Removal Procedure
Caution: When a rear compartment lid hold open device is being removed or installed, provide alternate support to avoid the possibility of damage to the vehicle or personal injury.
- Prop the rear compartment lid in the open position.
- Insert an 8 mm x 130 mm (5/16 in x 5 in) bolt (1) into each hinge (2) in order to prevent the hinge from fully opening.
- Remove the rear compartment lid.
- Remove the rear shelf trim panel.
- Fold the rear shelf insulator away from the rear compartment hinge attaching nuts and bolts.
- Remove the nuts and bolts from the rear compartment hinges.
- Remove the hinge (2) and the torque rods (1) as an assembly from the vehicle.
- Use the J 39384-10 in order to release the torque rods from the rear compartment hinge.
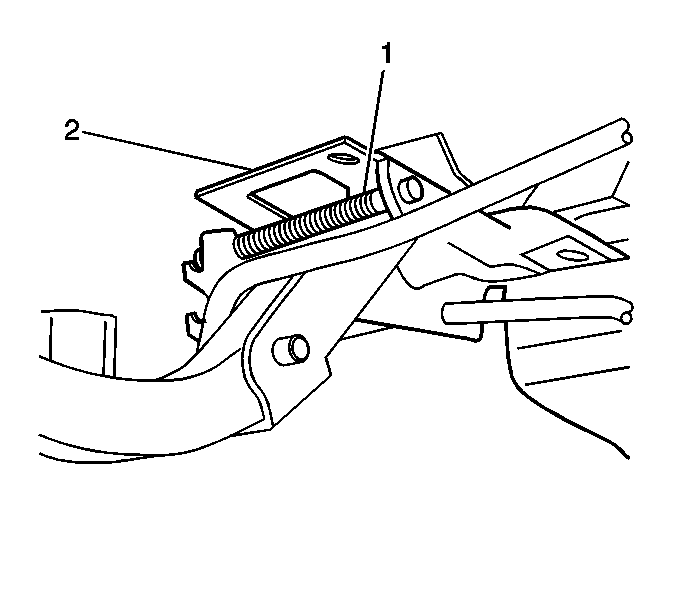
Refer to Compartment Lid Replacement -- Rear in the Body Rear End sub-section of the Service Manual for the removal procedure.
Refer to Trim Panel Replacement -- Rear Shelf in the Interior Trim sub-section of the Service Manual for the removal procedure.
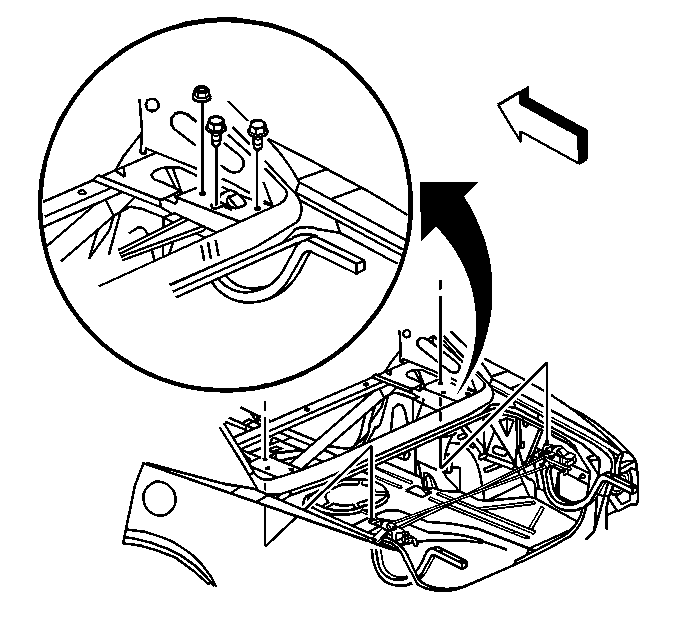
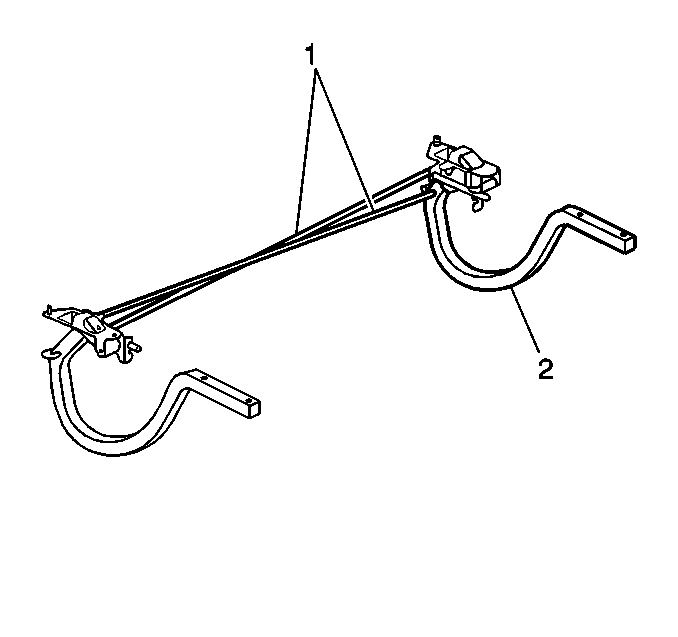
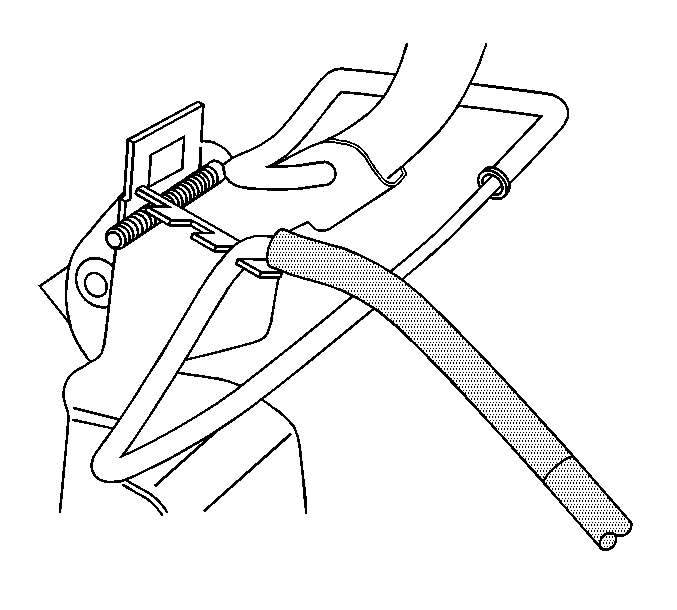
Installation Procedure

- Use the J 39384-10 in order to assemble the torque rods (1) to the rear compartment hinges (2).
- Install the hinge and torque rod assembly into the vehicle.
- Install the nuts and bolts in order to secure the hinges to the vehicle.
- Remove the bolts preventing the hinges from fully opening.
- Install the rear compartment lid.
- Adjust the rear compartment lid as necessary.
- Install the rear shelf trim panel.

Notice: Refer to the Fastener Notice in the Cautions and Notices sub-section of the Service Manual.
Tighten
Tighten the nuts and bolts to 24 N·m (18 lb ft).
Refer to Compartment Lid Replacement -- Rear in the Body Rear End sub-section of the Service Manual for the installation procedure.
Refer to Compartment Lid Adjustment -- Rear procedure in the Body Rear End sub-section of the Service Manual.
Refer to Trim Panel Replacement -- Rear Shelf in the Interior Trim sub-section of the Service Manual for the installation procedure.
Add the following Torque Rod Replacement -- Rear Compartment Lid:
Tools Required
J 39384-10 Torque Rod Adjustment Bar
Removal Procedure
Caution: When a rear compartment lid hold open device is being removed or installed, provide alternate support to avoid the possibility of damage to the vehicle or personal injury.
- Prop the rear compartment lid in the open position.
- Insert an 8 mm x 130 mm (5/16 in x 5 in) bolt (1) into each hinge (2) in order to prevent the hinge from fully opening.
- Remove the rear compartment lid.
- Remove the rear shelf trim panel.
- Fold the rear shelf insulator away from the rear compartment hinge attaching nuts and bolts.
- Remove the nuts and bolts from the rear compartment hinges.
- Remove the hinge (2) and the torque rods (1) as an assembly from the vehicle.
- Use the J 39384-10 in order to release the torque rods from the rear compartment hinge.

Refer to Compartment Lid Replacement -- Rear in the Body Rear End sub-section of the Service Manual for the removal procedure.
Refer to Trim Panel Replacement -- Rear Shelf in the Interior Trim sub-section of the Service Manual for the removal procedure.


Installation Procedure

- Use the J 39384-10 in order to assemble the torque rods (1) to the rear compartment hinges (2).
- Install the hinge and torque rod assembly into the vehicle.
- Install the nuts and bolts in order to secure the hinges to the vehicle.
- Remove the bolts preventing the hinges from fully opening.
- Install the rear compartment lid.
- Adjust the rear compartment lid as necessary.
- Install the rear shelf trim panel.

Notice: Refer to the Fastener Notice in the Cautions and Notices sub-section of the Service Manual.
Tighten
Tighten the nuts and bolts to 24 N·m (18 lb ft).
Refer to Compartment Lid Replacement -- Rear in the Body Rear End sub-section of the Service Manual for the installation procedure.
Refer to Compartment Lid Adjustment -- Rear procedure in the Body Rear End sub-section of the Service Manual.
Refer to Trim Panel Replacement -- Rear Shelf in the Interior Trim sub-section of the Service Manual for the installation procedure.
Warranty Information
The following revised labor operation times are the result of new labor time studies based on the revised procedures.
They are effective upon receipt. The changes will appear in the next update to the Labor Time Guide.
Labor Operation | Description | Labor Time |
|---|---|---|
B5420 | RH - Hinge, Rear Compartment Lid - R&R or Replace | 1.1 hrs |
B5421 | LH - Hinge, Rear Compartment Lid - R&R or Replace | 1.1 hrs |
B5427 | BOTH - Hinge, Rear Compartment Lid - R&R or Replace | 1.1 hrs |
B5460 | RH - Rod and/or Spring, Rear Compartment Lid Torque - Replace | 1.1 hrs |
B5461 | LH - Rod and/or Spring, Rear Compartment Lid Torque - Replace | 1.1 hrs |
