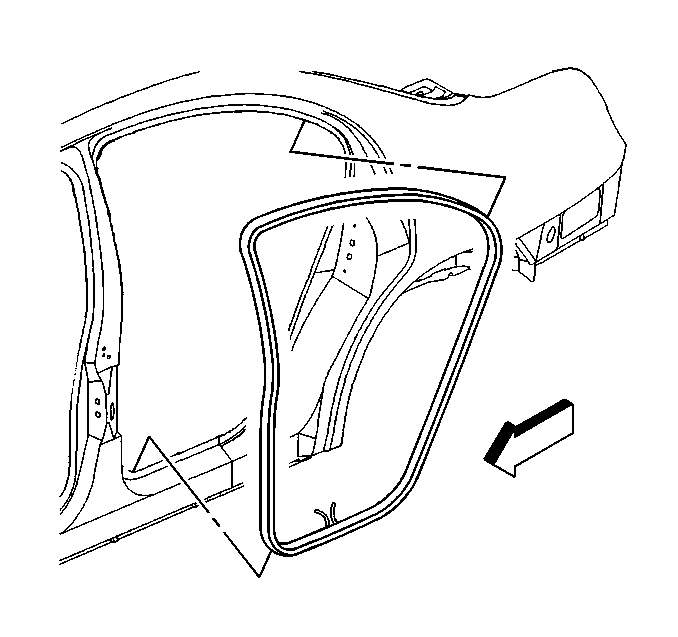
For 1990-2009 cars only
Removal Procedure
- Remove the sill plate. Refer to Carpet Retainer Replacement in Interior Trim.
- Start at the rear upper corner of the door opening and pull the weatherstrip away from the door opening flange.
- Work around the door opening and remove the weatherstrip.

Installation Procedure
- Position the paint dot in the upper corner of the center pillar.
- Working downward along the front edge, install the weatherstrip on the door opening flange ensuring that the carrier is fully seated in the corners.
- From the center pillar corner working rearward, install the weatherstrip along the roof rail and the rear of the door opening.
- Using the palm of your hand or a rubber mallet, ensure that the weatherstrip is seated on the entire door opening flange.
- Using a plastic trim stick or an equivalent, position the close-out lip over the interior trim around the door opening, or use the pull-string, on new weatherstrip, under the close-out lip, in order to reposition the lip over the interior trim.
- Install the sill plate. Refer to Carpet Retainer Replacement in Interior Trim.

Important:
• One paint dot on the weatherstrip indicates the RH weatherstrip
starting point. • Two paint dots on the weatherstrip indicates the LH weatherstrip
starting point.
Important: The rubber side of the weatherstrip should be outboard of the car.
