For 1990-2009 cars only
Tools Required
J 45059 Torque Angle Meter
Removal Procedure
- Remove the right engine mount bracket. Refer to Engine Mount Bracket Replacement - Right Side .
- Remove the drive belt tensioner assembly. Refer to Drive Belt Tensioner Replacement .
- Remove the crankshaft balancer. Refer to Crankshaft Balancer Replacement .
- Remove the crankshaft sensor shield.
- Remove the crankshaft sensor.
- Remove the oil pan to engine front cover bolts.
- Remove the engine front cover attaching bolts.
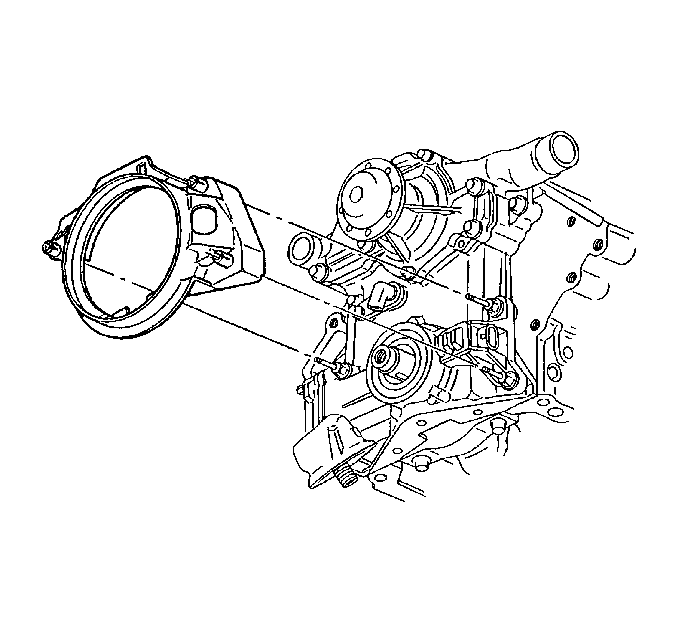
- Remove the engine front cover.
- Inspect the timing chain for overall in and out movement. Movement should not exceed 25 mm (1 in).
- Inspect the timing sprockets for wear.
- Clean the gasket mating surfaces at the cylinder block.
- If the oil pan gasket is excessively swollen, the oil pan must be removed and the gasket replaced.
- Clean and inspect the engine front cover. Refer to Engine Front Cover Cleaning and Inspection .


Installation Procedure
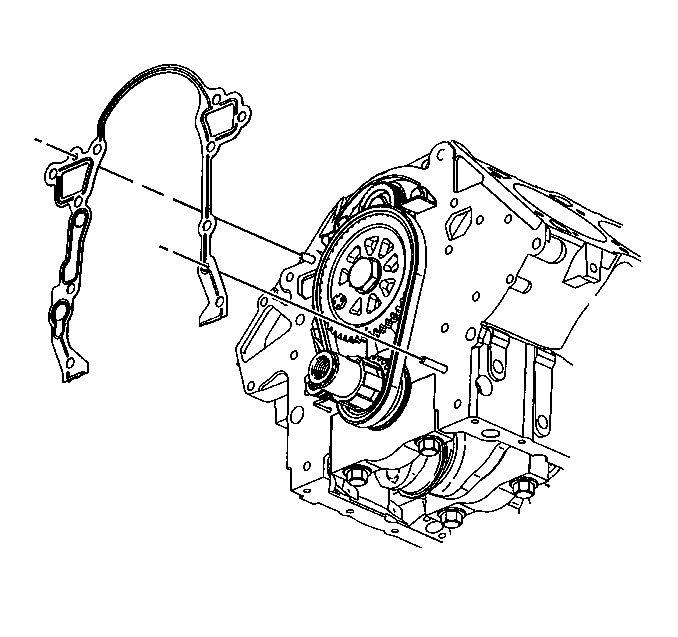
- Install the engine front cover gasket .
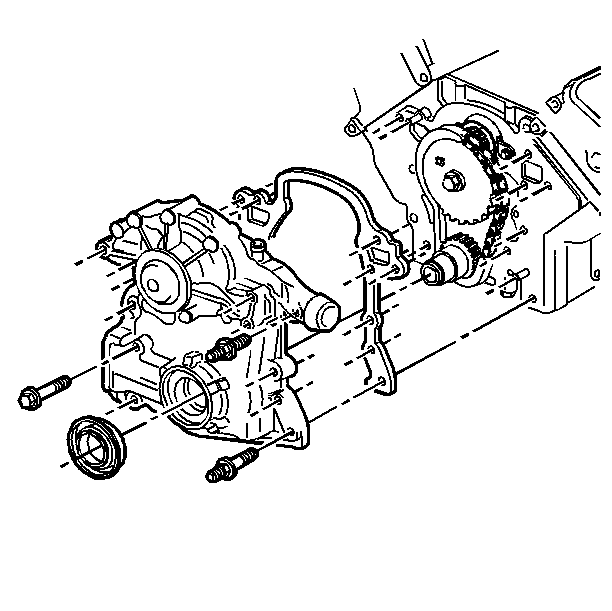
- Install the engine front cover.
- Apply sealant GM P/N 12346004 (Canadian P/N 10953480) or equivalent to the bolt threads.
- Install the engine front cover attaching bolts.
- Install the oil pan to the engine front cover bolts.
- Install the drive belt tensioner assembly. Refer to Drive Belt Tensioner Replacement .
- Install the crankshaft sensor.
- Install the crankshaft sensor shield.
- Install the crankshaft balancer and bolt. Refer to Crankshaft Balancer Replacement .
- Install the right engine mount bracket. Refer to Engine Mount Bracket Replacement - Right Side .


Notice: Refer to Fastener Notice in the Preface section.
Tighten
Tighten the engine front cover bolts to 20 N·m (15 lb ft).
Use the J 45059
in order
to rotate the bolts an additional 40 degrees.
Tighten
Tighten the oil pan bolts to 14 N·m (125 lb in).

Important: Do not adjust the crankshaft sensor.
