Tools Required
J 39384-10 Torsion Rod Adjustment Bar
Front-to-Rear, Side-to-Side, and Up/Down Adjustments
- Remove the rear shelf trim panel. Refer to Rear Window Shelf Trim Panel Replacement in Interior Trim.
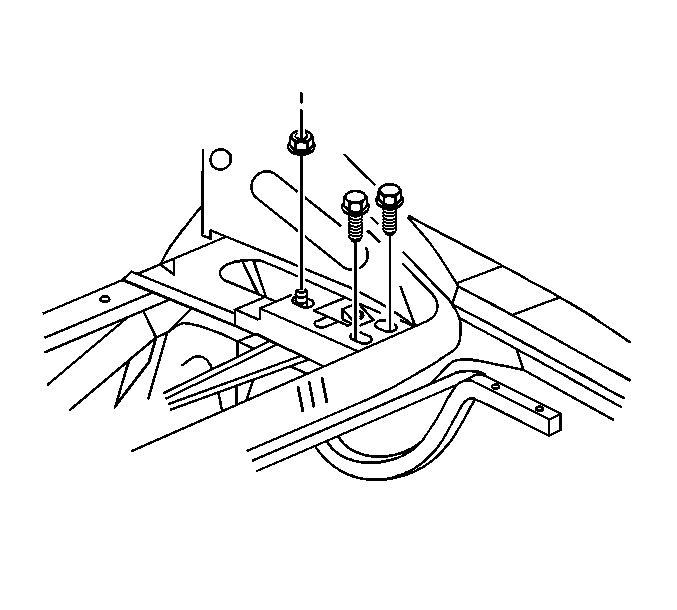
- Perform the front-to-rear lid adjustment at the hinge to rear shelf fasteners.
- Loosen the fasteners.
- Align the lid so as to achieve an equal 3 mm +/- 1 mm gap around the entire perimeter of the rear compartment lid.
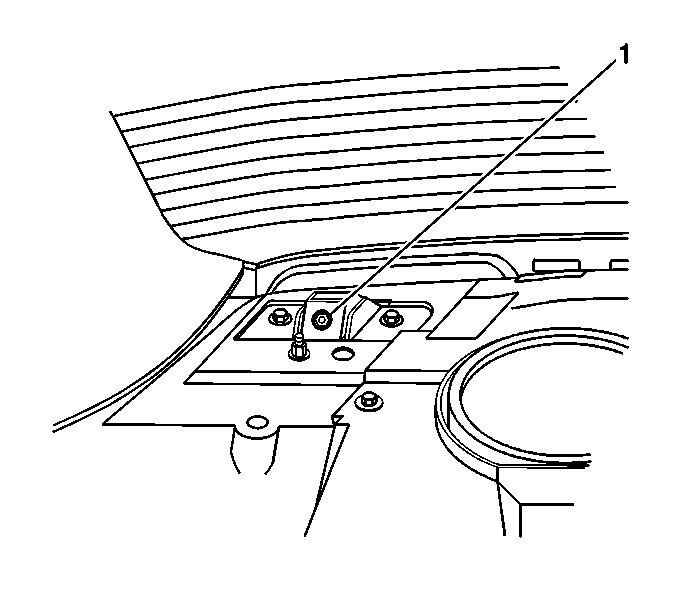
- Up and down adjustment at the front of the rear compartment lid is achieved by turning the adjustment screw (1) located on the hinge arms.
- Adjust the rear compartment lid flush with the rear quarter panels.
- Up and down adjustment at the rear of the rear compartment lid is achieved by turning the overslam bumpers in and out.
- Adjust the rear compartment lid flush with the rear quarter panels.

Notice: Use the correct fastener in the correct location. Replacement fasteners must be the correct part number for that application. Fasteners requiring replacement or fasteners requiring the use of thread locking compound or sealant are identified in the service procedure. Do not use paints, lubricants, or corrosion inhibitors on fasteners or fastener joint surfaces unless specified. These coatings affect fastener torque and joint clamping force and may damage the fastener. Use the correct tightening sequence and specifications when installing fasteners in order to avoid damage to parts and systems.
Tighten
Tighten the fasteners to 24 N·m (18 lb ft).

This procedure is performed from inside the passenger compartment.
Torque Rod Adjustment
- Support the rear compartment lid.
- Remove the rear compartment trim, as necessary. Refer to Rear Compartment Trim Panel Replacement .
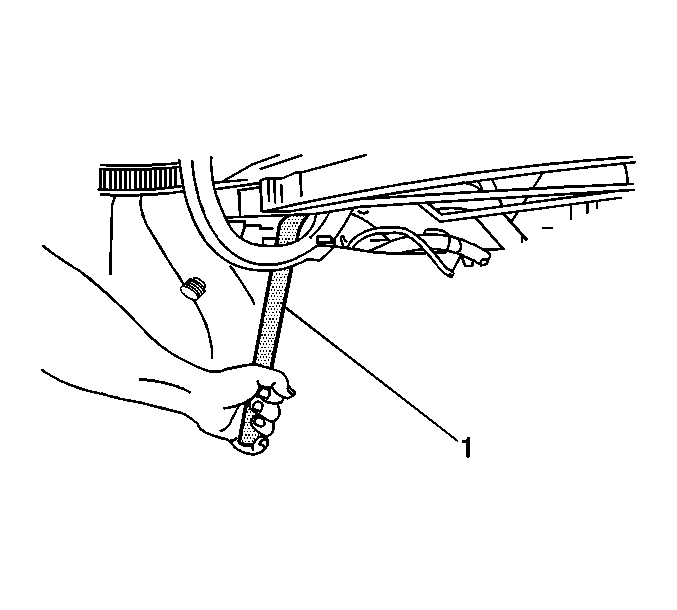
- Install the J 39384-10 to the end of the torque rod.
- Adjust the torque rods to one of three positions for the desired tension.
- Reposition the end of the torque rod in a higher notch, in order to decrease the amount of effort needed to raise the lid.

