For 1990-2009 cars only
- Cut the service part to appropriate length (according to dimensions), to replace removed section of the damaged rail.
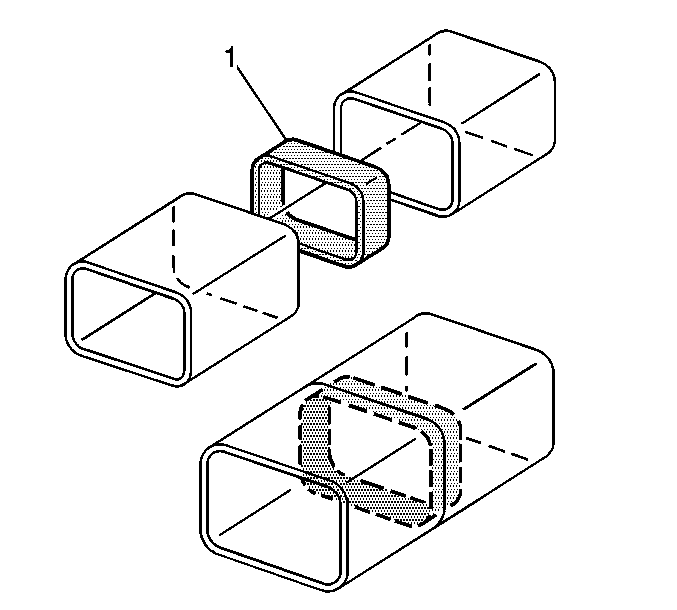
- At the sectioning joint, measure, mark, and cut 25 mm (1 in) to 50 mm (2 in) of rail to be used as a sleeved backing plate (1) from the unused portion of the service part.
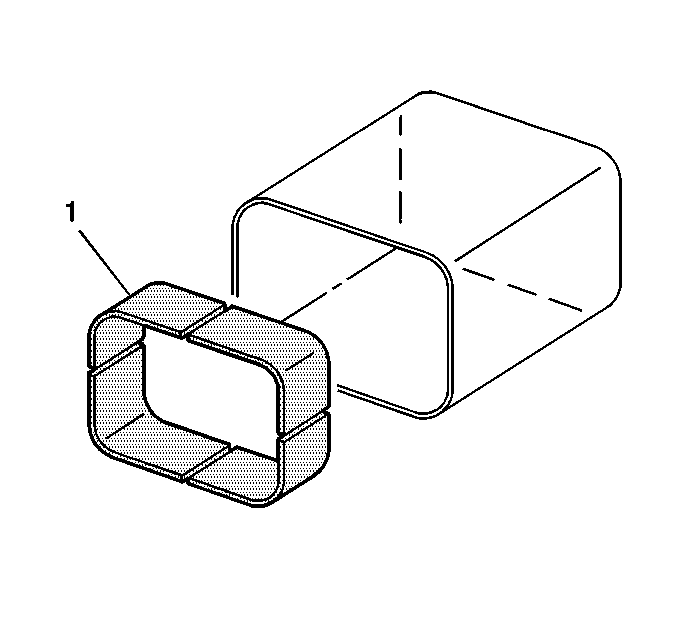
- Cut through each side of the sleeve in order to create four individual L (1) shaped pieces.
- Install the pieces one at a time with tack welds inside the undamaged portion of the frame rail.
- Trim the pieces as necessary to provide a flush fit along the butt-joint surface.
- Check the fit of the service part.
- Grind sleeve as necessary to allow for accurate alignment of the new part.
- Temporarily remove service part and prep all bare metal surfaces with a suitable weld-through primer.
- Stitch weld along the entire sectioning joint.
- Make 25 mm (1 in) welds along the seam with 25 mm (1 in) gaps between them.
- Complete the stitch weld. This will create a solid joint with minimal heat distortion.
- Prime all bare metal surfaces with PPG DP90, or an equivalent anti-corrosion primer.


Important: Retain a gap of one and one half times the metal thickness at the butt-joint when attaching the service part to the vehicle.
