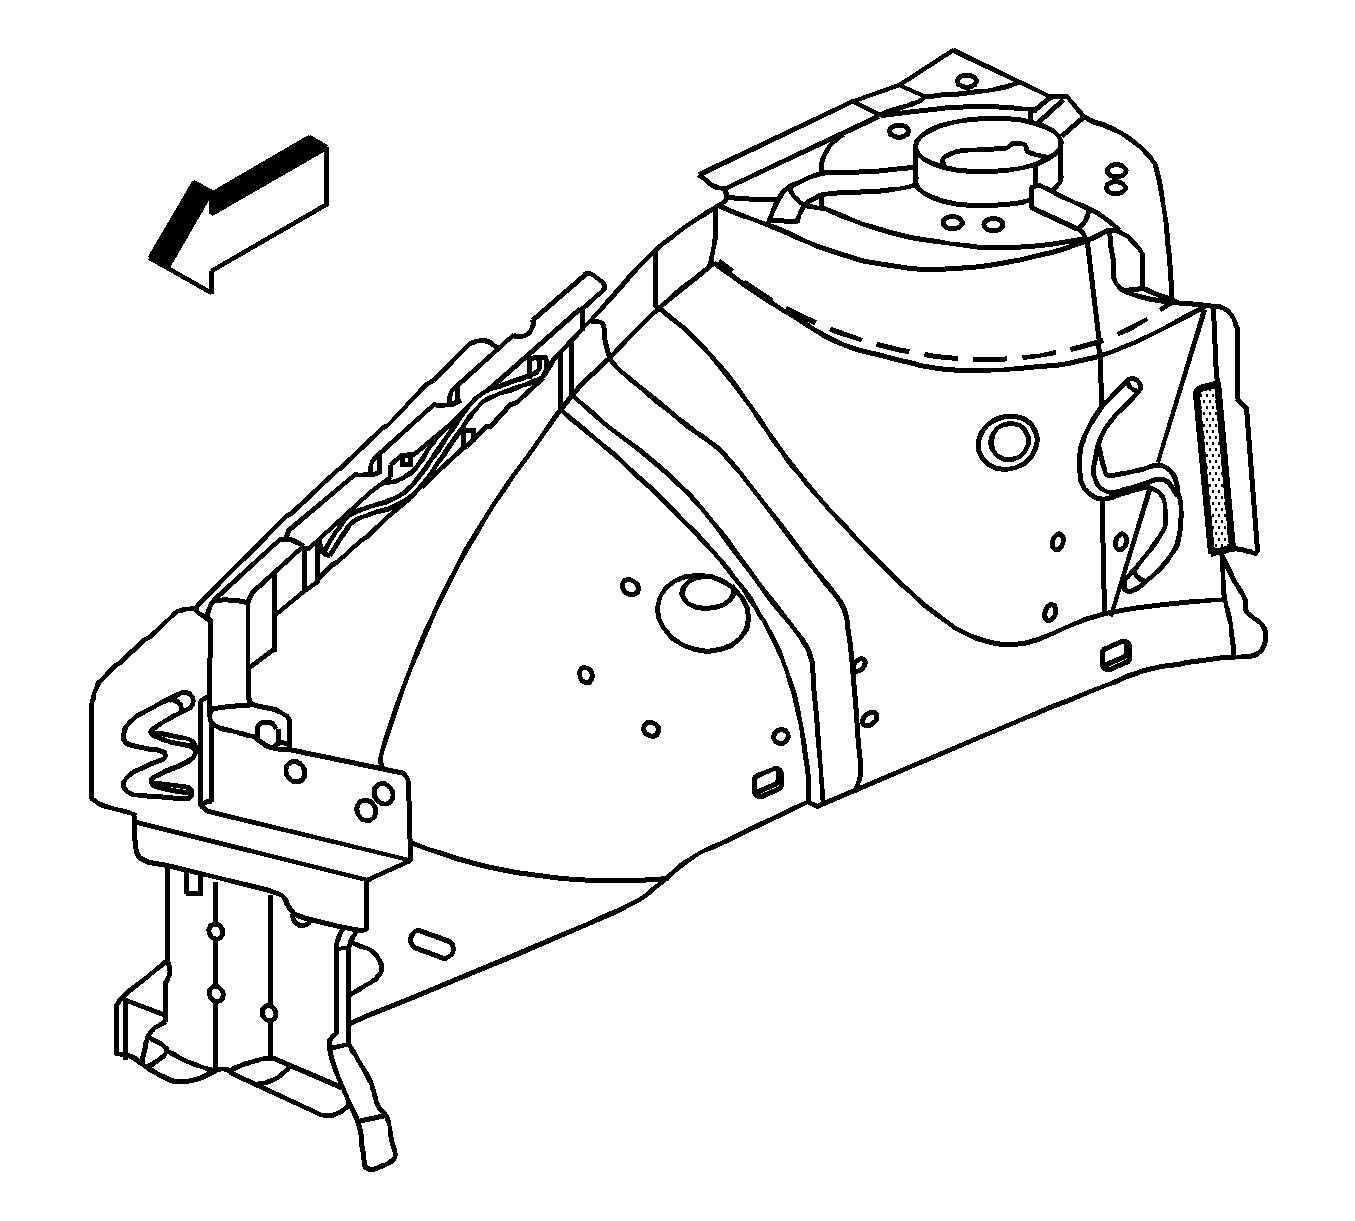
Removal Procedure
Caution: Foam sound deadeners must be removed from areas within 152.4 mm
(6 in) of where flame is to be used for body repairs. When
reinstalling foam sound deadeners, avoid inhaling fumes as bodily injury
may result.

Important: Both the driver-side and passenger-side front
wheelhouses are available as complete assemblies with the strut tower attached to
the wheelhouse. The strut mounting holes are pre-punched in the service part, which
also includes all necessary component stud mounts. When replacing a wheelhouse, carefully
position the service assembly. Use three-dimensional measuring equipment to properly
locate the wheelhouse.
Important: Do not replace the entire wheelhouse when
damage is limited to the front portion of the wheelhouse assemblies. Replace only
the necessary service parts.
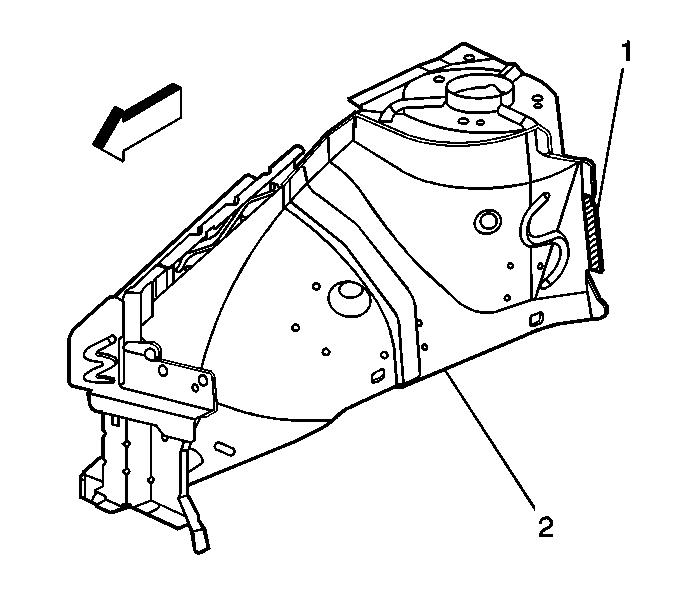
Important: Inspect for damage where the wheelhouse is
attached to the cowl panel (1). If the panels have been separated, it will be necessary
to repair the cowl panel and replace the wheelhouse. If the panels have not been separated
and there is no damage in this location, the wheelhouse can be sectioned.

- Remove
all related panels and components.
- Visually inspect and restore as much of the damage as possible to factory
specifications.
- Remove all sealers and anti-corrosion materials as necessary.
- Place a piece of 25 mm (1 in) wide masking tape (1)
on the forward contour of the wheelhouse at the flange where it attaches to the cowl
panel.

- Cut
the wheelhouse along the forward edge of the masking tape to leave a 25 mm
(1 in) tab extending forward from the cowl panel (1).
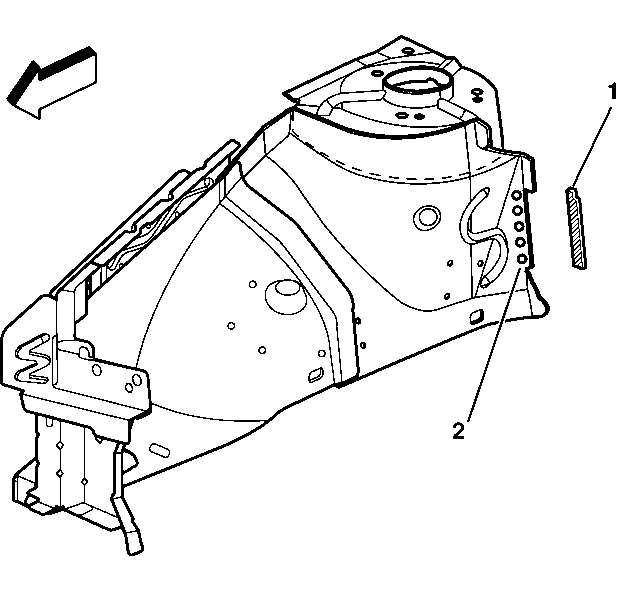
- Locate, mark and drill out factory welds which attach the wheelhouse
assembly to the following areas (2):
| • | The upper rail inner panel |
- Remove the damaged wheelhouse assembly.
Installation Procedure
- Clean and prepare surfaces to be welded.

- Cut
the flange off the service part that is normally welded to the cowl panel (1).
- Drill 8 mm (5/16 in) holes for plug welding in the locations
noted from the original assembly.
- Drill holes for plug welding every 40 mm (1½ in)
along the cut edge to be attached to the tab remaining from the original assembly (2).
- Inspect the position of the wheelhouse assembly, use 3-dimensional
measuring equipment.
- Plug weld accordingly.
- Clean and prepare all welded surfaces.
- Prime with 2-part catalyzed primer.
- Apply the following as necessary:
| • | Anti-corrosion materials |
- Install all related panels and components.


