For 1990-2009 cars only
Disassembly Procedure
- Remove the air compressor assembly from the vehicle. Refer to Air Compressor Replacement .
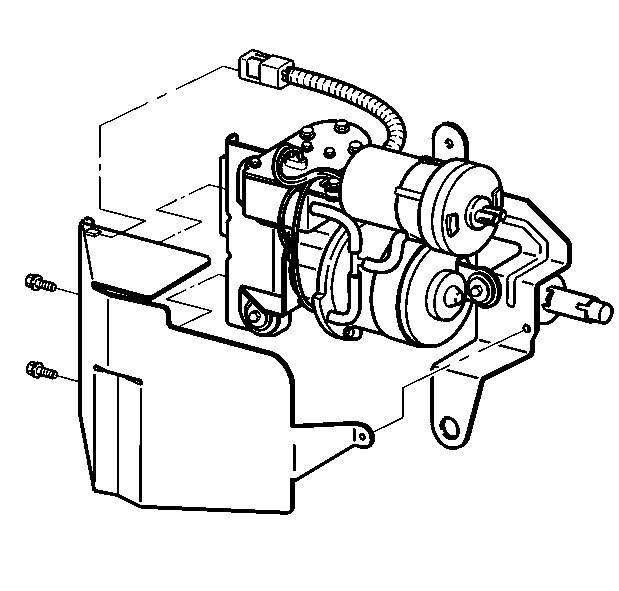
- Remove the air compressor connector from the connector anchor (slide the air compressor connector away from the air compressor and off of the anchor).
- Remove the 2 bolts and the heat shield from the air compressor bracket.
- Remove the air dryer. Refer to Automatic Level Control Air Dryer Replacement .
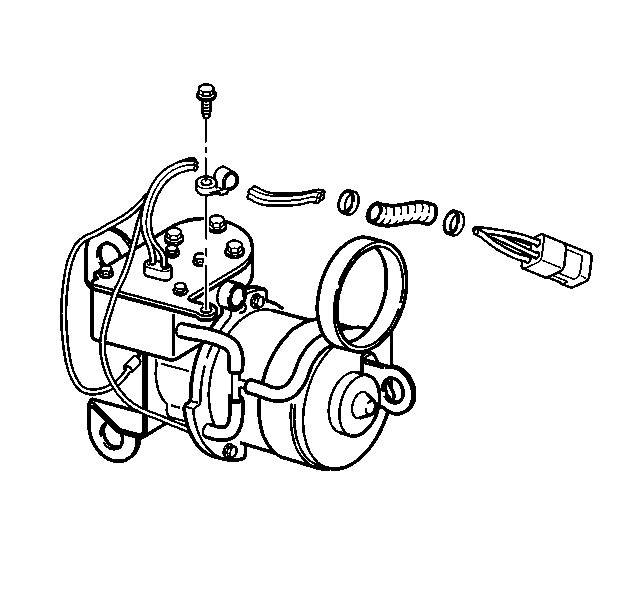
- Cut the harness tie.
- Remove the bolt and the harness tie.
- Remove the 2 harness ties and the wrap from the wires.
- Remove 2 wire terminals from the air compressor connector.
- Remove the air hose from the air compressor head.
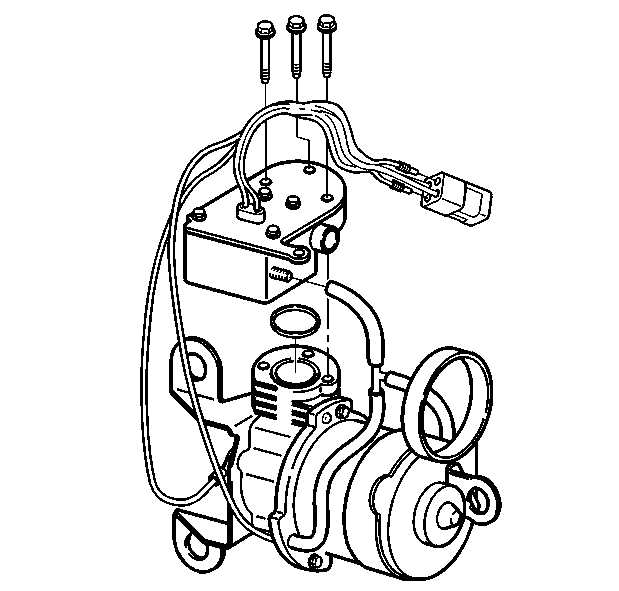
- Remove the 3 head bolts and the air compressor head from the air compressor assembly.
- Remove the gasket from the air compressor head or the air compressor assembly.


Important: Note the wire colors and the terminal numbers to ensure correct assembly.

Assembly Procedure
- Install the new gasket on the air compressor assembly.
- Install the air compressor head on the air compressor assembly with the 3 bolts.
- Connect the air hose to the air compressor head.
- Install the 2 wire terminals in the air compressor connector.
- Install the wrap around 4 wires and secure with 2 harness ties.
- Install 4 wires in the harness tie and install the harness tie on the air compressor head with the bolt.
- Install the air dryer. Refer to Automatic Level Control Air Dryer Replacement .
- Install the heat shield and the harness tie on the air compressor bracket with the 2 bolts.
- Connect the air compressor connector to the connector anchor.
- Install the air compressor on the vehicle. Refer to Air Compressor Replacement .

Notice: Refer to Fastener Notice in the Preface section.
Tighten
Tighten the 3 bolts to 6 N·m (53 lb in).

Tighten
Tighten the bolt to 3 N·m (26 lb in).

Tighten
Tighten the 2 bolts to 4 N·m (35 lb in).
