For 1990-2009 cars only
Removal Procedure
Caution: Fuel Vapors can collect while servicing fuel system parts in enclosed
areas such as a trunk. To reduce the risk of fire and increased exposure to
vapors:
• Use forced air ventilation such as a fan set outside
of the trunk. • Plug or cap any fuel system openings in order to reduce fuel vapor
formation. • Clean up any spilled fuel immediately. • Avoid sparks and any source of ignition. • Use signs to alert others in the work area that fuel system work
is in process.
- Remove the fuel sender. Refer to Fuel Sender Assembly Replacement .
- Release the fuel level sensor electrical connector clip.
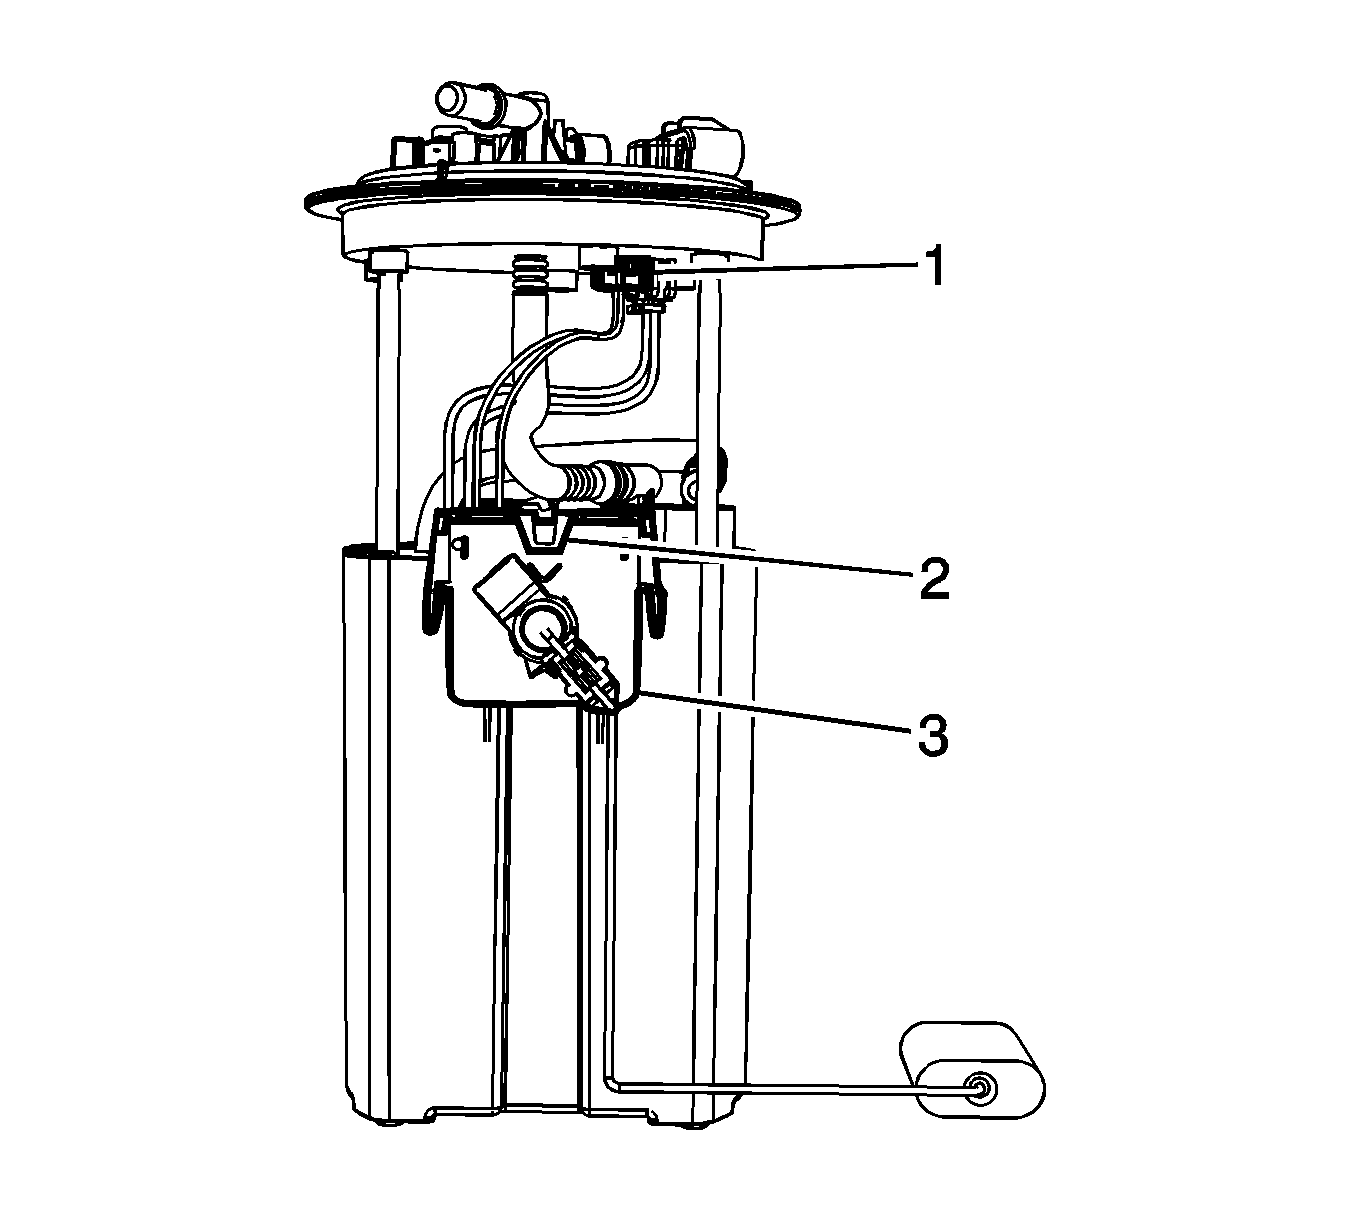
- Disconnect the fuel level sensor electrical connector (1) from under the fuel sender cover.
- Release the locking tab (2) and slide the fuel level sensor (3) down off of the bucket.

Installation Procedure
- Slide the fuel level sensor (3) up onto the bucket, gently lift up on the locking tab (2) and continue sliding the sensor up until it engages the tab.
- Connect the fuel level sensor electrical connector (1) under the sender cover. Push up the connector until the clip engages.
- Install the fuel sender. Refer to Fuel Sender Assembly Replacement.

