Interior Squeak/Rattle/Itch Noise From Front Door Map Pocket, Arm Rest, Lower A-Pillar, Instrumetn Panel (Apply Tape to Door Map Pocket)

| Subject: | Interior Squeak/Rattle/Itch Noise From Front Door Map Pocket, Arm Rest, Lower A-Pillar, Instrument Panel (Apply Tape to Door Map Pocket) |
| Models: | 2006-2008 Buick Lucerne |
Condition
Some customers may comment on a particular interior squeak/rattle/itch coming from the door area, map pocket, arm rest or lower A-pillar. This noise may be more noticeable when driving over rippled concrete or asphalt with small bumps at speeds between 25 mph (40 km/h) to 75 mph (120 km/h).
This noise may also be coming from driver or passenger side door.
Cause
This condition may be caused by map pocket friction against the door pad.
Correction
Technicians are to apply 10 mm wide X 1 mm thick (0.40 in wide X 0.040 in thick ) piece of adhesive-backed polyester felt tape to the outboard and inboard perimeter of the map pocket.
- Remove the front side door trim panel. Refer to Front Side Door Trim Panel Replacement in SI.
- Place the trim panel upside down on a bench.
- Unfasten the nylon batting of the trim panel substrate at the bottom of the trim panel by the pocket map.
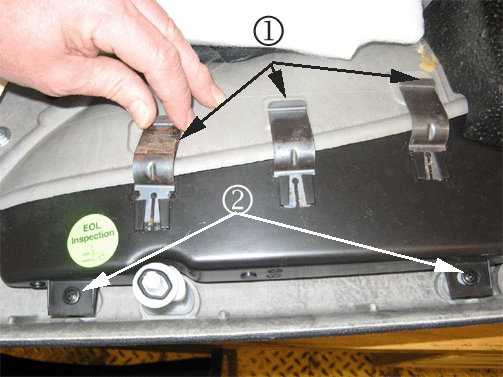
- Temporarily remove the three large spring clips from the back of the map pocket by rocking side-to-side as you pull up (refer to the graphic above).
- Remove the two Phillips plastic-specific screws from the lower map pocket. Refer to previous graphic.
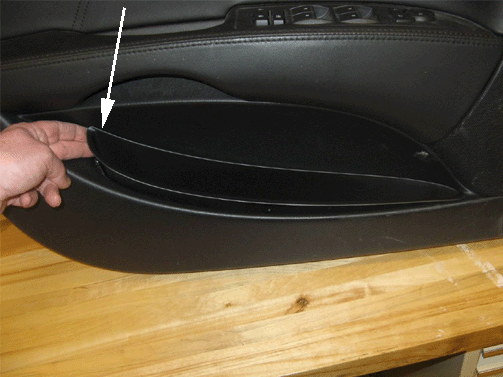
- Push the rear corner of the map pocket up and out from the bottom (refer to graphic above).
- Clean the perimeter of the map pocket lip.
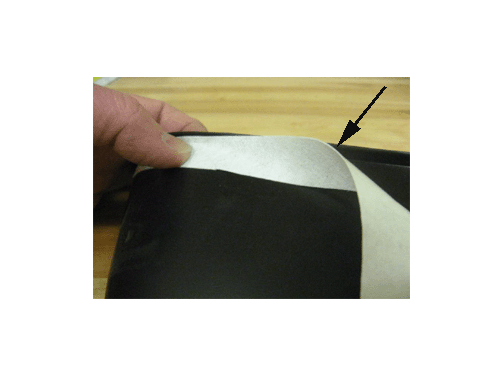
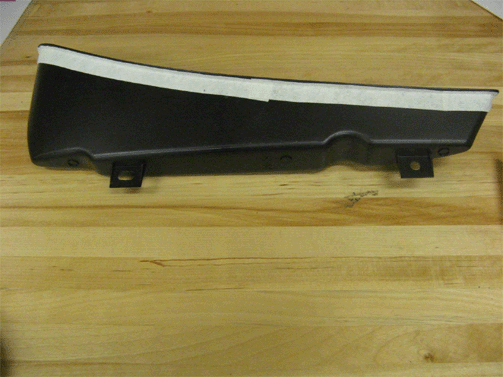
- Apply the 10 mm X 1 mm (0.40 in X 0.040 in) piece of the adhesive-backed polyester felt tape to the outboard and inboard perimeter of the map pocket (the tape is black in color; white is shown here for illustration purposes only)
- Install the map pocket back to the door trim panel.
- Install the front side door trim panel. Refer to Front Side Door Trim Panel Replacement in SI.
Important: Working on a clean workbench will help prevent damage to the exterior trim.

Notice: Rock side to side gently to avoid breaking the retaining tabs. Take care to clear the lip of the trim panel substrate.

Important: Take care not to drag the corner of the pocket on the vinyl show side of the trim panel.


Important: The felt must be applied directly under the lip of the pocket and into the corner. Apply the tape around the map pocket.
Parts Information
Purchase tape locally or contact Kent Automotive at 1-800-654-6333 or online at www.kent-automotive.com.
Part Number | Part Description | Material Allowance |
|---|---|---|
KT13485 | BRS Tape (10 mm x 10 ft) | One Side - $2 per Vehicle / Two Sides - $4 per Vehicle |
Warranty Information
For vehicles repaired under warranty, use:
Labor Operation | Description | Labor Time |
|---|---|---|
C9847* | Apply Tape to Map Pocket (One Side) | 0.4 hr |
Add | Apply Tape to Map Pocket (Two Sides) | 0.4 hr |
*This is a unique labor operation for bulletin use only. It will not be published in the Labor Time Guide. | ||
