Removal Procedure
- Install the engine support fixture. Refer to Engine Support Fixture .
- Remove the air cleaner outlet duct. Refer to Air Cleaner Outlet Duct Replacement .
- Raise and support the vehicle. Refer to Lifting and Jacking the Vehicle .
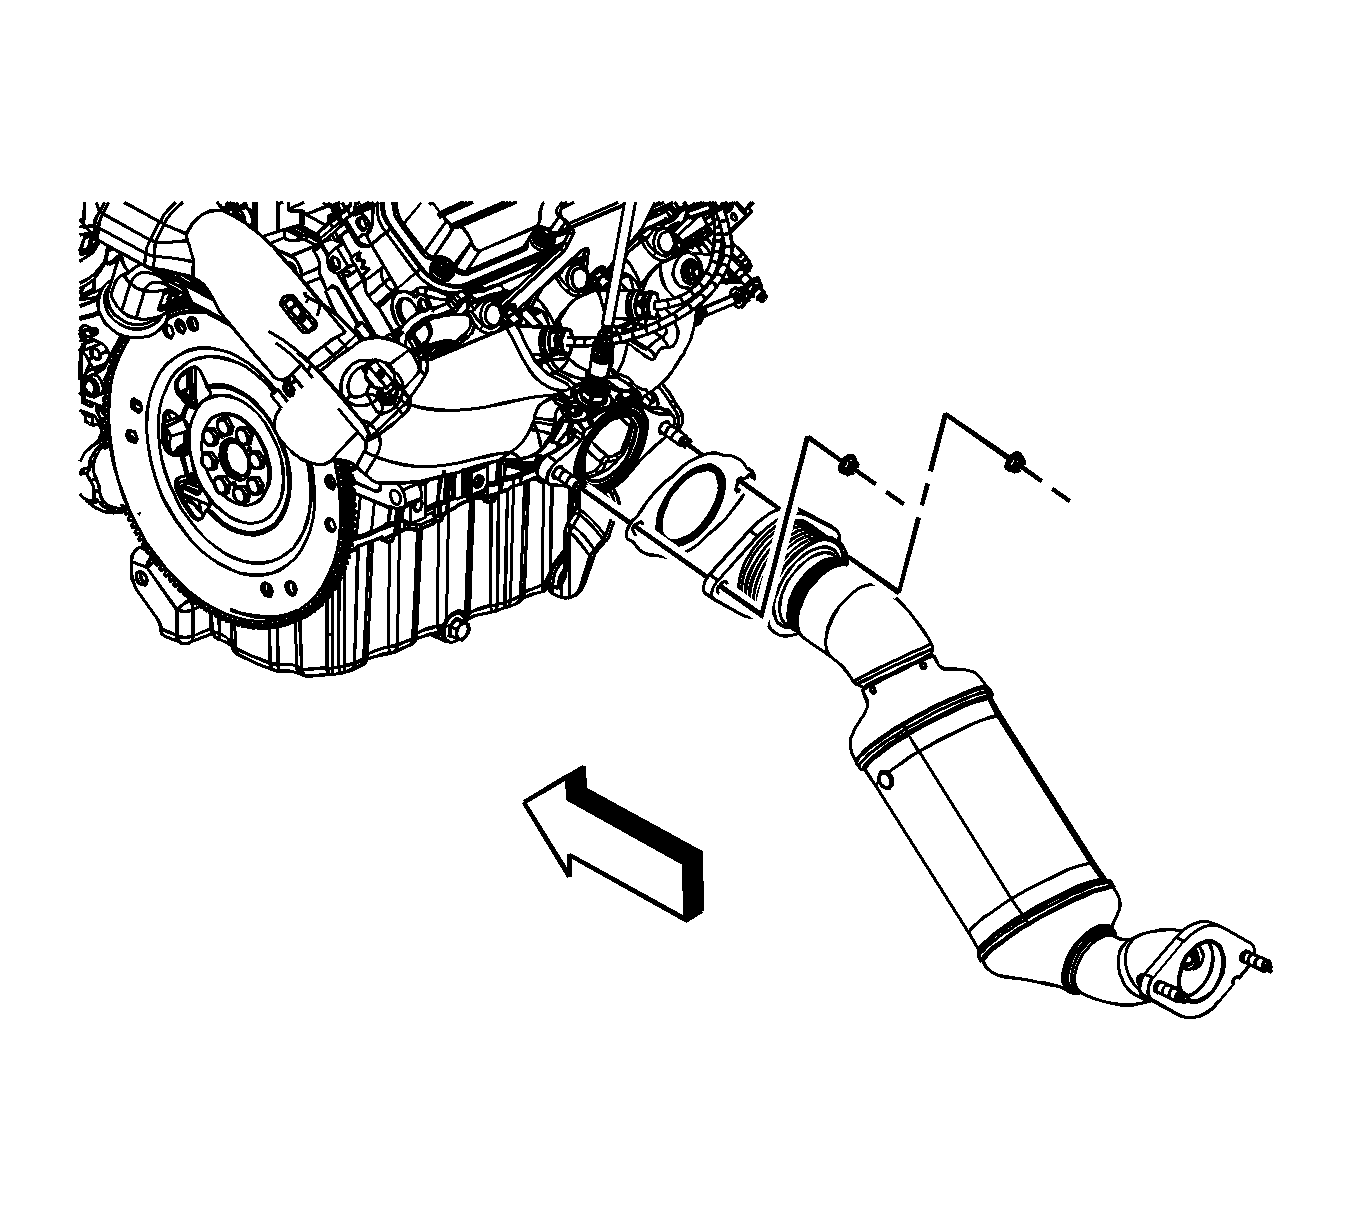
- Remove the catalytic converter to exhaust manifold nuts.
- Drain the engine oil and remove the oil filter. Refer to Engine Oil and Oil Filter Replacement .
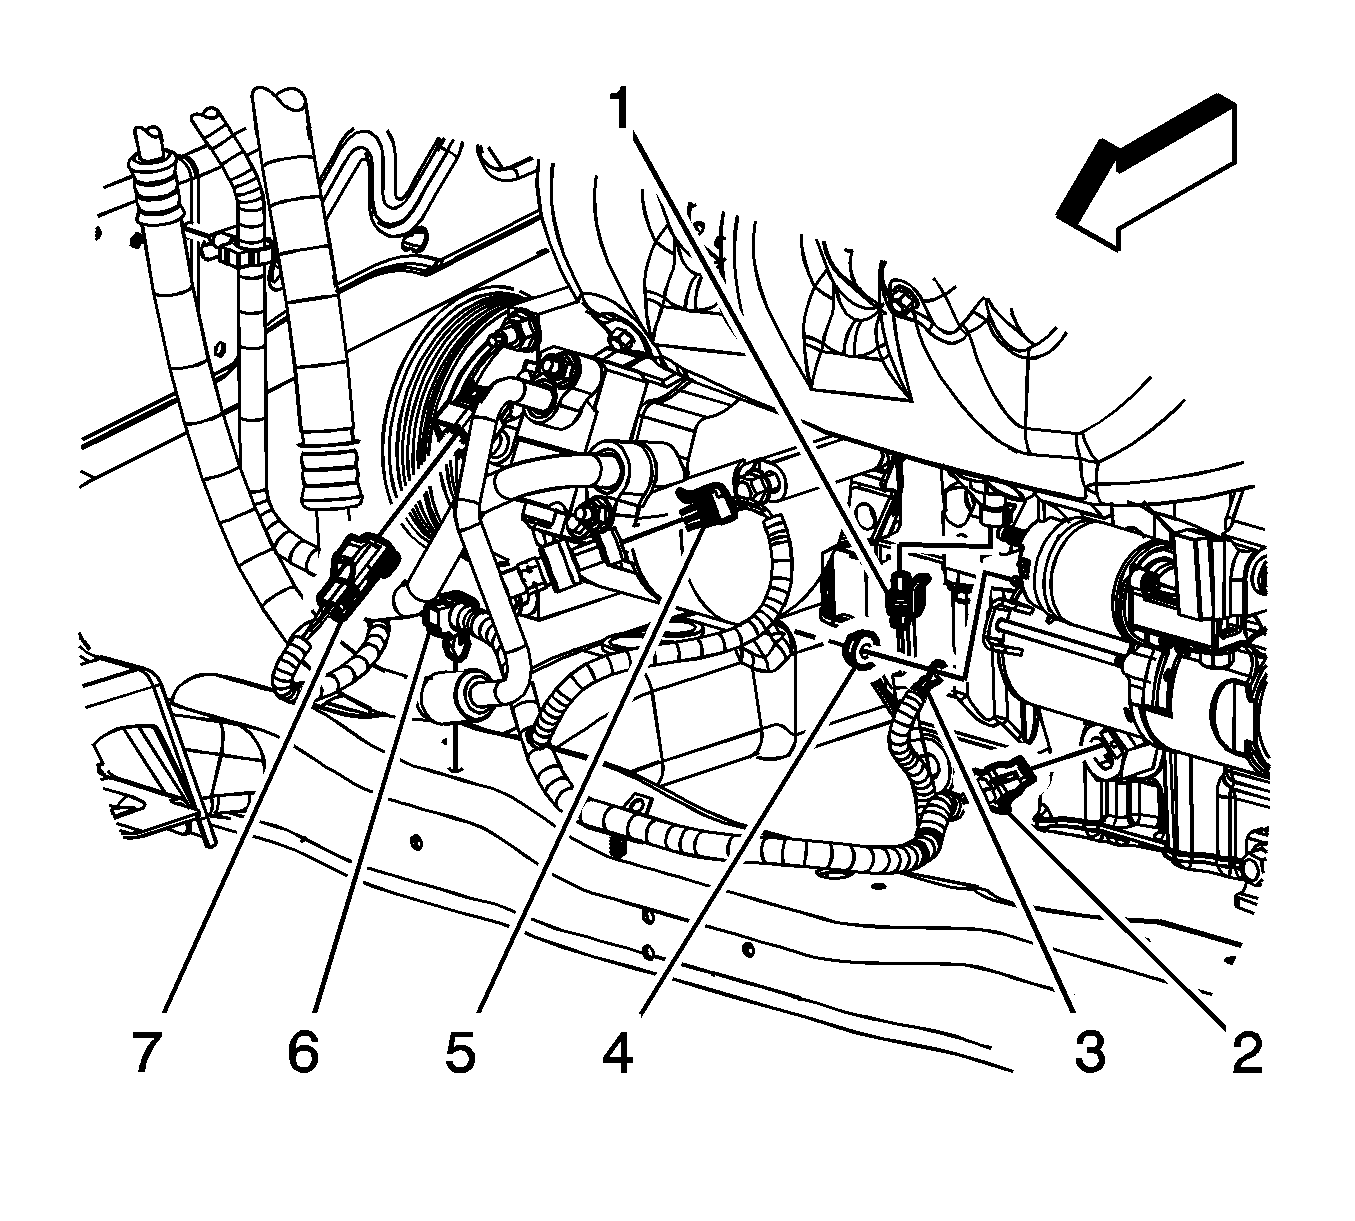
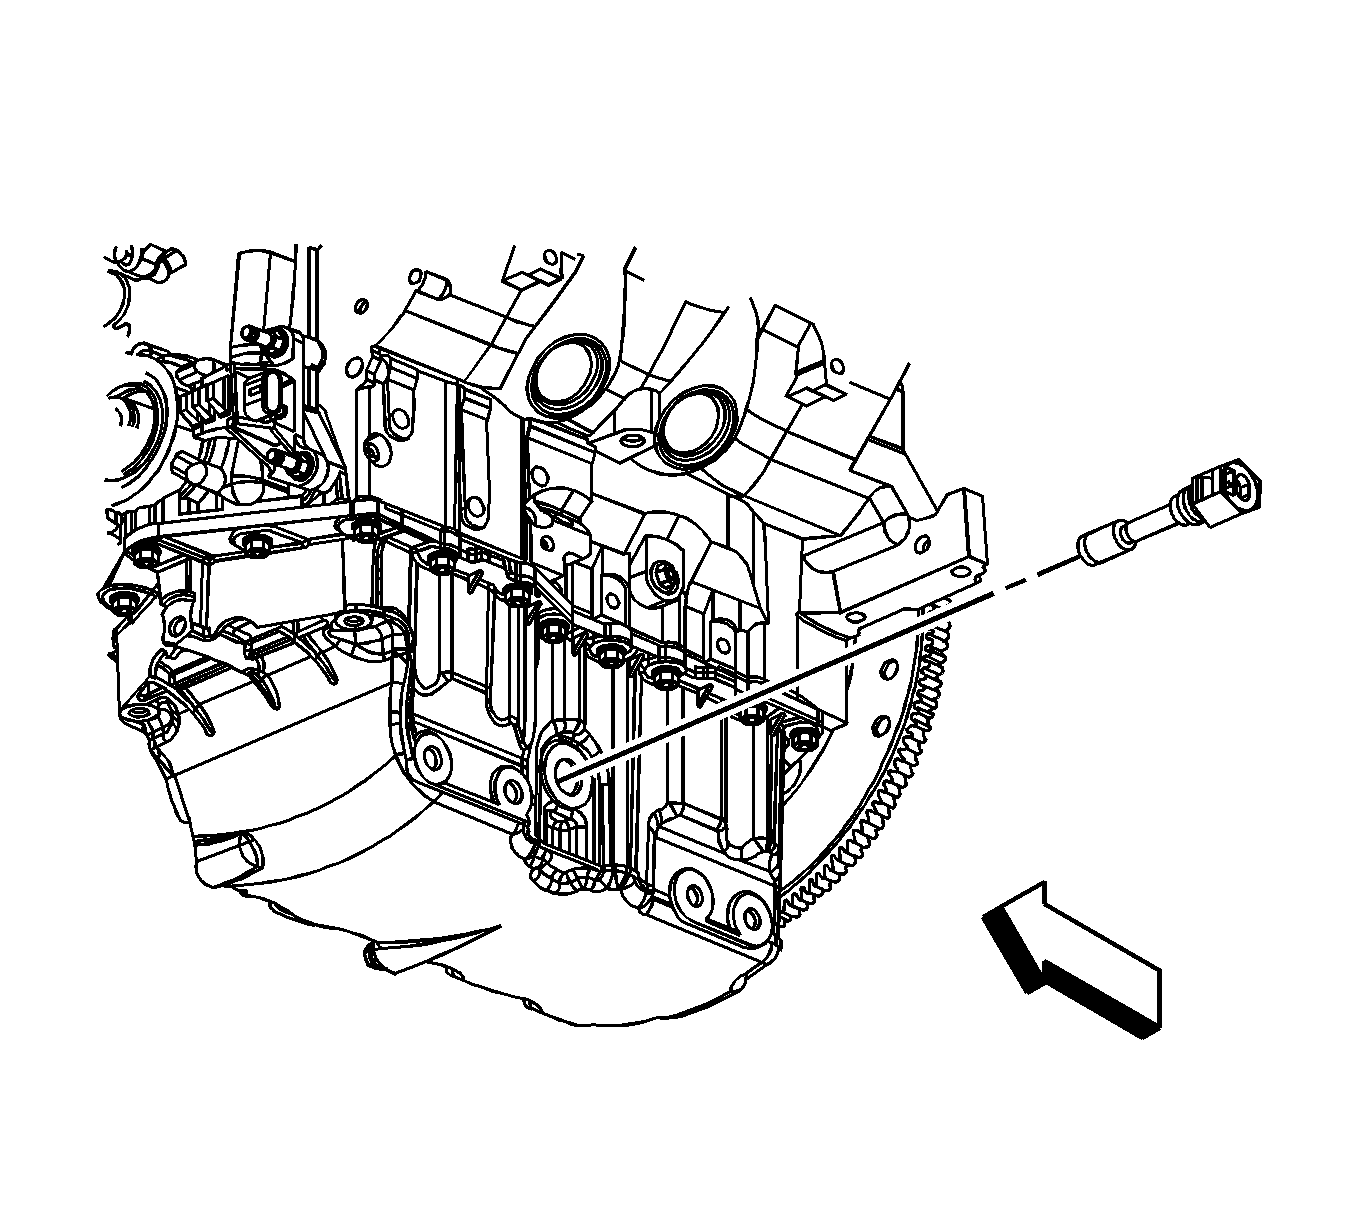
- Disconnect the engine harness electrical connector (2) from the oil level sensor.
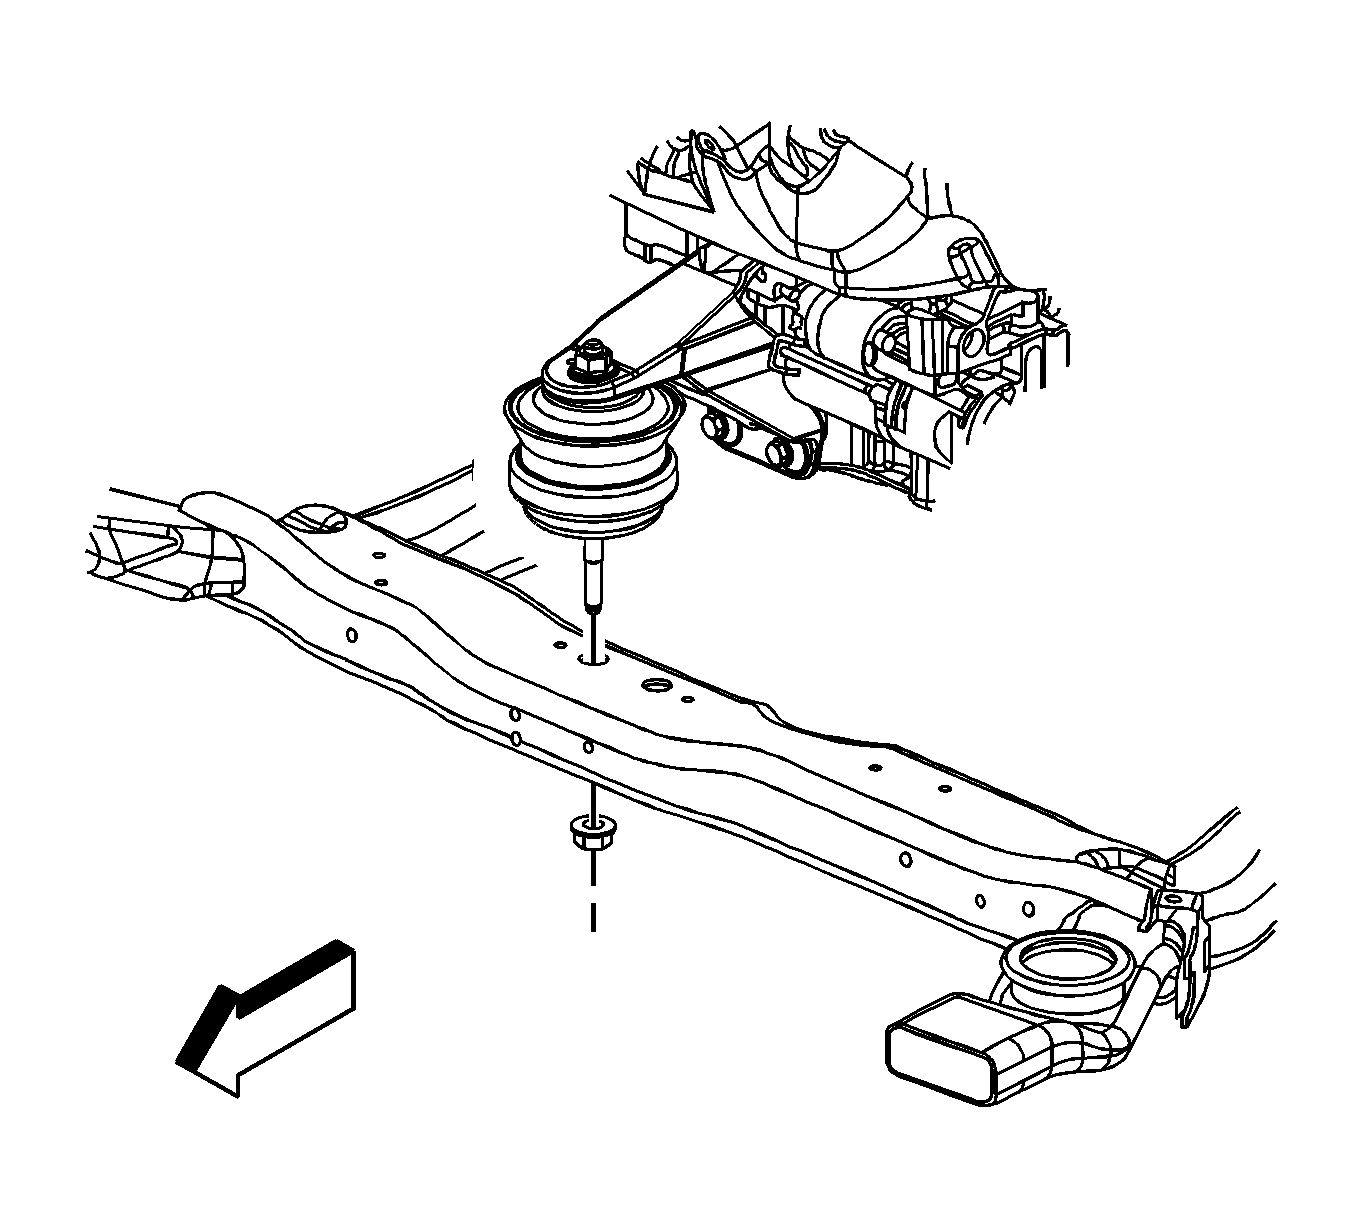
- Remove the front engine mount to frame nut.
- Lower the vehicle.
- Using the engine support fixture, raise the engine.
- Raise the vehicle.
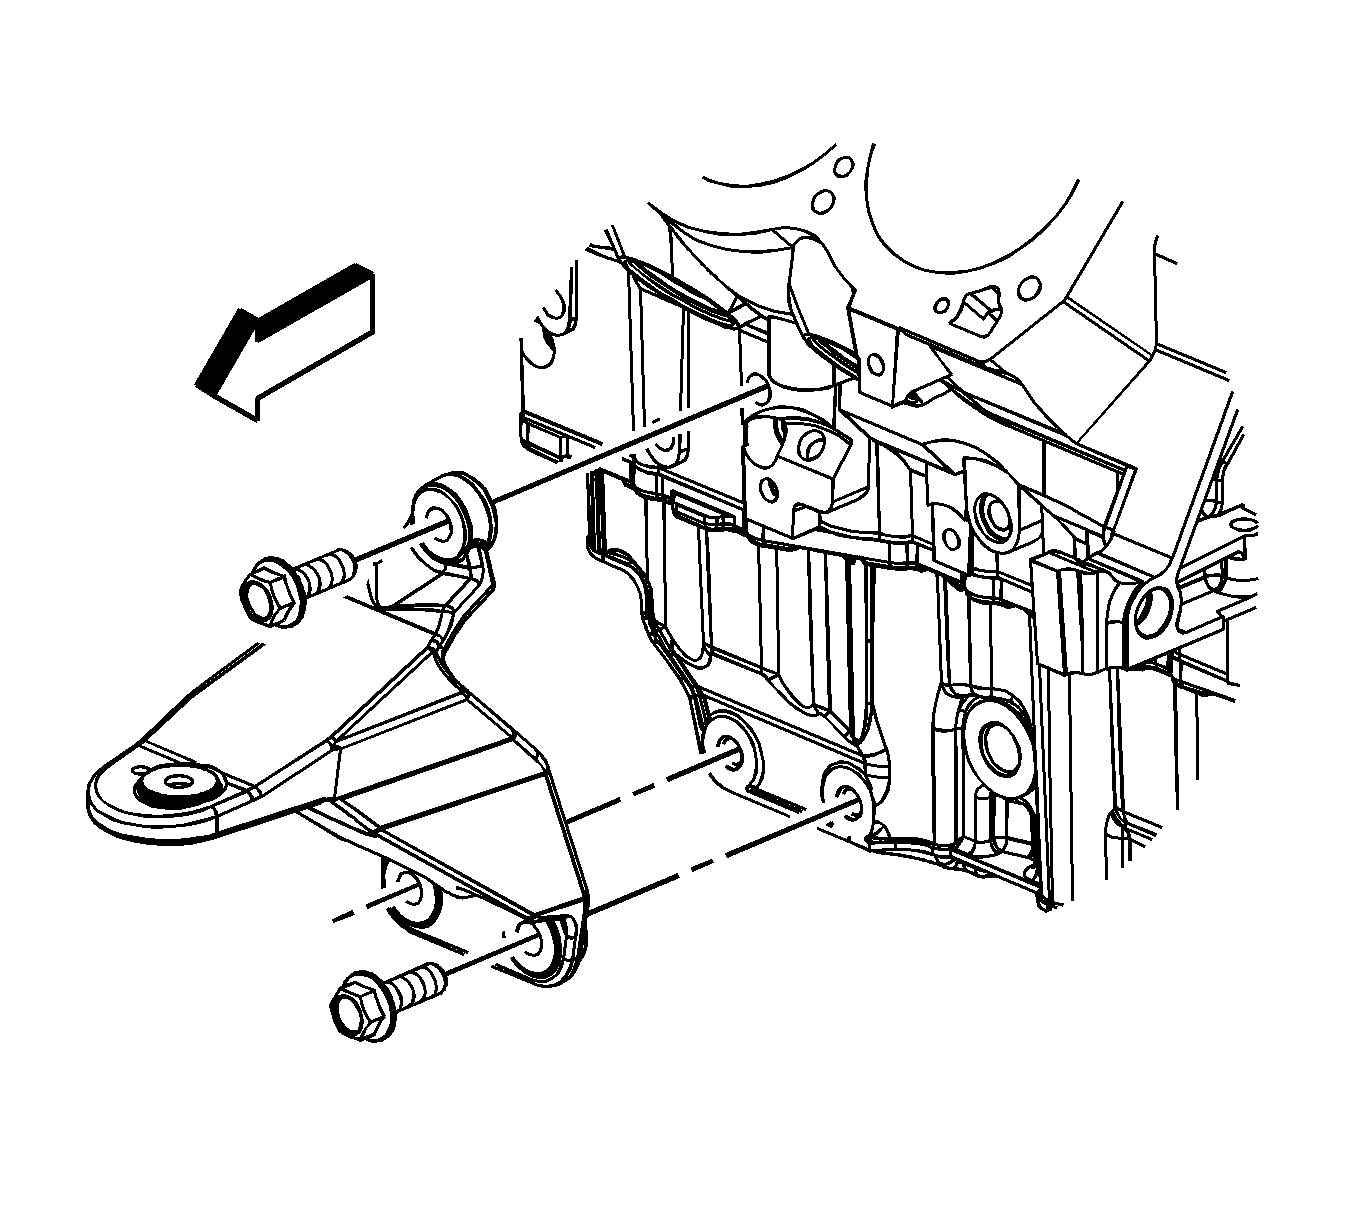
- Remove the front engine mount bracket bolts.
- Remove the front engine mount bracket with mount.
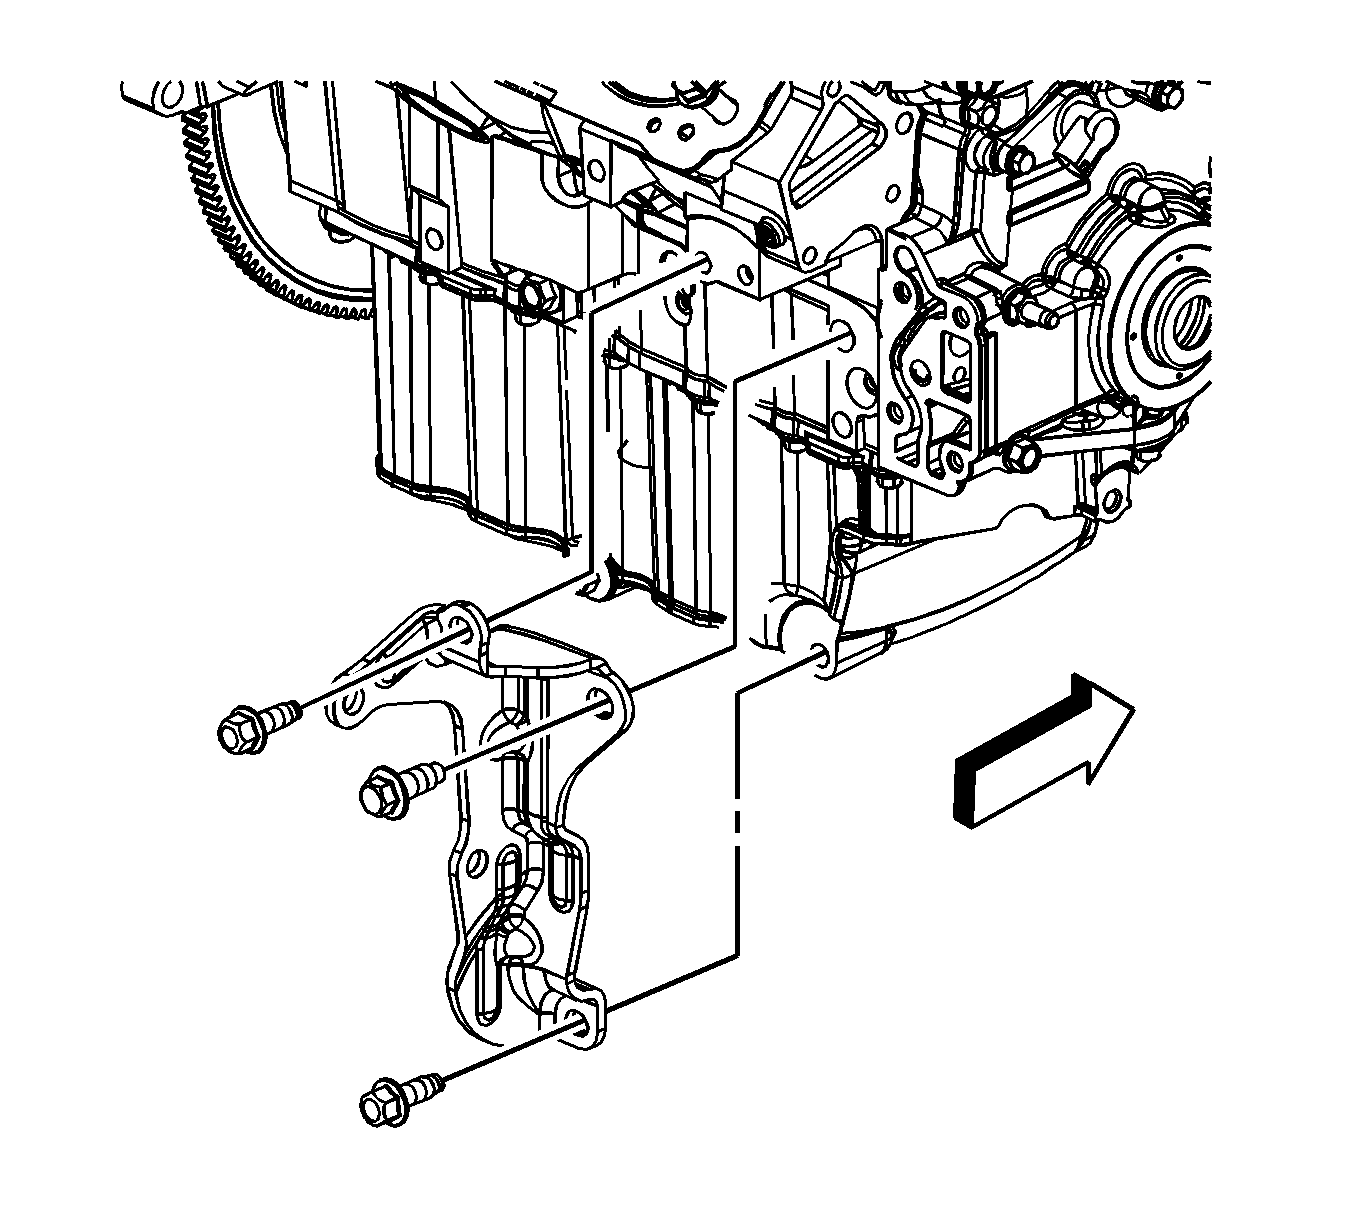
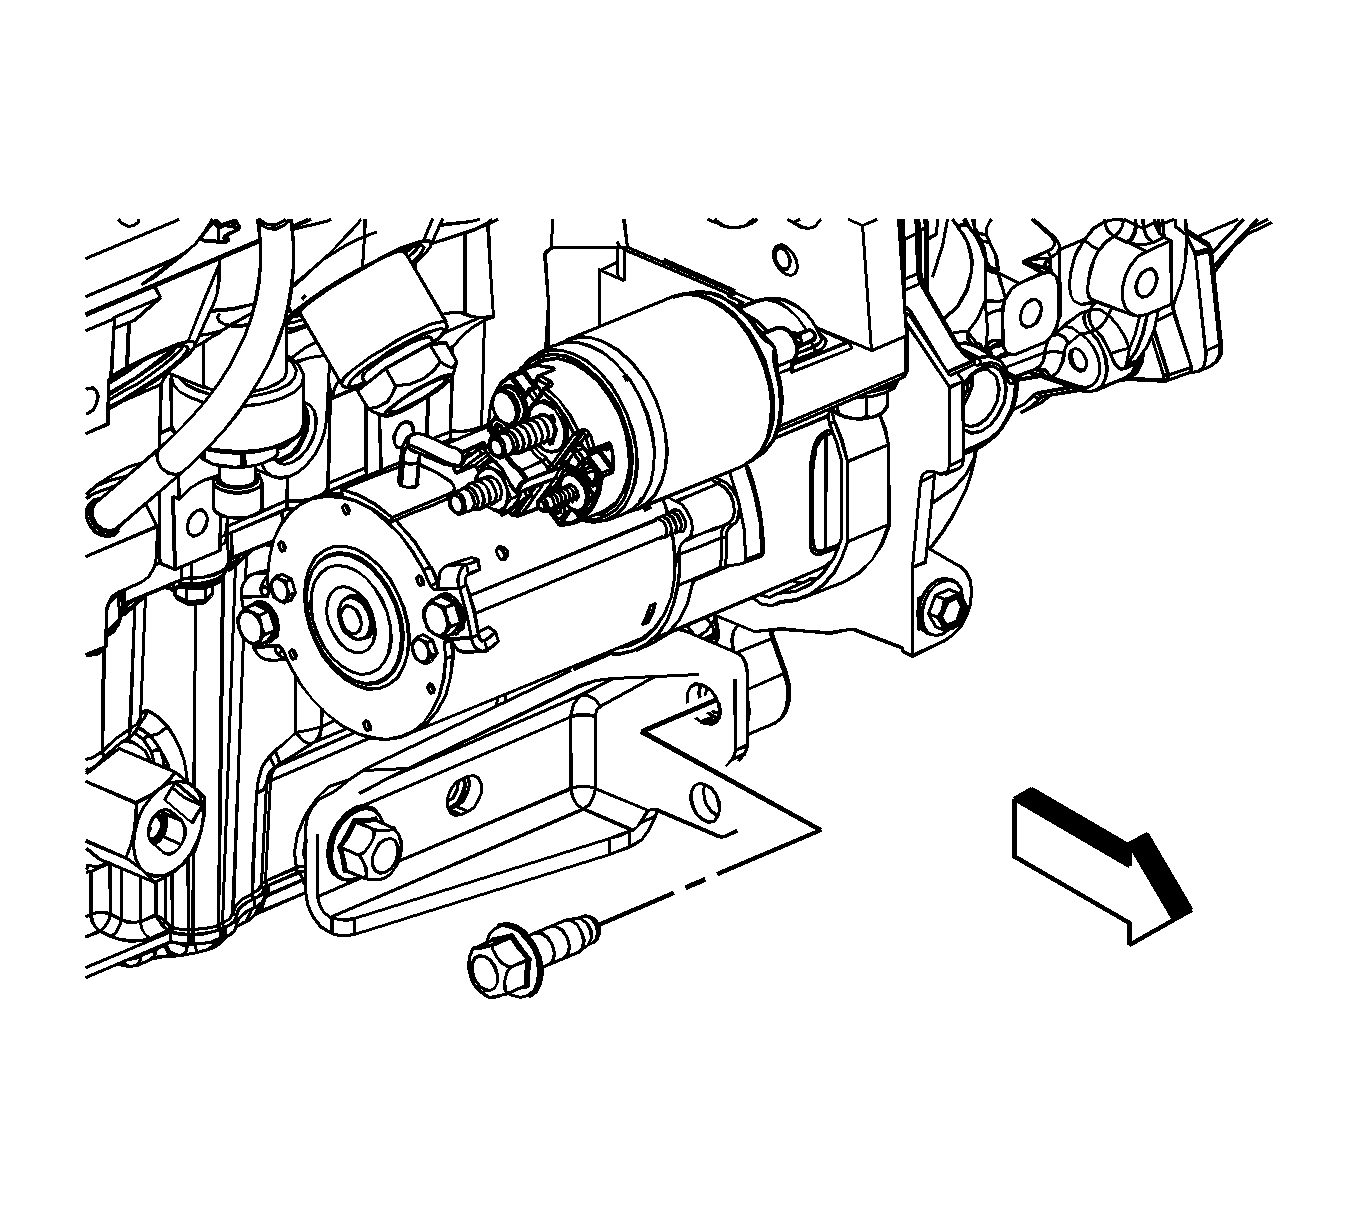
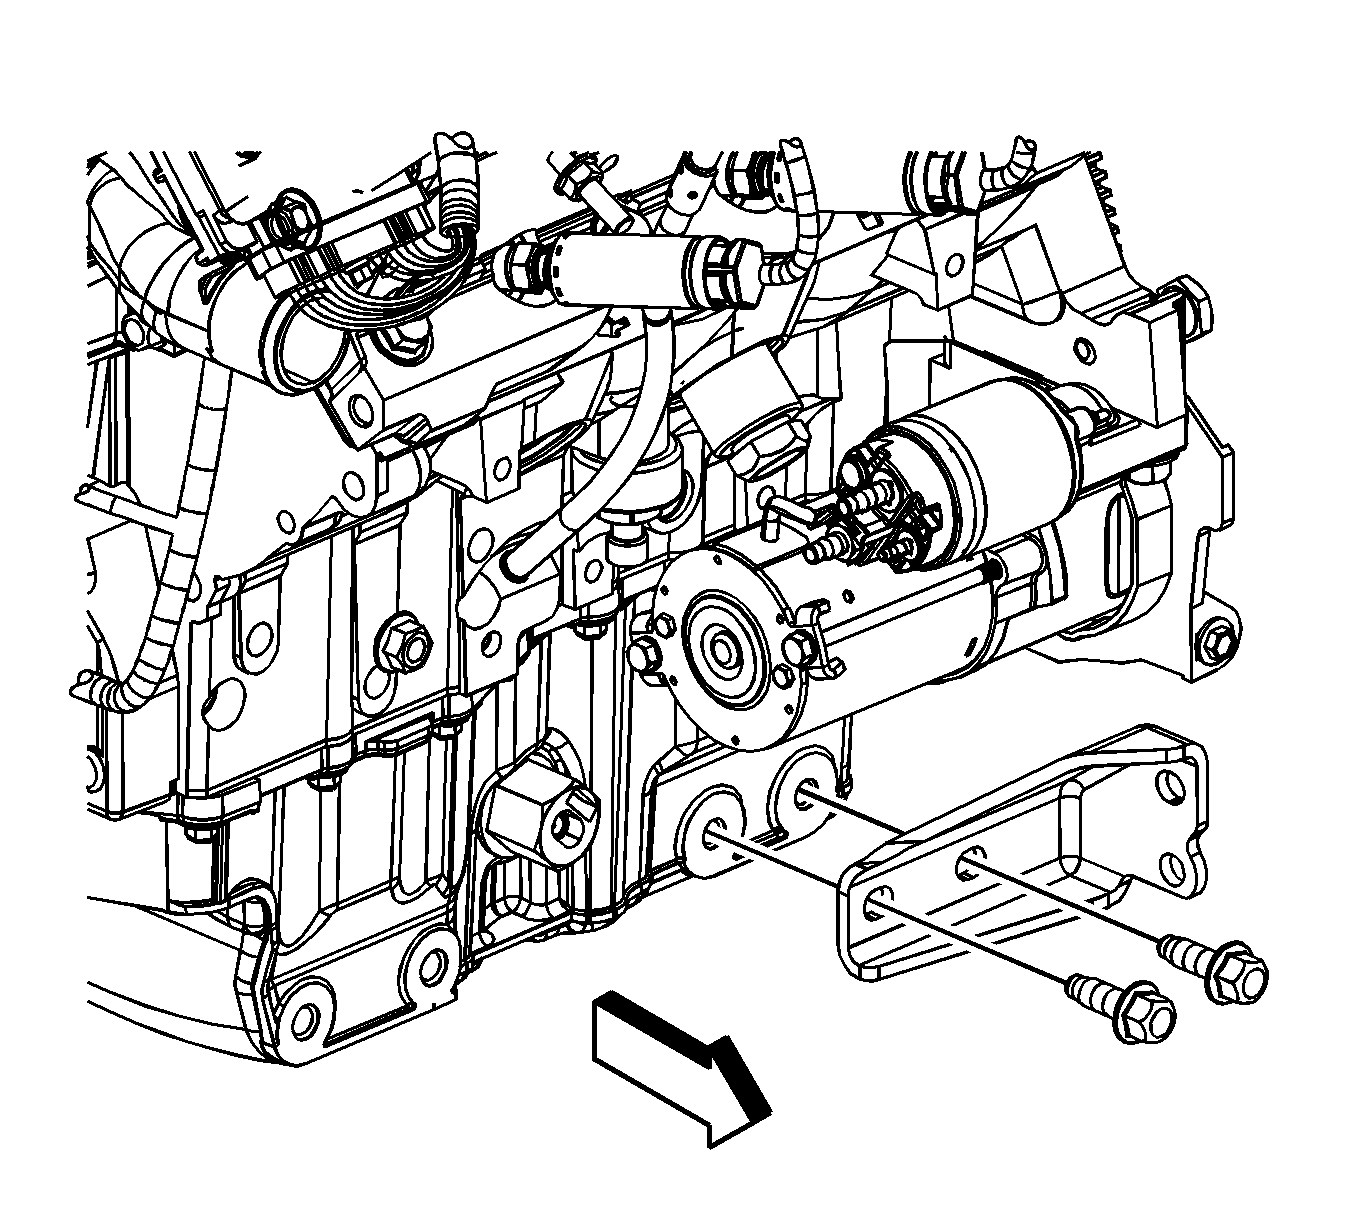
- Remove the transaxle brace to oil pan bolt.
- Remove the transaxle brace to transaxle bolts.
- Remove the transaxle brace to oil pan bolts.
- Remove the transaxle brace.
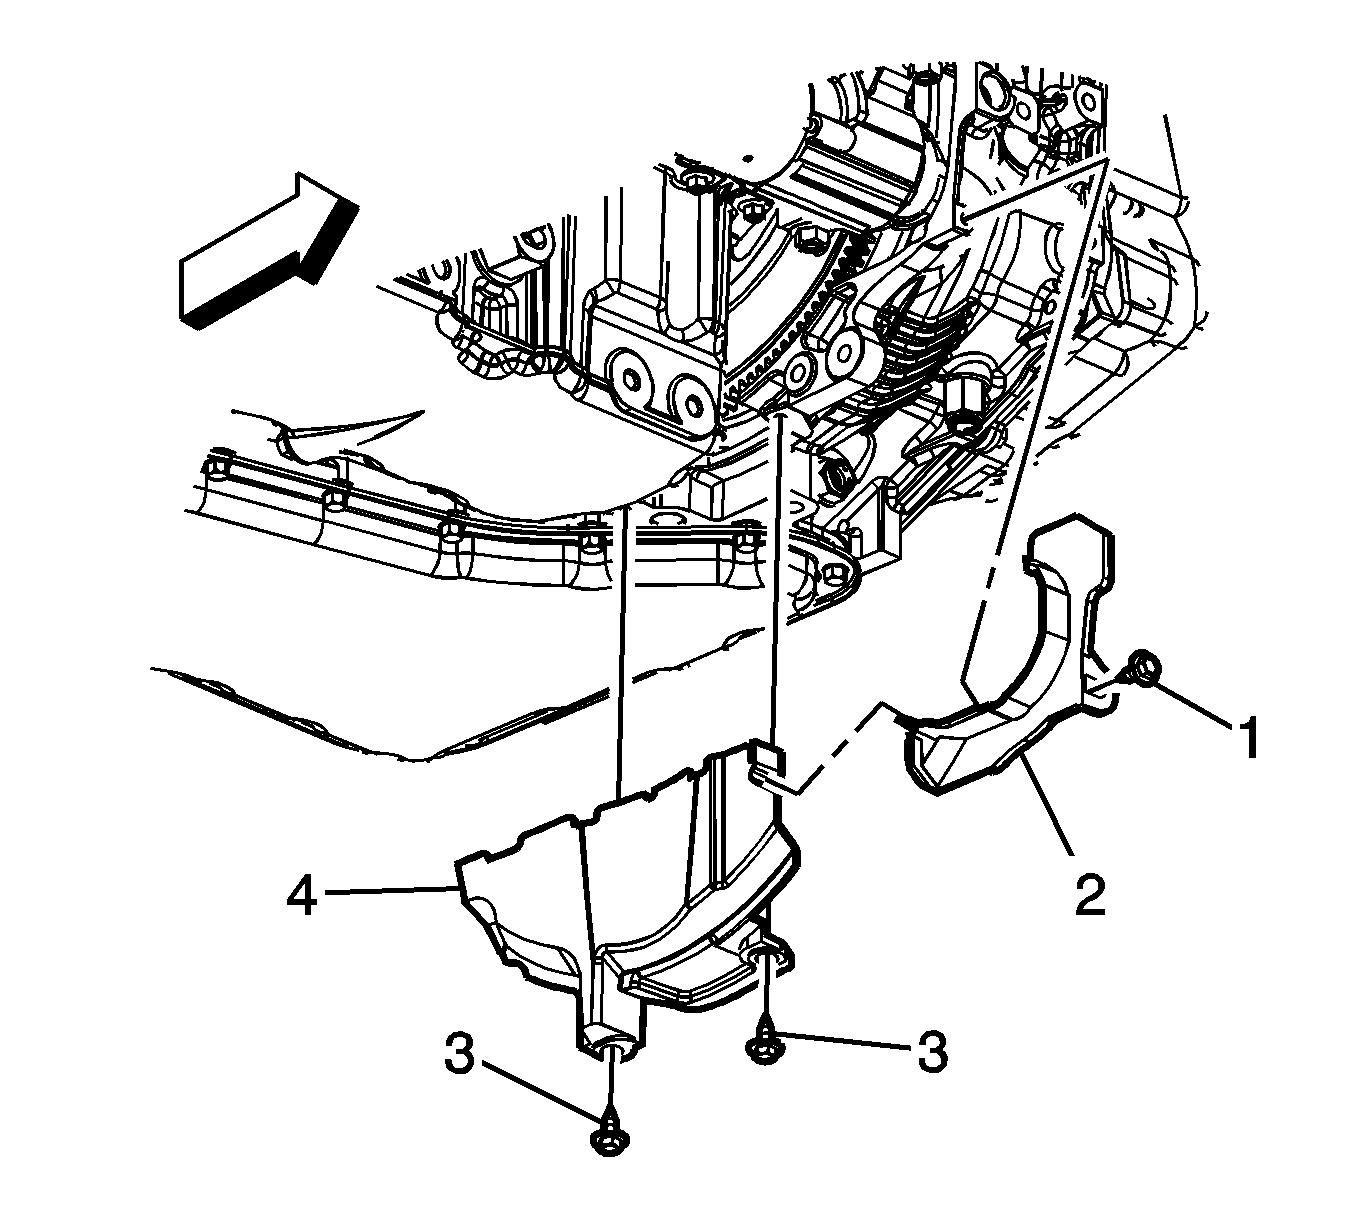
- Remove the front torque converter cover bolt (1).
- Remove the front torque converter cover (2).
- Remove the rear torque converter cover bolts (3).
- Remove the rear torque converter cover (4).
- Remove the oil level sensor.
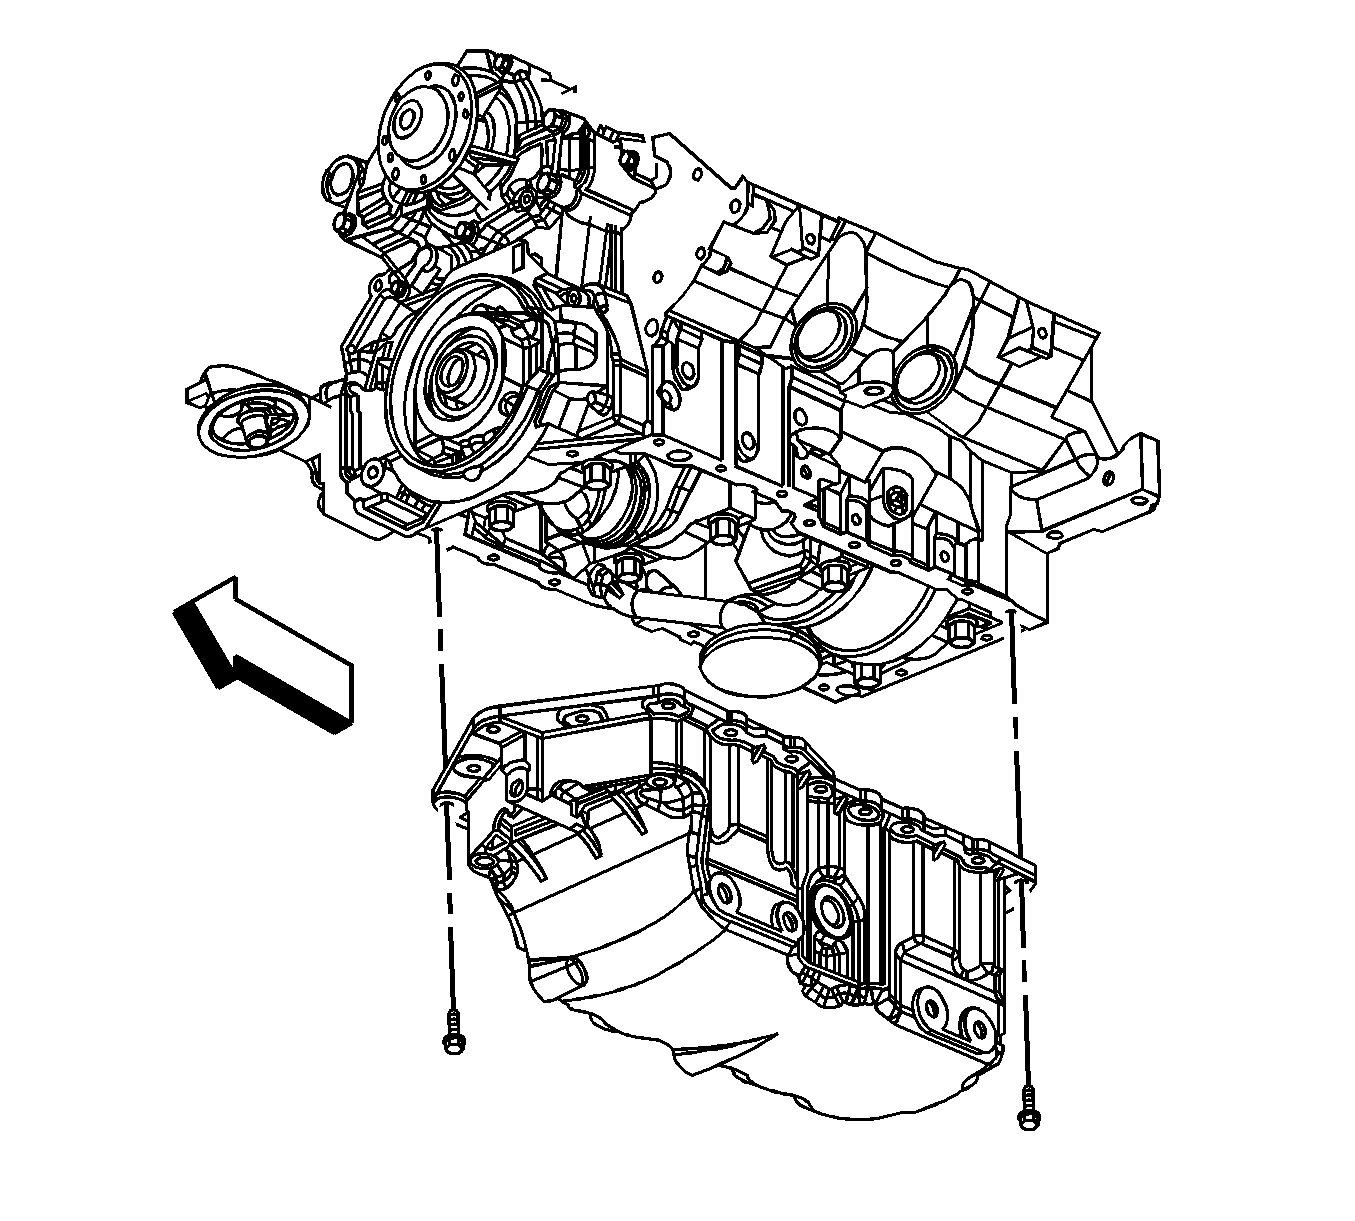
- Remove the oil pan bolts.
- Remove the oil pan.
- Clean the oil pan bolts of all debris.
Notice: Remove the oil level sensor, located in the oil pan, before the oil pan is removed. The sensor may be damaged if the oil pan is removed first.
Installation Procedure
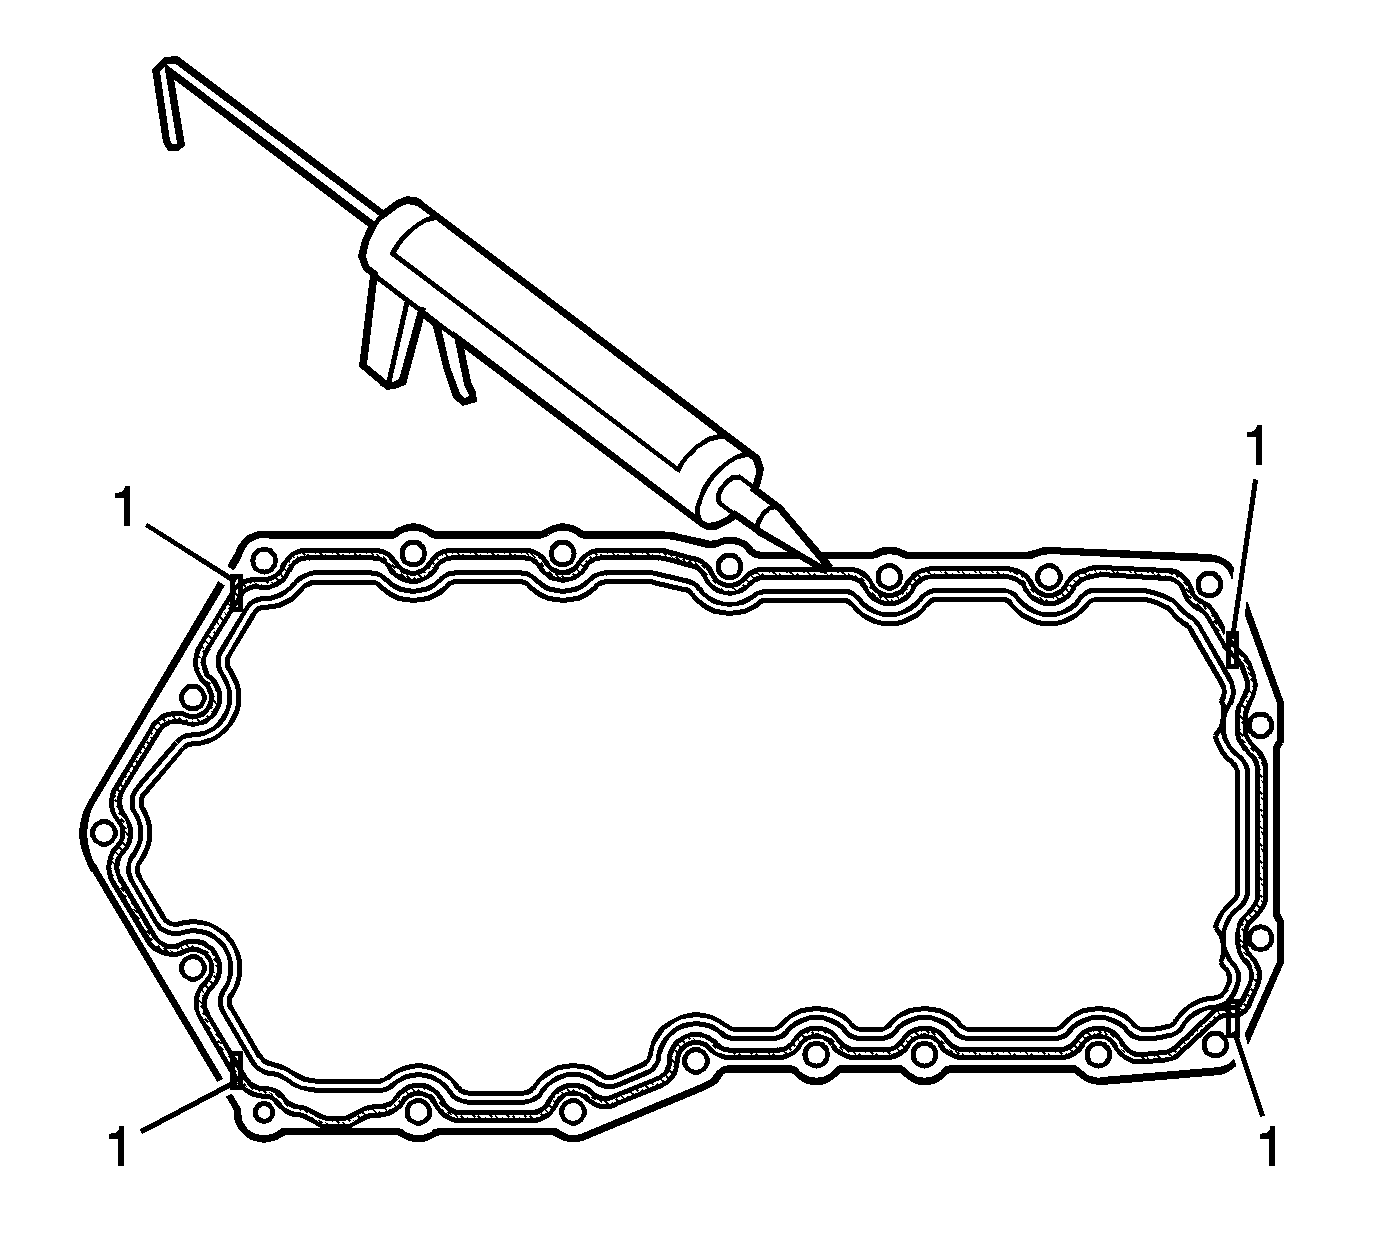
- Apply a continuous bead 6.35 mm (0.25 in) thick of RTV sealer, ensuring that the sealer also completely fills the groove in the oil pan. Refer to Adhesives, Fluids, Lubricants, and Sealers for the correct part number.
- To ensure proper sealing, apply additional sealer at the four locations (1).
- Apply a drop of threadlock to each bolt. Refer to Adhesives, Fluids, Lubricants, and Sealers for the correct part number.
- Position the oil pan to the engine.
- Install the oil pan bolts.
- Install the oil level sensor.
- Position the rear torque converter cover (4).
- Install the rear torque converter cover bolts (3).
- Position the front torque converter cover (2).
- Install the front torque converter cover bolt (1).
- Position the transaxle brace.
- Install the transaxle brace to oil pan bolts.
- Install the transaxle brace to transaxle bolts.
- Install the transaxle brace to oil pan bolt.
- Position the front engine mount bracket with mount.
- Install the front engine mount bracket bolts.
- Lower the vehicle.
- Using the engine support fixture, lower the engine.
- Raise the vehicle.
- Install the front engine mount to frame nut.
- Connect the engine harness electrical connector (2) to the oil level sensor.
- Remove the catalytic converter to exhaust manifold nuts.
- Lower the vehicle.
- Install the air cleaner intake duct. Refer to Air Cleaner Outlet Duct Replacement .
- Install the engine support fixture. Refer to Engine Support Fixture .
- Install the oil filter and refill the engine with oil. Refer to Engine Oil and Oil Filter Replacement .
Notice: Install the oil level sensor, located in the oil pan, after the oil pan is installed. The sensor may be damaged if the oil level sensor is installed first.

Notice: Refer to Fastener Notice in the Preface section.
Important: DO NOT overtighten the oil pan bolts or damage to the oil pan may occur, resulting in an oil leak.
Tighten
Tighten the bolts to 14 N·m (10 lb ft).

Tighten
Tighten the sensor to 20 N·m (15 lb ft).

Tighten
Tighten the bolts to 7.5 N·m (66 lb in).
Tighten
Tighten the bolts to 7.5 N·m (66 lb in).

Tighten
Tighten the bolts to 50 N·m (37 lb ft).

Tighten
Tighten the bolts to 50 N·m (37 lb ft).

Tighten
Tighten the bolts to 50 N·m (37 lb ft).

Tighten
Tighten the bolts to 70 N·m (52 lb ft).

Tighten
Tighten the nut to 80 N·m (59 lb ft).


Tighten
Tighten the nuts to 35 N·m (26 lb ft).
