For 1990-2009 cars only
Special Tools
| • | J 6125-1B Slide Hammer |
| • | J 23129 Universal Seal Remover |
| • | J 36850 Transmission Assembly Lubricant |
Removal Procedure
- Raise and support the vehicle. Refer to Lifting and Jacking the Vehicle.
- Place the drain pan under the transaxle oil pan.
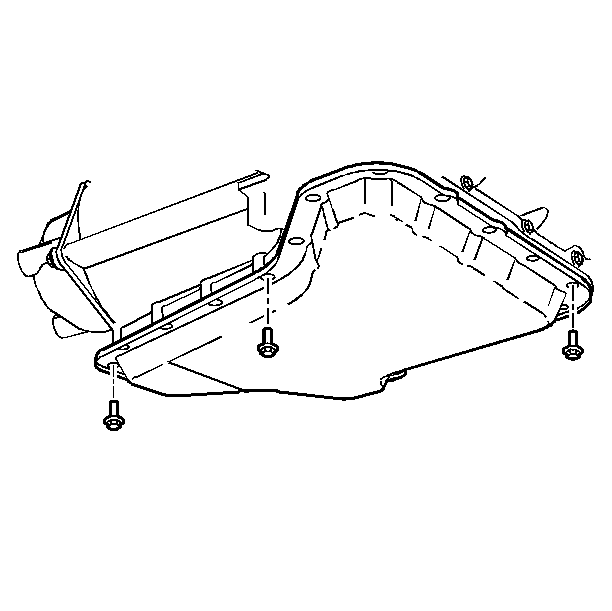
- Remove the oil pan bolts from only the front and the sides.
- Loosen the rear oil pan bolts about 4 turns.
- Lightly tap the oil pan with a rubber mallet or pry in order to allow the fluid to drain.
- Inspect the fluid color.
- Remove the remaining oil pan bolts.
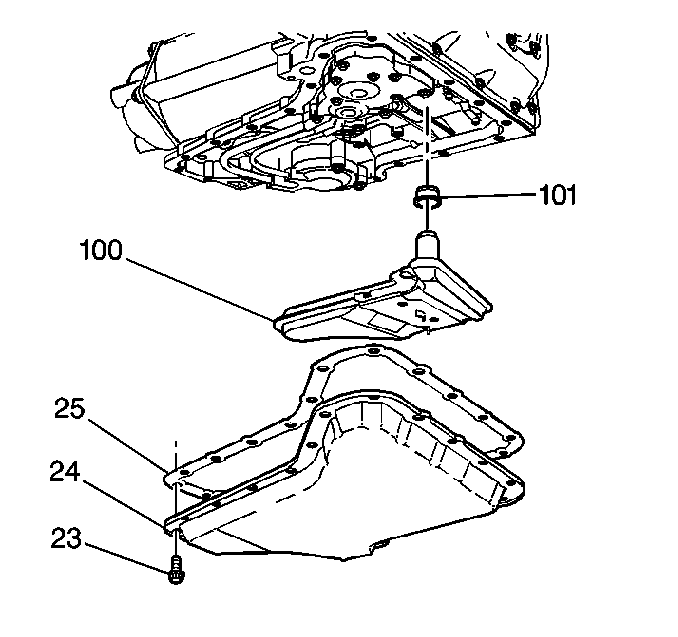
- Remove the oil pan (24) and the gasket (25).
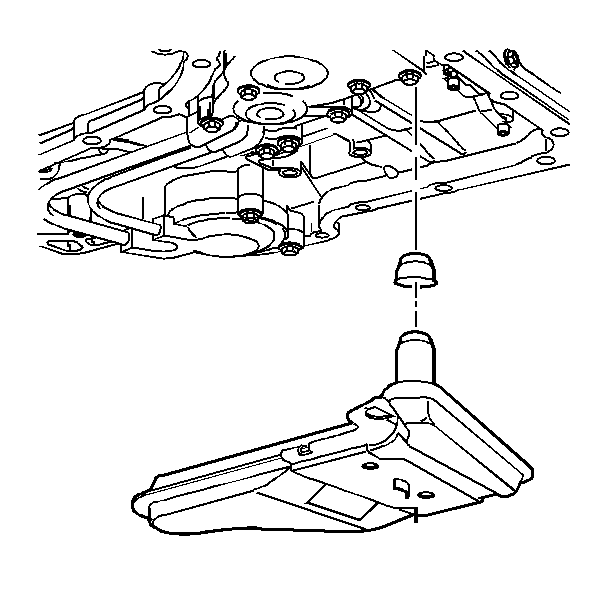
- Remove the oil filter. Use a long screwdriver in order to pry the oil filter neck out of the seal.
- Check the oil filter seal for damage or wear.
- As needed, remove the seal using the J 6125-1B and the J 23129 .
Caution: When removing the oil pan bolts, be careful not to damage the oil pan sealing surfaces. Such damage may result in oil leaks in this area.


Installation Procedure
- Install a new seal, as needed. Before installing, coat the new seal with a small amount of J 36850 or petroleum jelly.
- Install a new filter into the case.
- Install the oil pan (24) and the gasket (25) at the same time.
- Install the oil pan bolts.
- Lower the vehicle.
- Fill the transaxle to the proper level. Refer to Fluid Capacity Specifications.
- Inspect the transmission fluid level. Refer to Transmission Fluid Check.
- Inspect the oil pan gasket for leaks.


Note: Oil pan gaskets are reusable. Only replace if sealing surface is damaged.
Caution: Refer to Fastener Caution in the Preface section.

Tighten
Tighten the bolts to 14 N·m (125 lb in).
