For 1990-2009 cars only
Special Tools
| • | J 26958 Output Shaft Loading and Aligning Tool |
| • | J 26958-10B Adapter Plug |
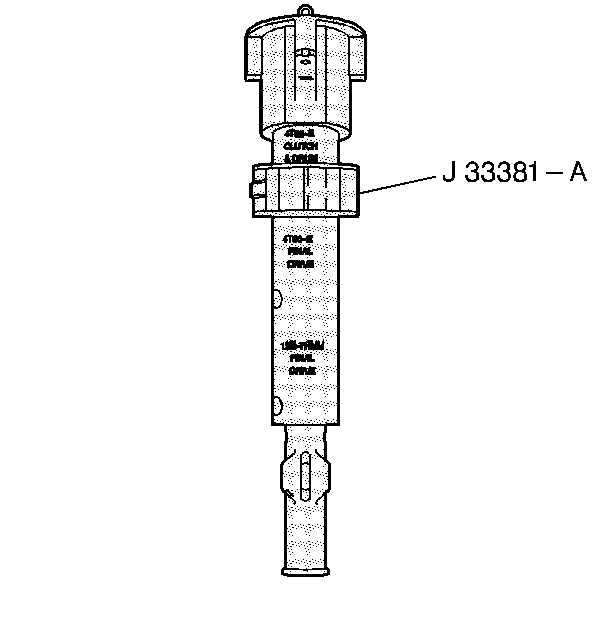
| • | J 33381-A Clutch Assembly Remover/Installer |
| • | J 33386-A Input Shaft End Play Tool |
| • | J 38385 Output Shaft Loading Tool Adapter |
| • | J 43425 Output Shaft Loading Tool Adapter |
For equivalent regional tools, refer to Special Tools.
- Adjust the collar on tool J 33381-A remover/installer to the 4T65-E CLUTCH & DRUM setting.
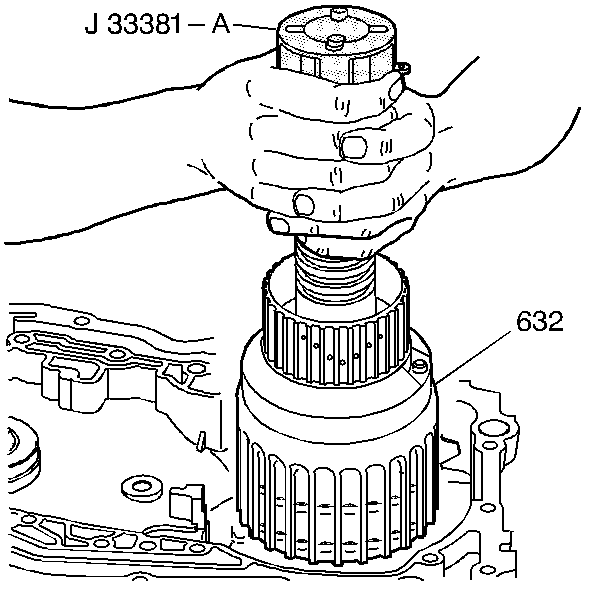
- Install J 33381-A remover/installer into the input clutch housing assembly (632).
- Tighten the threaded rod of J 33381-A remover/installer until the rod is finger tight.
- Use J 33381-A remover/installer in order to lift the input clutch housing assembly (632). The sprag clutch assemblies will also be attached.
- Install the assembly (632) into the case. Be sure that the assembly is down all the way.
- Remove J 33381-A remover/installer from the assembly.
- Install J 38385 adapter (3) for a standard duty transmission or J 43425 adapter (3) for a heavy duty transmission.
- Install J 26958-10B adapter plug (2) depending on model. Stadard duty uses this tool with the smaller end (4) facing down. Heavy duty uses this tool with the larger end (5) facing down.
- Install J 26958 loading and aligning tool (1) onto the case extension (6).
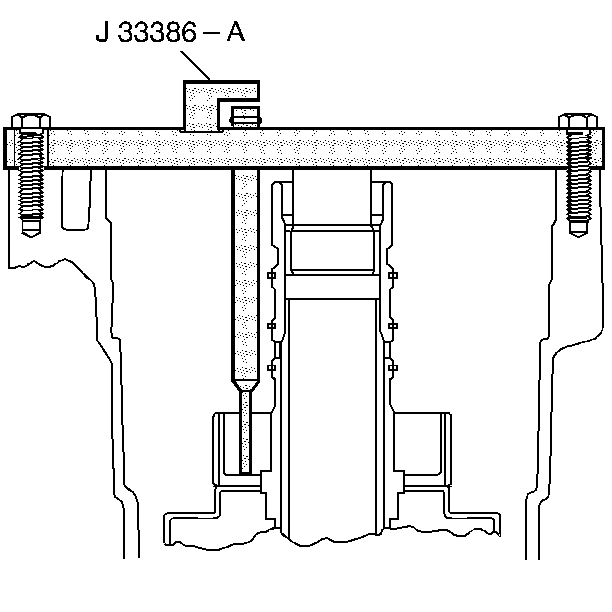
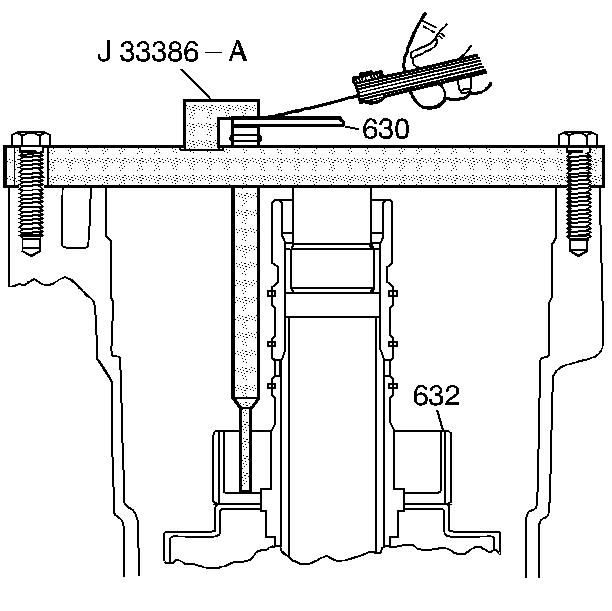
- Using two bolts, install J 33386-A end play tool onto the case.
- Tighten the bolts in order to securely hold J 33386-A end play tool .
- Tighten J 26958 loading and aligning tool finger tight in order to eliminate differential carrier end play.
- Insert the thrust washer (630) from the input clutch housing into J 33386-A end play tool as indicated. If the thrush washer will not fit into J 33386-A end play tool , select the next size smaller thrust washer and recheck.
- Use a feeler gauge in order to measure the clearance between J 33386-A end play tool and the thrust washer (630).
- Remove J 33386-A end play tool .
- Adjust the collar on tool J 33381-A remover/installer to the 4T65-E CLUTCH & DRUM setting. Make sure that the threaded rod is fully loosened.
- Install J 33381-A remover/installer into the input clutch housing (632).
- Tighten the threaded rod of J 33381-A remover/installer until the rod is finger tight.
- Use J 33381-A remover/installer in order to lift the input clutch housing assembly (632). The sprag clutch assemblies will also be attached.
- Remove the assembly (632) from the case.
- Position the transmission so that the oil pan is facing down.
- Remove J 26958 loading and aligning tool (1), J 26958-10B adapter plug (2), and J 38385 adapter (3) or J 43425 adapter (3).
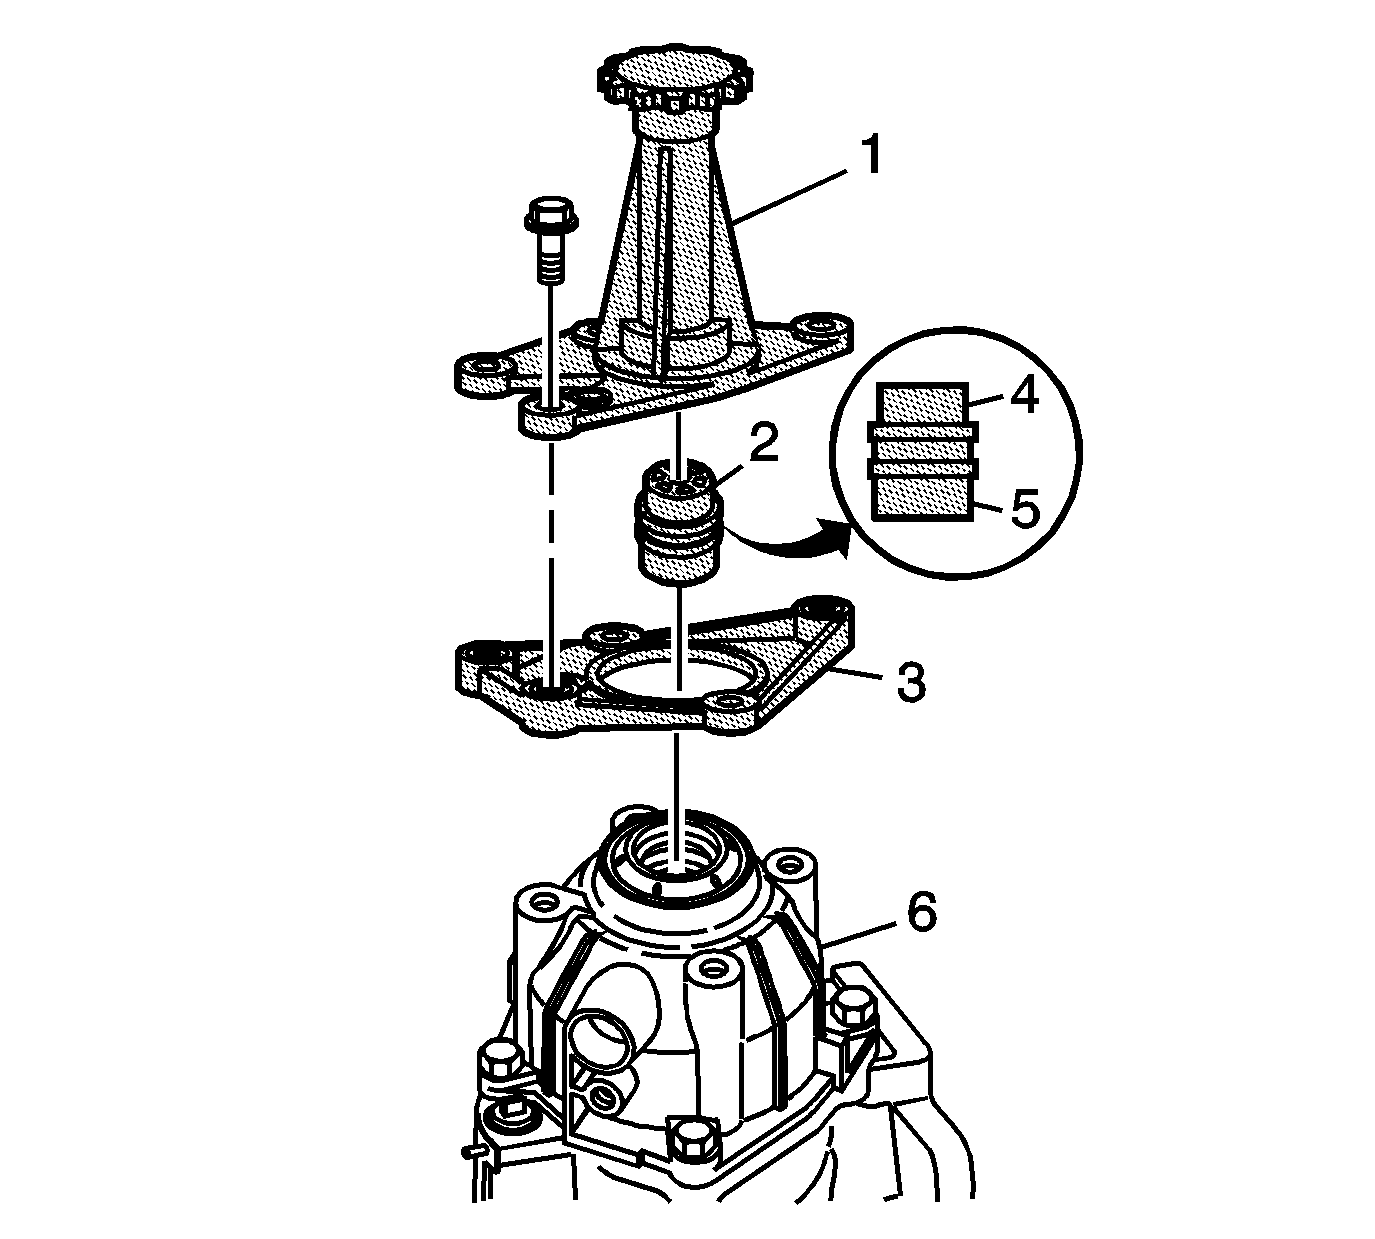
Note: The tool J 38385 adapter (3) is used on a standard duty transmission, and J 43425 (3) is used on a heavy duty transmission.
Note: The tool J 26958-10B adapter plug (2) is model specific and can be used on a standard duty and a heavy duty transmission. This tool has a small end (4) and a larger end (5). Standard duty would use the smaller end (4) facing down, and a heavy duty would use the larger end (5) facing down.
Note: Install bolts and tighten securely to prevent tool deflection during end play measurement.
| • | If the clearance is less than 0.1521 mm (0.006 in), use the current size thrust washer. |
| • | If the clearance is 0.1521 mm (0.006 in) or more, select the next size larger thrust washer and recheck. |
| • | Refer to the Bearing/Input Clutch Hub Selective Thrust Washer (630) Selection Guide in End Play Specifications . |


