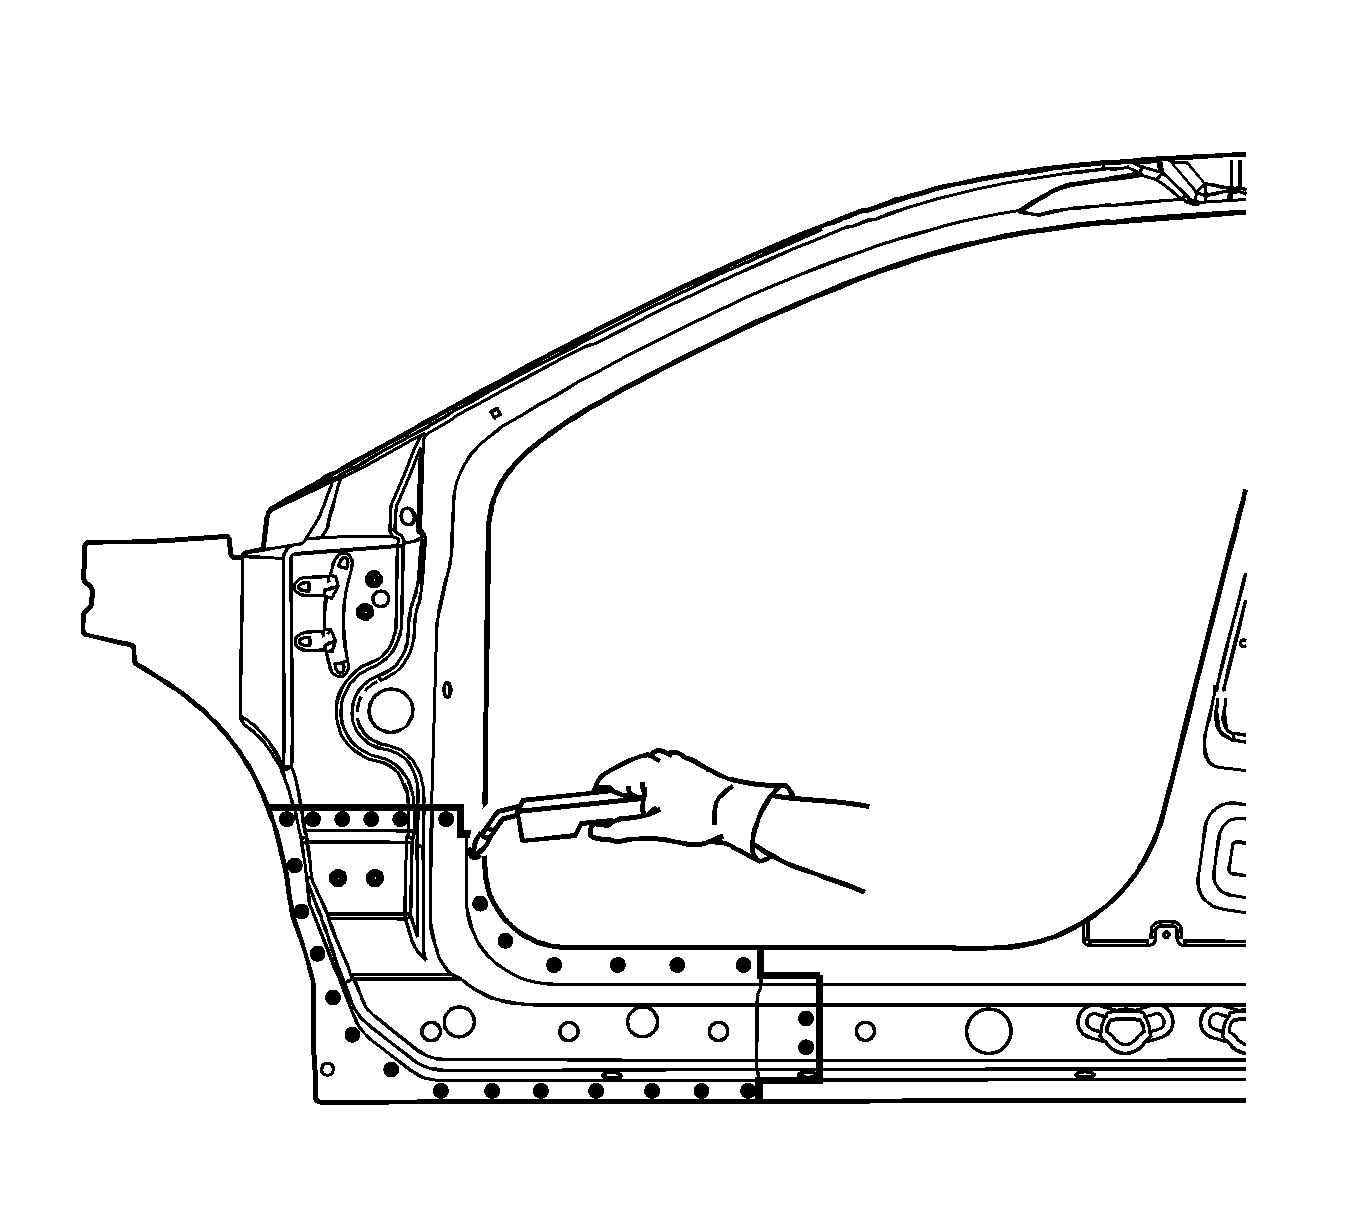
Removal Procedure
Warning: Refer to Approved Equipment for Collision Repair Warning in the Preface section.
The full body side inner panel comes as a one-piece assembly and can be replaced at the factory seams after removal of the outer panels, the roof panel and the front and rear window, any of these sectioning procedures can be performed separately or in any combination, depending on the extent of the damage to the vehicle.
Warning: Sectioning should be performed only in the recommended areas. Failure to do so may compromise the structural integrity of the vehicle and cause personal injury if the vehicle is in a collision.
- Disable the SIR system. Refer to SIR Disabling and Enabling.
- Disconnect the negative battery cable. Refer to Battery Negative Cable Disconnection and Connection.
- Remove all related panels and components.
- Remove the sealers and anti-corrosion materials from the repair area, as necessary. Refer to Anti-Corrosion Treatment and Repair.
- Repair as much of the damage as possible.
- Locate and mark a horizontal line 25 mm (1 in) down from the raised square portion of the hinge pillar. This will be the cut location.
- At the rocker panel, locate and mark a vertical cut line in the approved sectioning location.
- Cut at the 2 marked locations.
- Locate and drill out the factory welds, noting the number and the location of the welds.
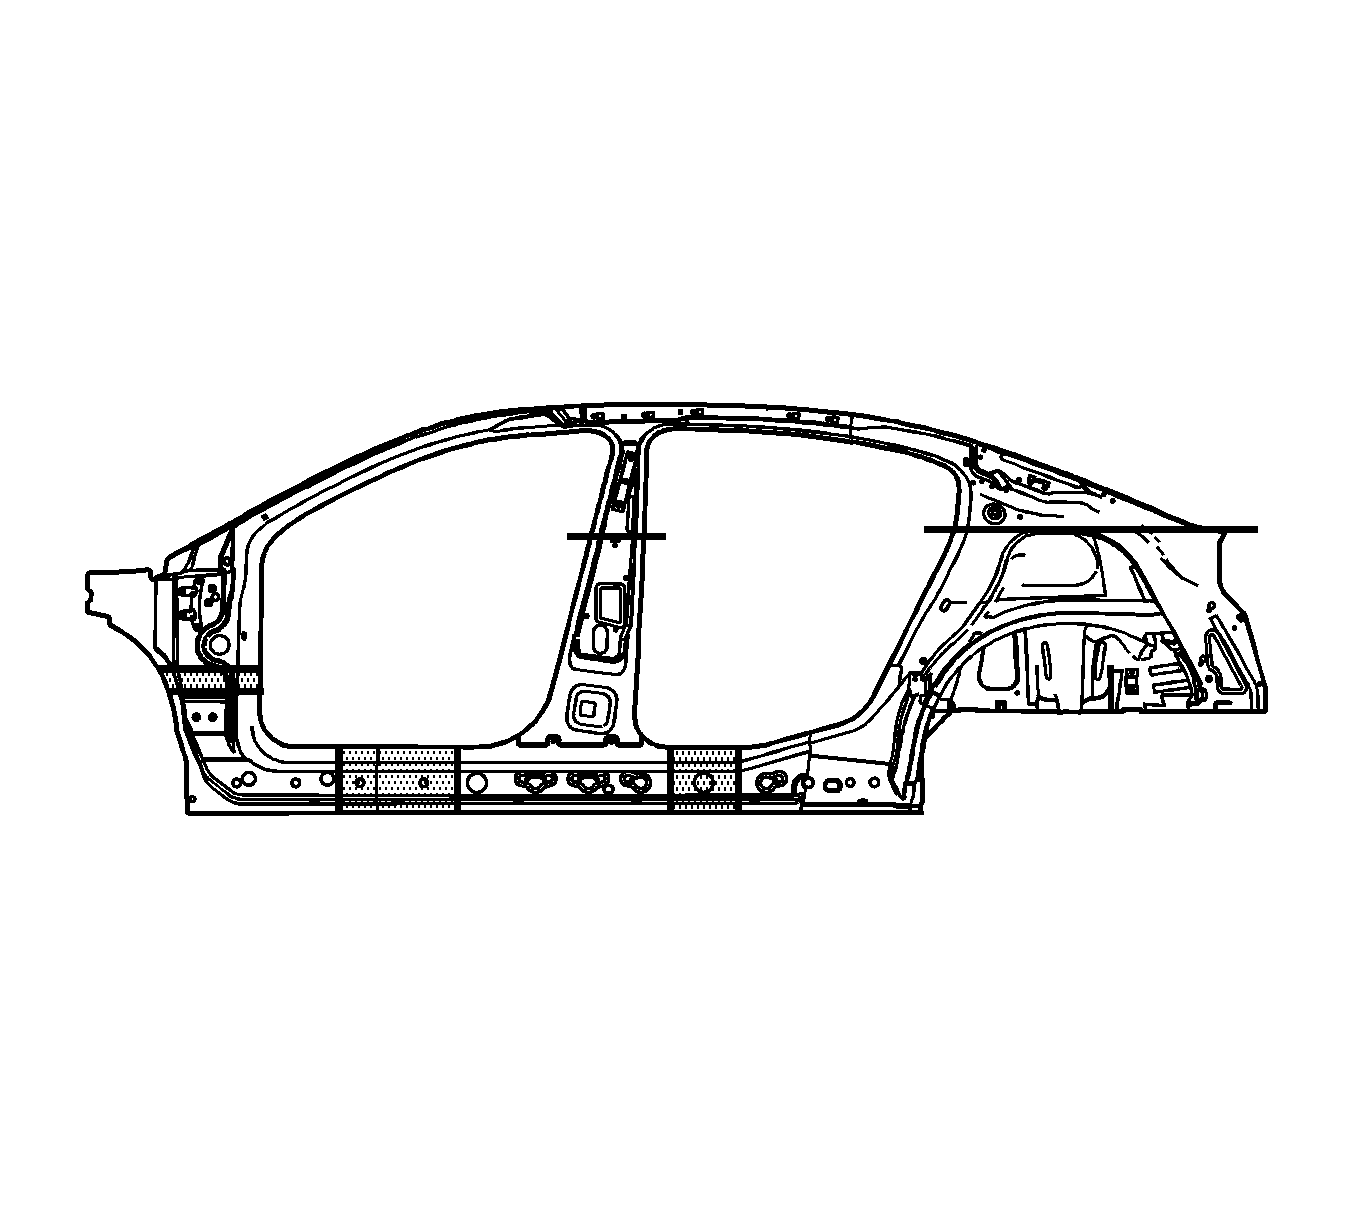
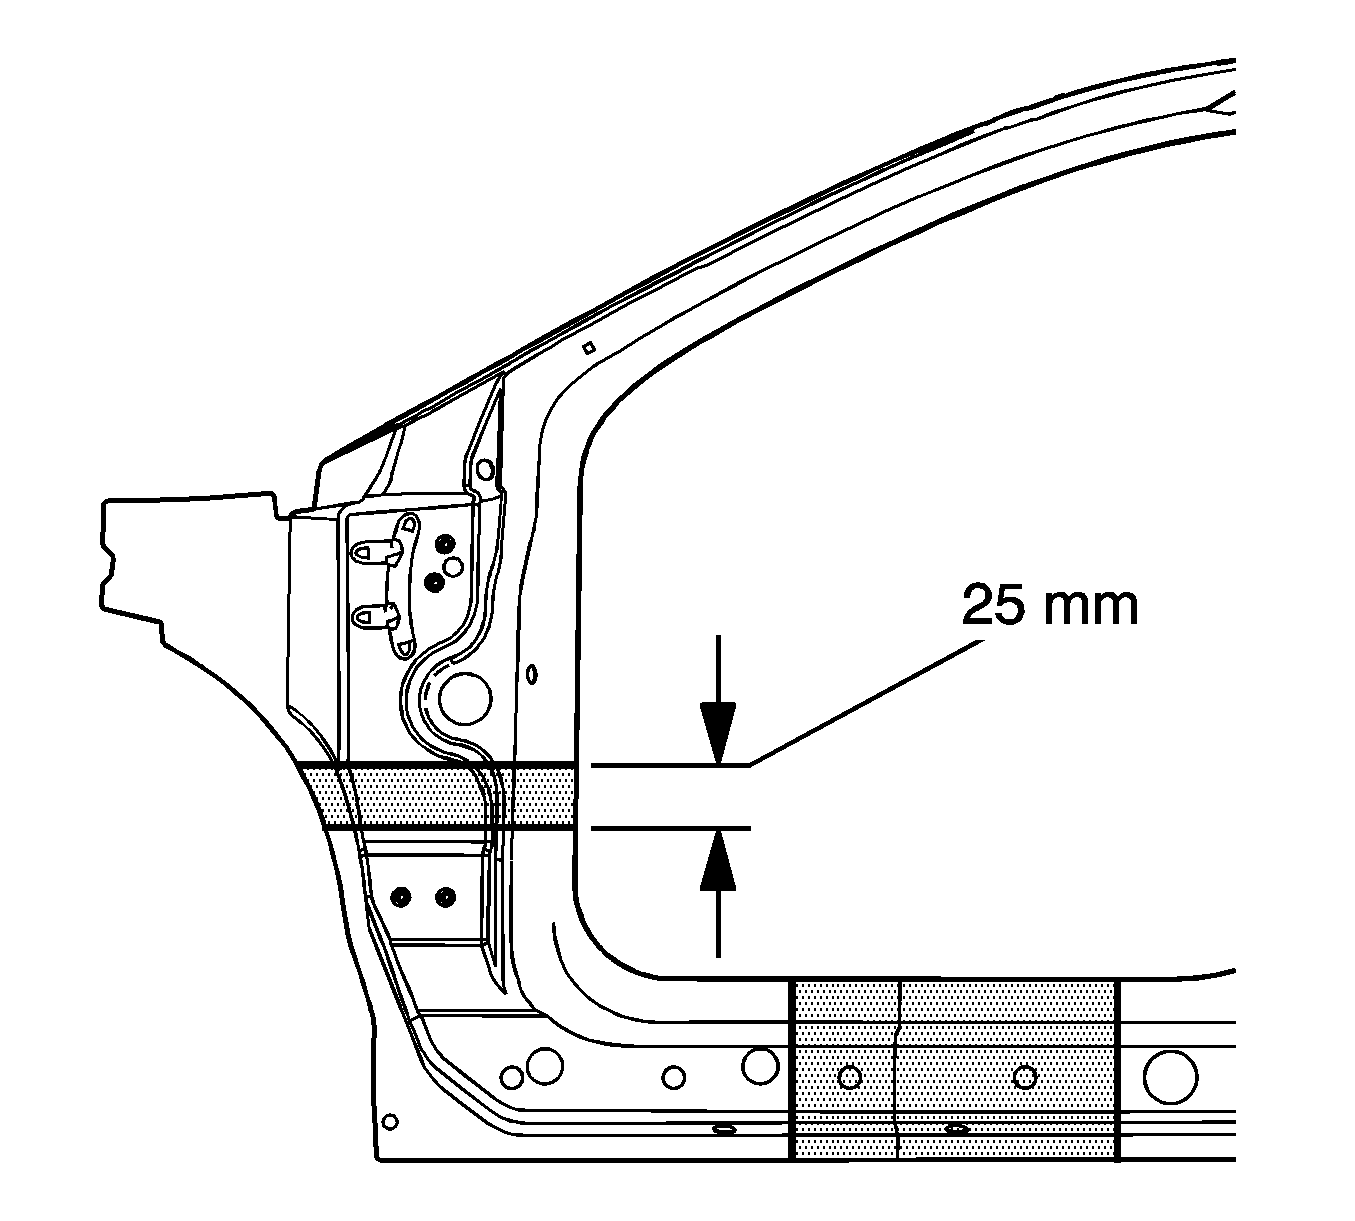
Note: Do not damage any inner reinforcements or panels.
Note: Cut through only one layer of metal.
Remove the damaged section from the vehicle.
Installation Procedure
- On the hinge pillar, scribe a cut line 50 mm (2 in) above the raised square portion of the hinge pillar. This will create a 25 mm (1 in) overlap on the service part.
- Notch the panel on the door weatherstrip flange to prevent excessive metal thickness in this area.
- In the rocker area, locate and mark a cut line in the recommended sectioning area. Allow for a 50 mm (2 in) overlap to the vehicle sectioning areas.
- Cut along the marked sectioning lines to create the service part.
- Notch the panel on the door weatherstrip flange to prevent excessive metal thickness in this area.
- Note the number and the location of the factory welds for installation of the service part.
- Drill 8 mm (5/16 in) plug weld holes in the service part as necessary as noted from the original panel.
- Drill additional plug weld holes 13 mm (1/2 in) in from the seam weld.
- Prepare all mating surfaces as necessary.
- Apply GM-approved Weld-Thru Coating or equivalent to all mating surfaces. Refer to Anti-Corrosion Treatment and Repair.
- Align service part using 3 dimensional measuring equipment. Clamp in place.
- Plug weld accordingly.
- Weld and grind the seam.
- Refinish and paint the repaired area. Refer to Basecoat/Clearcoat Paint Systems.
- Install all of the related panels and components.
- Connect the negative battery cable. Refer to Battery Negative Cable Disconnection and Connection.
- Enable the SIR system. Refer to SIR Disabling and Enabling.
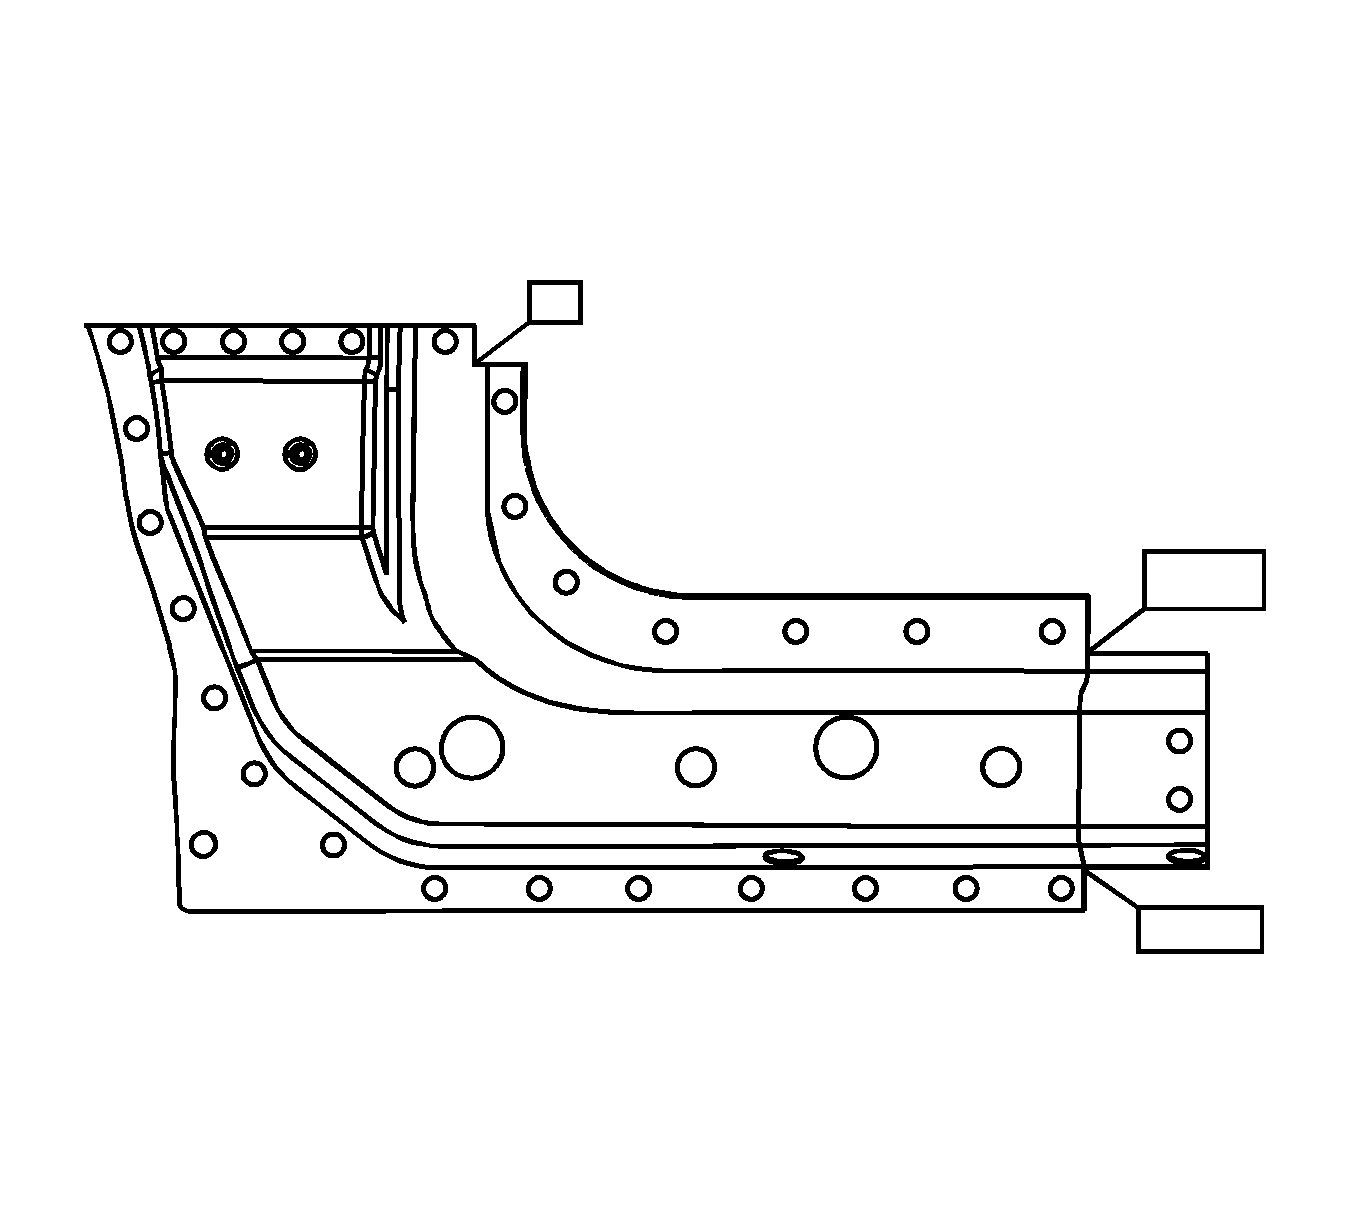
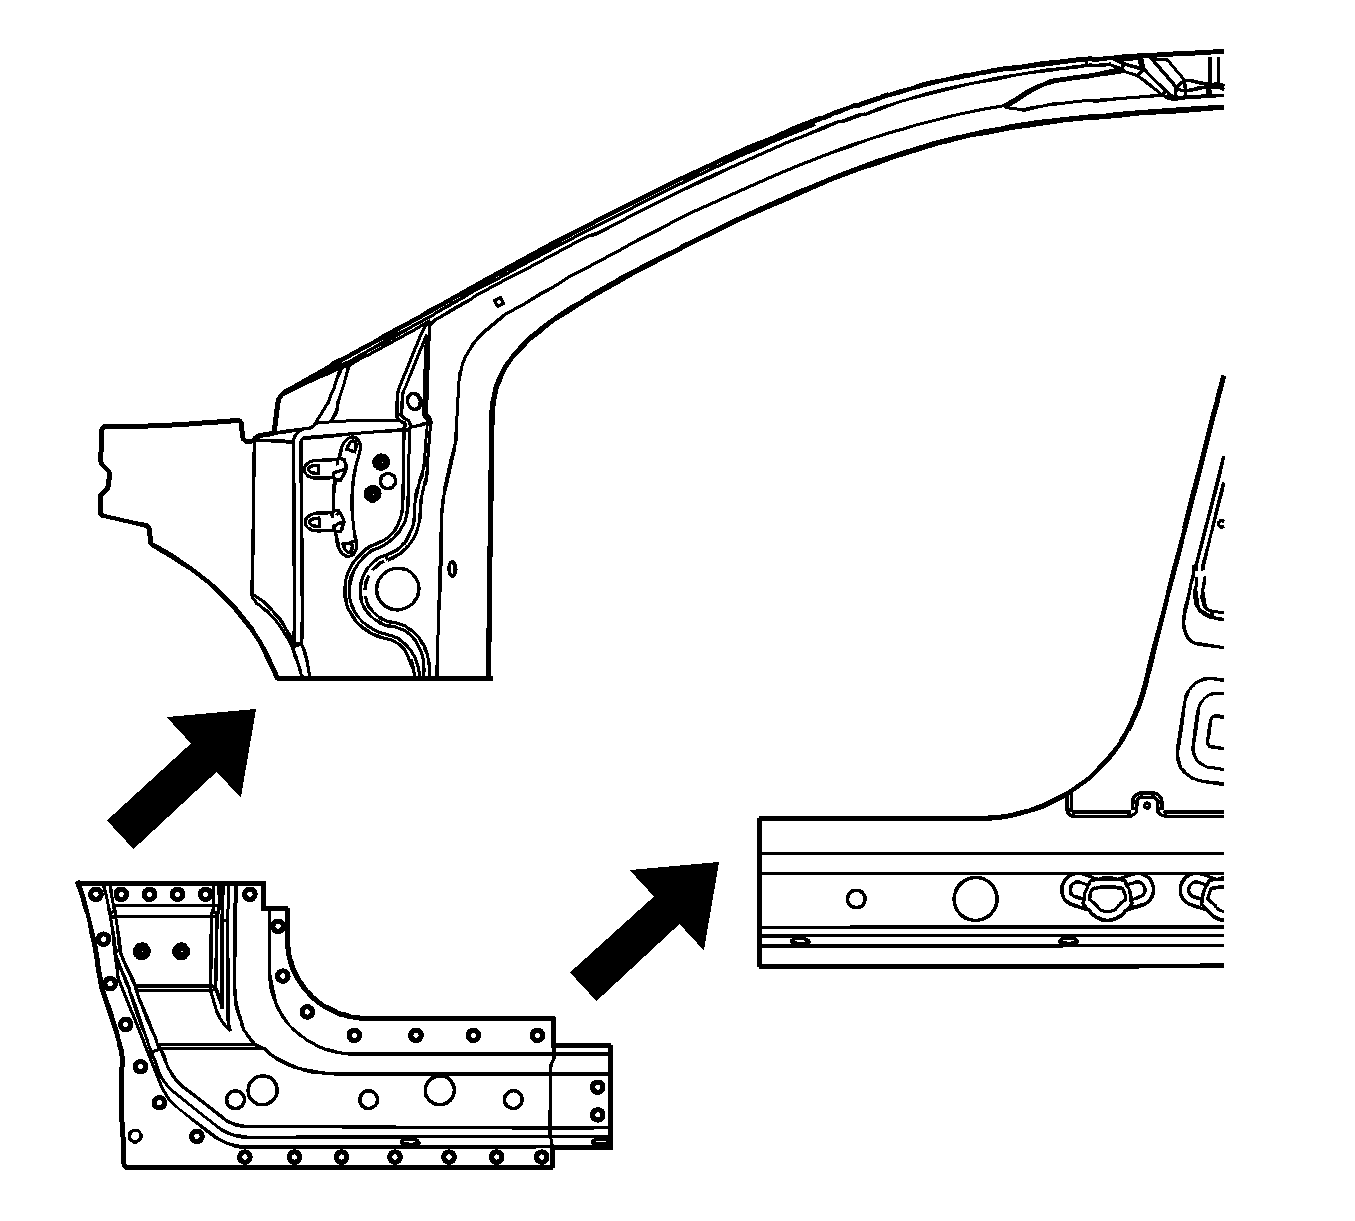
Note: If the location of the original plug weld holes cannot be determined, or if structural weld-thru adhesive is present, space the plug weld holes every 40 mm (1½ in).
