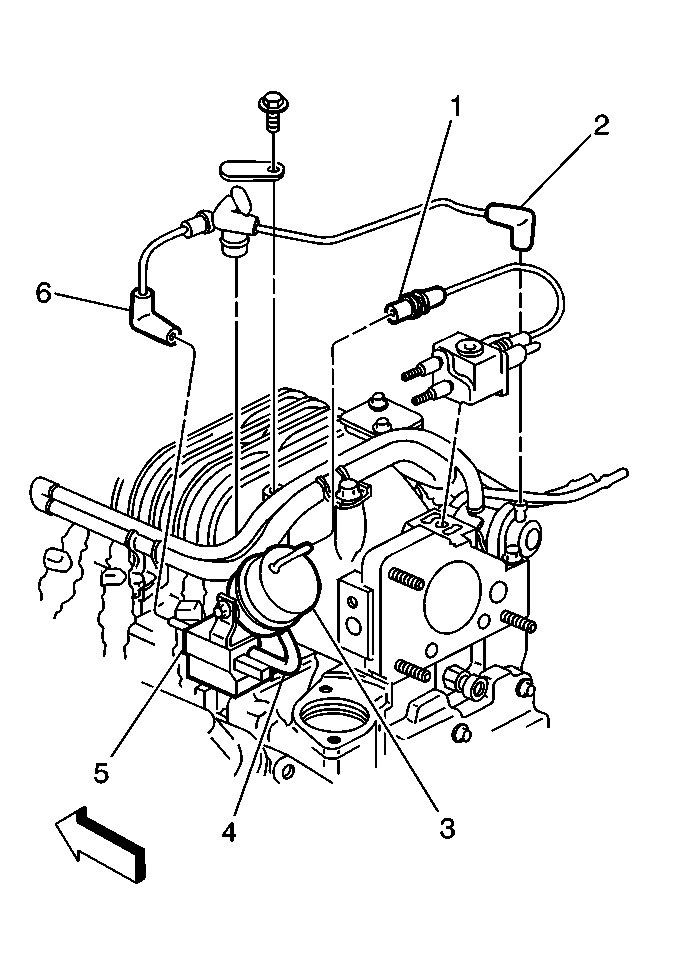
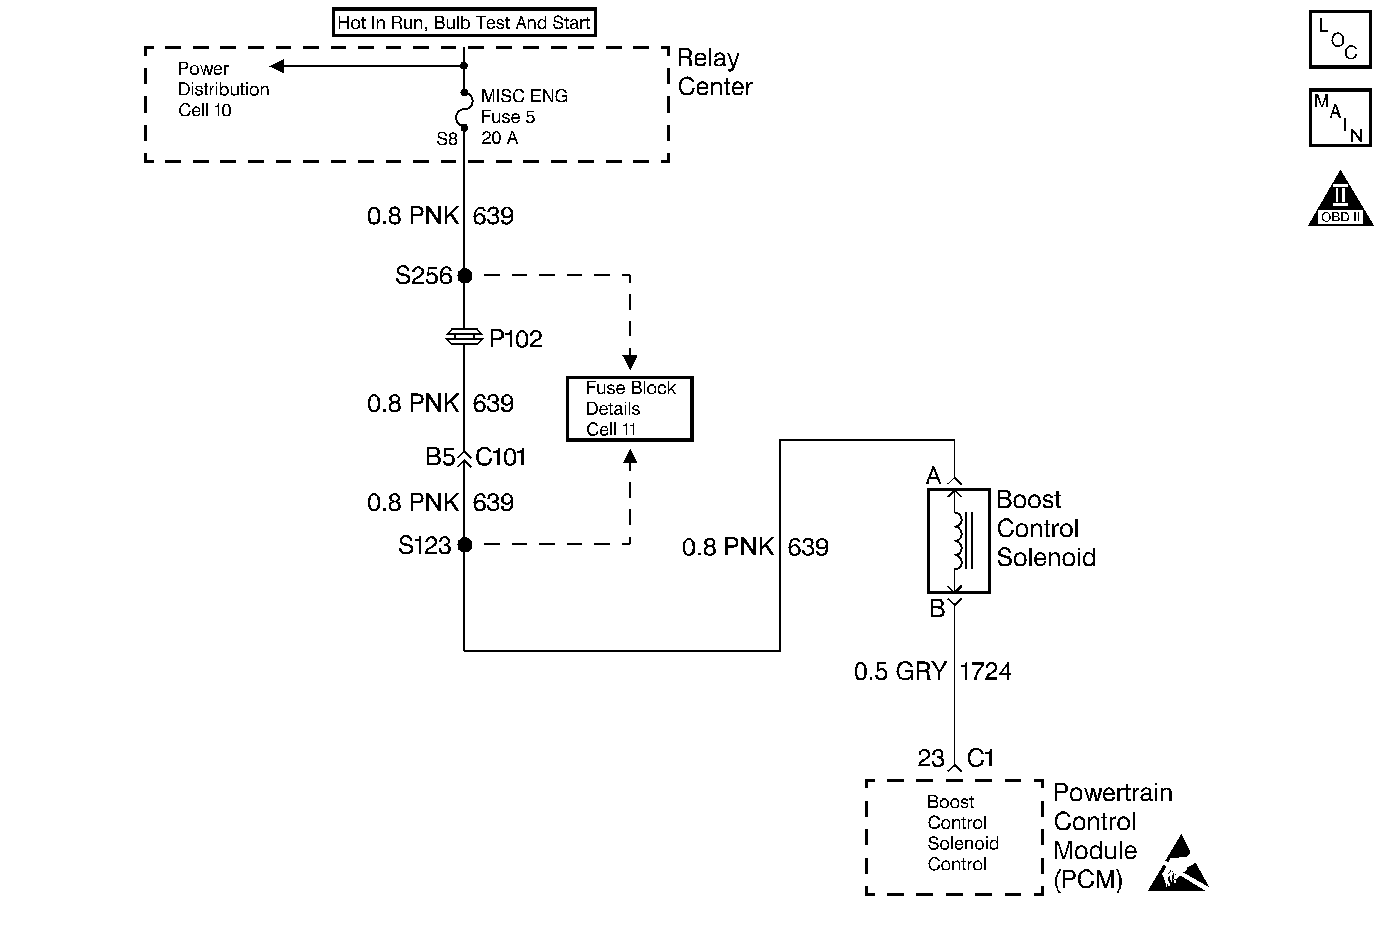
An intermittent may be caused by rubbed through wire insulation.
Number(s) below refer to Step number(s) in the diagnostic table.
DTC P1257 - Supercharger System Overboost
Step
| Action
| Value(s)
| Yes
| No
|
1
| Was the Powertrain On-Board
Diagnostic (OBD) System Check performed?
| --
|
Go to Step 2
| Go to the
Powertrain On Board Diagnostic (OBD) System Check
|
2
|
Important: Before continuing with diagnosis, visually and physically inspect for
damaged, disconnected, or incorrectly routed boost control system hoses. Refer
to

Select DTC info, Last Tst Fail and record any other DTCs set.
Are any other DTCs stored?
| --
| Diagnose
the other DTC first - Refer to
Powertrain Control Module Diagnosis
|
Go to Step 3
|
3
|
- Disconnect the Boost Control Solenoid electrical connector.
- Turn ON the ignition switch.
- Connect the test light between the Boost Control Solenoid harness
connector terminals.
Is the test light ON?
| --
|
Go to Step 9
|
Go to Step 4
|
4
|
- Disconnect the inlet vacuum signal hose from the Bypass Valve
actuator. Refer to

- Connect a vacuum gauge to read the inlet vacuum signal to the
Bypass Valve Actuator.
- Start the engine and idle in Park.
- Observe the vacuum gauge reading
Does the vacuum gauge indicate vacuum greater than the specified value?
| 12 in. Hg
|
Go to Step 5
|
Go to Step 11
|
5
|
- Reconnect the Boost Control Solenoid electrical connector and
the inlet vacuum signal hose.
- Disconnect the boost signal hose between the Boost Control Solenoid
and the Bypass Valve Actuator. Refer to

- Connect the vacuum gauge to read the boost signal from the Boost
Control Solenoid.
- Turn the Boost Control Solenoid OFF using the scan tool output
control function.
- Observe the vacuum gauge.
Does the vacuum gauge indicate vacuum greater than the specified value
with the Boost Control Solenoid commanded OFF?
| 12 in. Hg
|
Go to Step 6
|
Go to Step 12
|
6
|
- Check for a restricted or damaged boost signal hose between the
Boost Control Solenoid and the Bypass Valve Actuator. Refer to

- If a problem is found, repair as necessary.
Was a problem found?
| --
|
Go to Step 15
|
Go to Step 7
|
7
|
- Check for the following conditions:
| • | Sticking or misadjusted Bypass Valve Actuator linkage. |
- If a problem is found, repair as necessary. Refer to Supercharger
.
Was a problem found?
| --
|
Go to Step 15
|
Go to Step 8
|
8
| Replace the Bypass Valve actuator. Refer to
Supercharger Bypass Valve Actuator
.
Is action complete?
| --
|
Go to Step 15
| --
|
9
|
- Turn OFF the ignition switch.
- Disconnect the PCM.
- Turn ON the ignition switch.
- Observe the test light.
Is the test light ON?
| --
|
Go to Step 10
|
Go to Step 13
|
10
| Locate and repair short to ground in Boost Control Solenoid
control circuit. Refer to Repair Procedures
in Electrical Diagnosis.
Is action complete?
| --
|
Go to Step 15
| --
|
11
| Repair restricted or damaged inlet vacuum
signal hose to the Bypass Valve Actuator or blocked inlet vacuum source. Refer
to

Is action complete?
| --
|
Go to Step 15
| --
|
12
|
- Check for a restricted or damaged boost source hose to the Boost
Control Solenoid. Refer to

- If a problem is found, repair as necessary.
Was a problem found?
| --
|
Go to Step 15
|
Go to Step 14
|
13
| Replace
the PCM.
Important:: The replacement PCM must be programmed. Go to
Powertrain Control Module Replacement/Programming
.
Is action complete?
| --
|
Go to Step 15
| --
|
14
| Replace the Boost Control Solenoid. Refer
to
Boost Control Solenoid
.
Is action complete?
| --
|
Go to Step 15
| --
|
15
|
- Review and record scan tool Fail Records data.
- Clear DTCs.
- Operate the vehicle within Fail Records conditions.
- Monitor Specific DTC info for DTC P1257 on the scan tool.
Does the scan tool indicate DTC P1257 failed this ign?
| --
|
Go to Step 2
| System
OK
|


