Removal Procedure
- Move the seat to the full-rearward position.
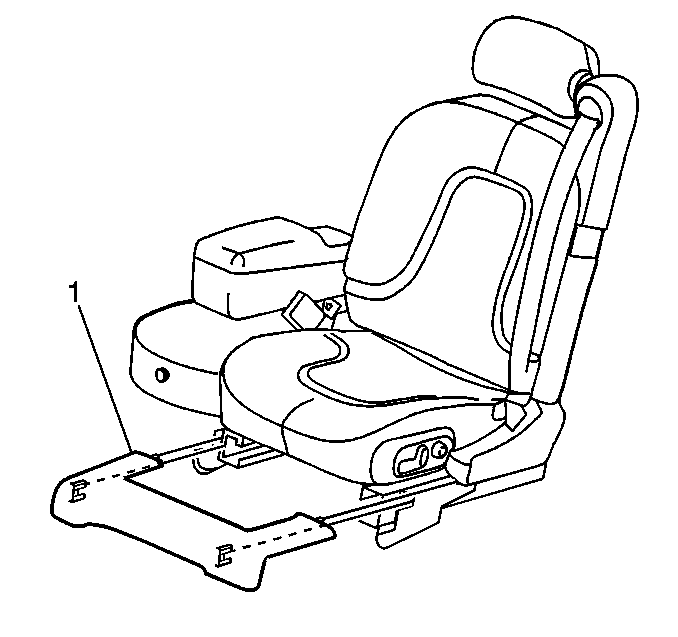
- Remove the track cover (1), unsnap the track cover and slide forward.
- Move the seat to the full forward position.
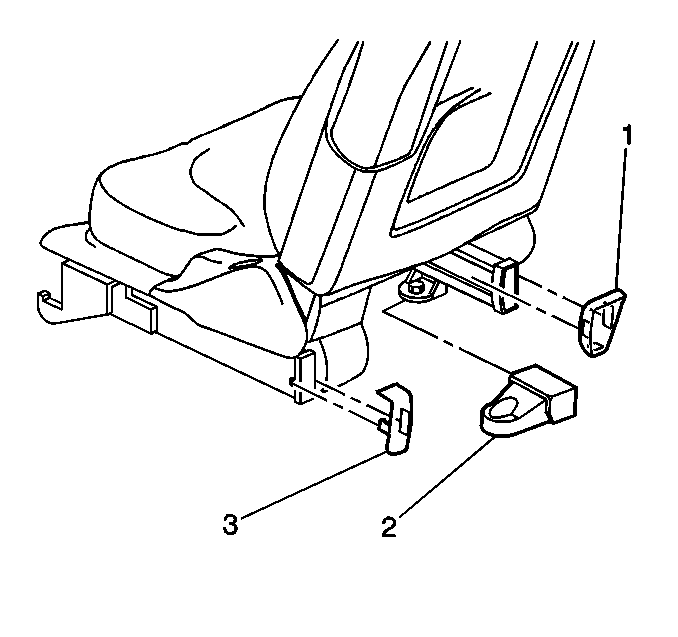
- Remove the track covers (1,2,3).
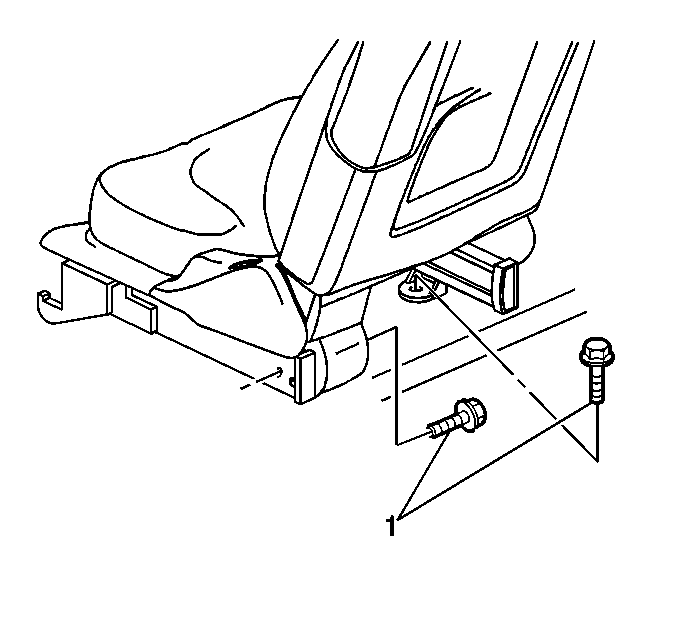
- Remove the seat to floorpan bolts (1).
- Tilt the seat forward.
- Disconnect the rear heater duct (if equipped).
- Disconnect the electrical connectors.
- Remove the seat with aid from an assistant.

Installation Procedure
- Position the seat in order to align the hooks in the slots, with the aid of an assistant.
- Tilt the seat forward.
- Connect the electrical connectors.
- Connect the heater duct (if equipped).
- Install the rear seat to floorpan bolts (1).
- Torque the outer bolt first then the inner bolt (1) in order to secure the seat to the floorpan.
- Install the rear support covers (1,3).
- Slide the seat full rearward
- Align the front trim cover (1) to the seat track.
- Push the cover inward to secure.
- Reposition the seat.
Important: Prior to installing the seat, verify that the area where the hooks engage is not deformed or raised. If the sheet metal is deformed, re-flatten the raised sheet metal using an appropriate device, such as a ball peen hammer.
Notice: Use the correct fastener in the correct location. Replacement fasteners must be the correct part number for that application. Fasteners requiring replacement or fasteners requiring the use of thread locking compound or sealant are identified in the service procedure. Do not use paints, lubricants, or corrosion inhibitors on fasteners or fastener joint surfaces unless specified. These coatings affect fastener torque and joint clamping force and may damage the fastener. Use the correct tightening sequence and specifications when installing fasteners in order to avoid damage to parts and systems.
Tighten
Tighten the bolts to 35 N·m (26 lb ft).
Important: Install the rear adjuster cover (2). Ensure that the adjuster tongues are under the track.
