Removal Procedure
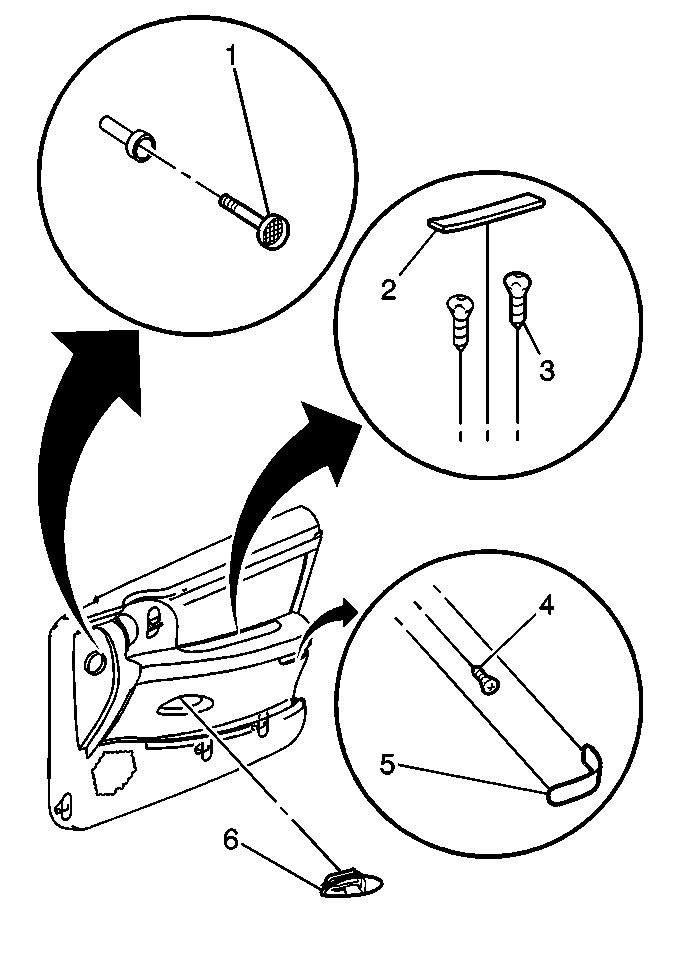
- Remove the door handle trim plate (6).
- Carefully remove the armrest cover plate (2) by prying upward from the access hole using a thin-bladed tool.
- Remove the 2 fasteners (3) from the armrest.
- Remove the courtesy lamp assembly (5).
- Remove the fastener from behind the lamp assembly (4).
- Remove the push in retainer from the defroster duct.
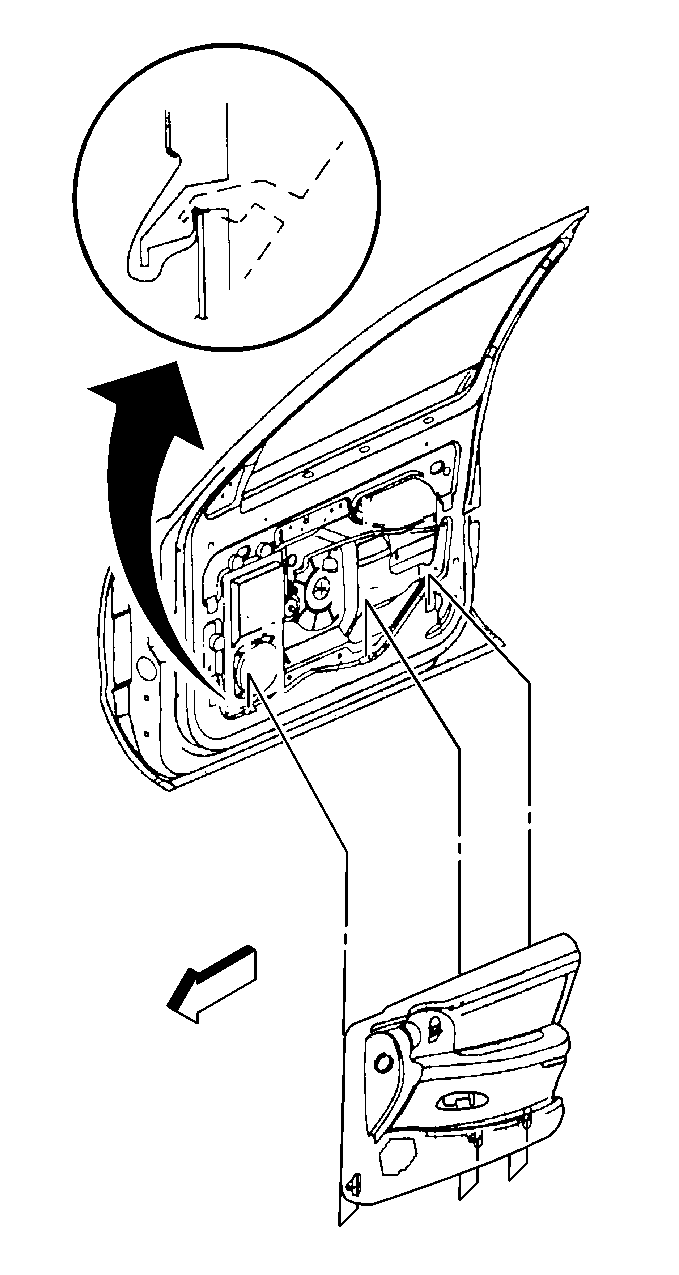
- Lift straight up on the trim panel in order to disengage the hooks on the backside of the panel (4).
- Disconnect the electrical connectors.
- Remove the door trim panel.
Caution: Disconnect the power window switch when working inside the driver door. When operated, the Express Up/Down Feature allows the door window to move very quickly, without stopping, which could cause personal injury.

Installation Procedure
- Connect the electrical connectors.
- Install the clips on the electrical connectors to the front door module.
- Install the door trim panel by engaging the hooks on the backside of the panel.
- Ensure the door trim panel is fully seated prior to fastener installation.
- Install the push pin retainer (1) in the defroster duct.
- Install the fastener behind the lamp assembly (4).
- Install the courtesy lamp assembly (5).
- Install the 2 fasteners (3) in the armrest.
- Install the armrest cover plate (2) by inserting the rear retainer tab into the slot in the armrest pull cup.
- Snap the front edge into place in order to secure the cover plate.
- Install the door handle trim plate (6).
Caution: Disconnect the power window switch when working inside the driver door. When operated, the Express Up/Down Feature allows the door window to move very quickly, without stopping, which could cause personal injury.
Notice: Use the correct fastener in the correct location. Replacement fasteners must be the correct part number for that application. Fasteners requiring replacement or fasteners requiring the use of thread locking compound or sealant are identified in the service procedure. Do not use paints, lubricants, or corrosion inhibitors on fasteners or fastener joint surfaces unless specified. These coatings affect fastener torque and joint clamping force and may damage the fastener. Use the correct tightening sequence and specifications when installing fasteners in order to avoid damage to parts and systems.
Tighten
Tighten the fastener to 0.6N·m (5 lb in).
Tighten
Tighten the two fasteners to 0.6N·m (5 lb in).
