Step | Action | Value(s) | Yes | No |
|---|---|---|---|---|
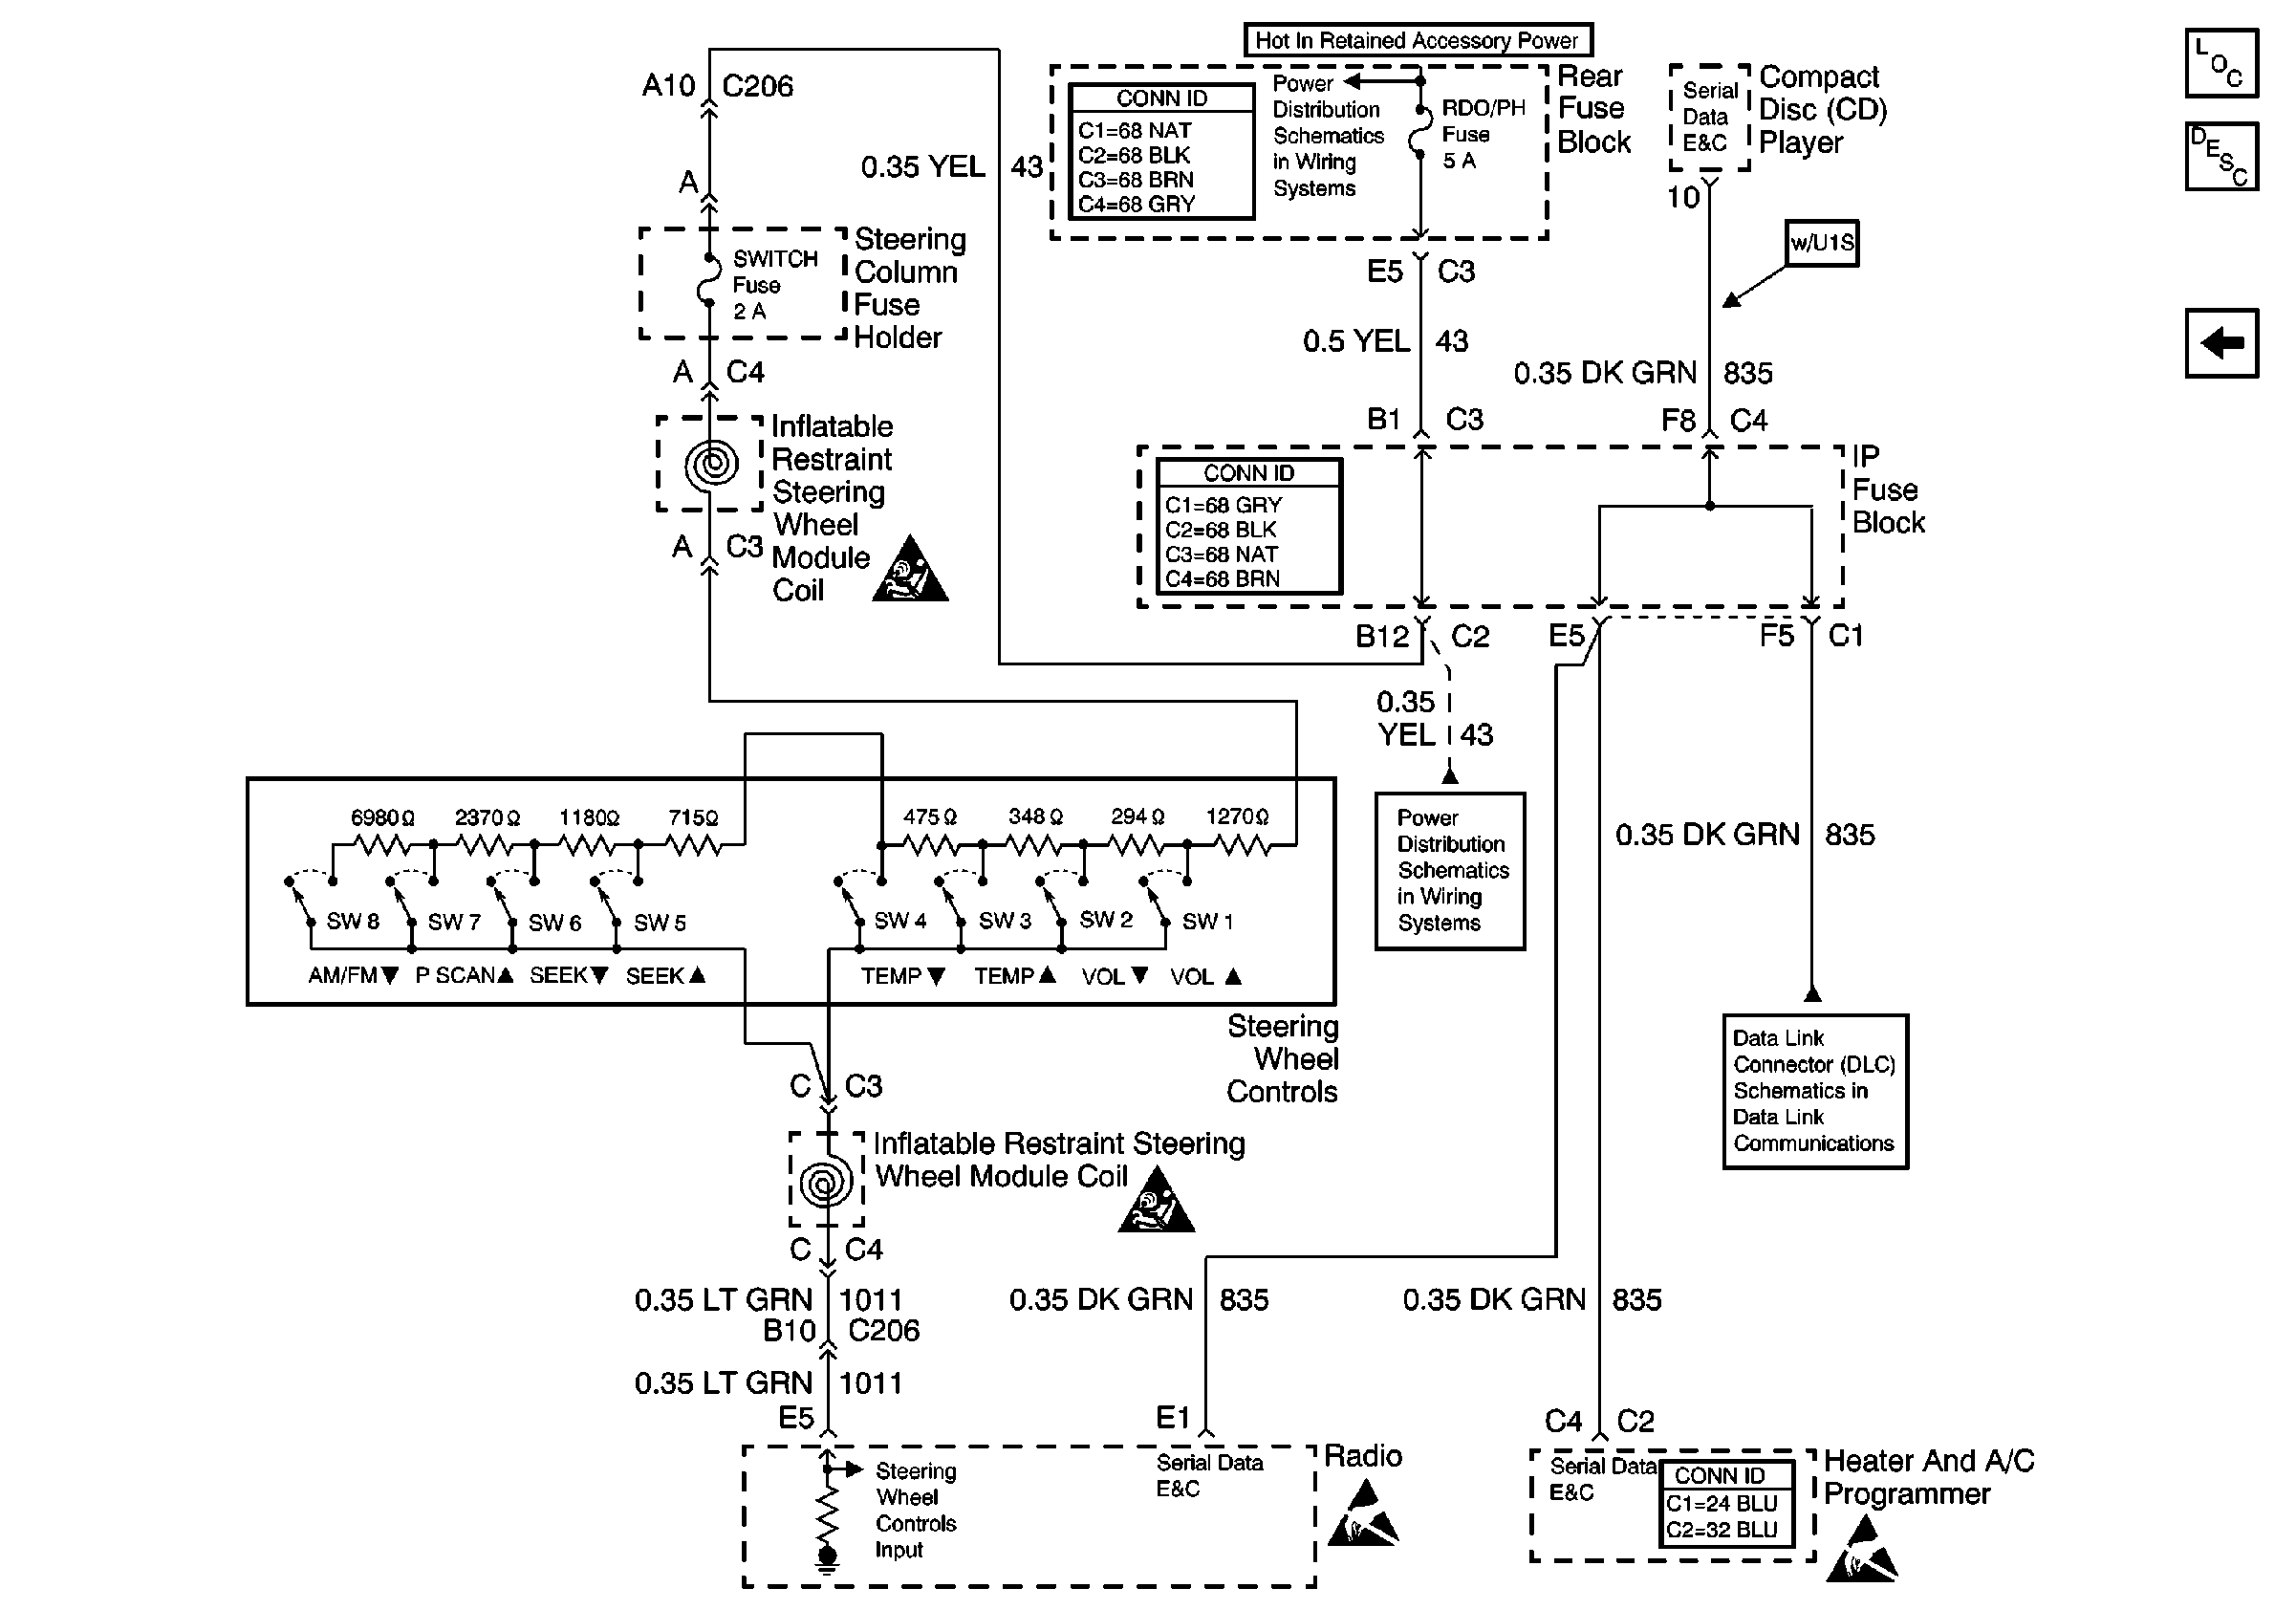
Schematic Reference: HVAC
Air Delivery/Temperature Control Schematics
| ||||
1 | Did you perform the HVAC Diagnostic System Check? | -- | Go to Step 2 | Go to Diagnostic System Check |
2 |
Do the entertainment steering wheel controls function? | -- | Go to Step 3 | Go to Symptoms in Entertainment |
3 |
Does the voltage change for each switch pressed? | -- | Go to Step 4 | Go to Step 17 |
4 | Is the vehicle equipped with a CD changer? | -- | Go to Step 5 | Go to Step 6 |
5 |
Do the CD changer controls function? | -- | Go to Step 10 | Go to Symptoms in Entertainment |
6 |
Does the voltage measure above the specified value? | 3 V | Go to Step 7 | Go to Step 9 |
7 |
Does the voltage measure above the specified value? | 3 V | Go to Step 8 | Go to Step 13 |
8 |
Does the voltage measure above the specified value? | 3 V | Go to Step 11 | Go to Step 14 |
9 |
Does the voltage measure above the specified value? | 3 V | Go to Step 16 | Go to Step 12 |
10 | Test the serial data E&C circuit for an open between the radio and the HCM. Refer to Circuit Testing and Wiring Repairs in Wiring Systems. Did you find and correct the condition? | -- | Go to Step 20 | Go to Step 16 |
11 | Test the serial data E&C circuit for a short to voltage. Refer to Circuit Testing and Wiring Repairs in Wiring Systems. Did you find and correct the condition? | -- | Go to Step 20 | Go to Step 16 |
12 | Test the serial data E&C circuit for a short to ground. Refer to Circuit Testing and Wiring Repairs in Wiring Systems. Did you find and correct the condition? | -- | Go to Step 20 | Go to Step 15 |
13 | Test the serial data E&C circuit for an open between the radio and the HCM. Refer to Circuit Testing and Wiring Repairs in Wiring Systems. Did you find and correct the condition? | -- | Go to Step 20 | Go to Step 15 |
14 | Test the serial data E&C circuit for an open between the radio and the HCM. Refer to Testing for Intermittent Conditions and Poor Connections and Connector Repairs in Wiring Systems. Did you find and correct the condition? | -- | Go to Step 20 | Go to Step 16 |
15 | Inspect for poor connections at the harness connector of the radio. Refer to Testing for Intermittent Conditions and Poor Connections and Connector Repairs in Wiring Systems. Did you find and correct the condition? | -- | Go to Step 20 | Go to Step 18 |
16 | Inspect for poor connections at the harness connector of the HCM. Refer to Testing for Intermittent Conditions and Poor Connections and Connector Repairs in Wiring Systems. Did you find and correct the condition? | -- | Go to Step 20 | Go to Step 19 |
17 | Replace the steering wheel control switches. Refer to Steering Wheel Control Switch Assembly Replacement in Steering. Did you complete the repair? | -- | Go to Step 20 | -- |
18 | Replace the radio. Refer to Radio Replacement in Entertainment. Did you complete the repair? | -- | Go to Step 20 | -- |
19 | Replace the HCM. Refer to Programmer Replacement . Did you complete the repair? | -- | Go to Step 20 | -- |
20 | Operate the system in order to verify the repair. Did you correct the condition? | -- | System OK | Go to Step 2 |