For 1990-2009 cars only
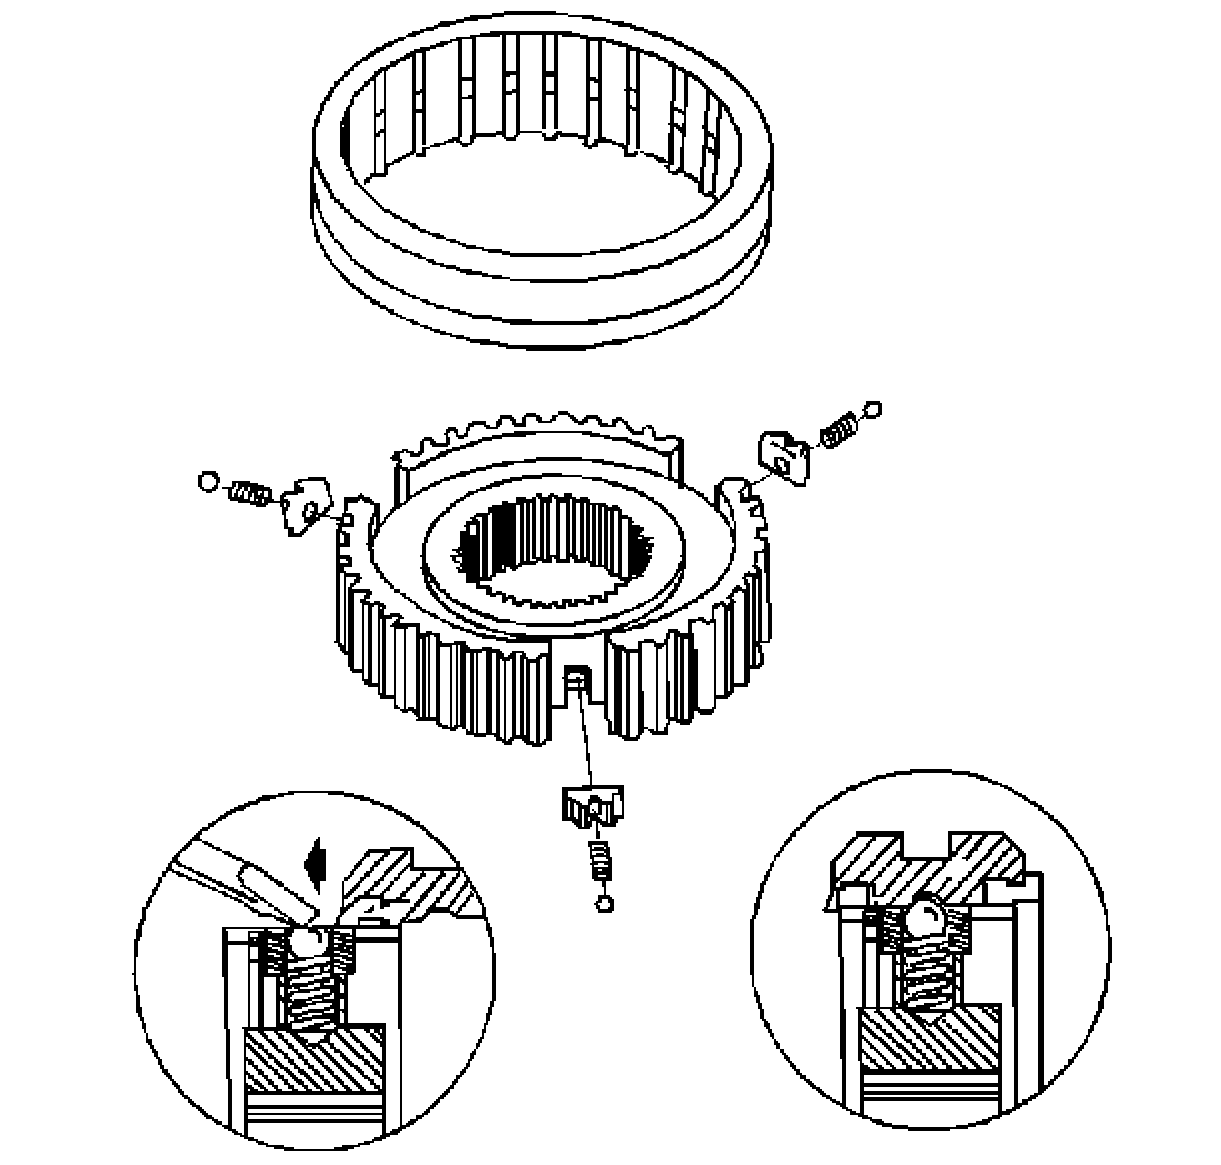
3rd/4th Synchronizers Disassemble
- Mark the blocking rings in order for a correct assembly.
- Remove the blocking rings.
- Cover the 3rd/4th synchronizer with a shop towel to prevent loss of springs, the balls, and the inserts.
- Remove the synchronizer sleeve from the synchronizer hub.
- Remove the balls, the springs, and the inserts.

Important:
• When you service the synchronizers, keep them in the order that they
are removed. • Only remove the synchronizer sleeve from the hub if necessary. Re-assembly
of the balls and springs may take some practice.
1st/2nd Synchronizers Disassemble
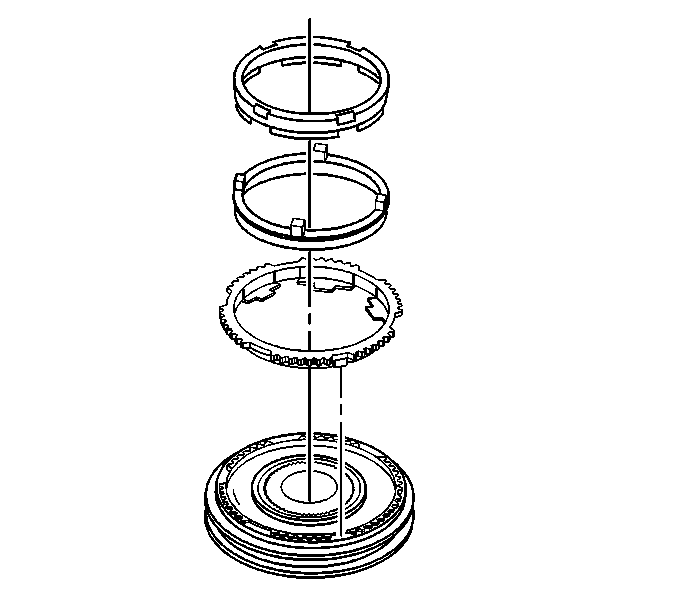
- Remove the following synchronizer blocking rings from the 1st/2nd synchronizer assembly.
- Cover the 1st/2nd synchronizer with a shop towel to prevent loss of springs, the balls, and the inserts.
- Remove the synchronizer sleeve from the synchronizer hub.
- Remove the shift balls, the springs, and the inserts.

Important:
• When you service the synchronizers, keep them in the order that they
are removed. • Only remove the synchronizer sleeve from the hub if necessary. Re-assembly
of the balls and springs may take some practice.
| • | Blocking rings |
| • | Center rings |
| • | Inner rings |

5th/Reverse Synchronizers Disassemble
- Mark the blocking rings in order for a correct assembly.
- Remove the blocking rings.
- Cover the 5th/reverse synchronizer with a shop towel to prevent loss of springs , the balls, and the inserts.
- Remove the synchronizer sleeve from the synchronizer hub.
- Remove the balls, the springs, and the inserts.

Important:
• When you service the synchronizers, keep them in the order that they
are removed. • Only remove the synchronizer sleeve from the hub if necessary. Re-assembly
of the balls and springs may take some practice.
