Rear License Plate Pocket Perimeter Gasket Loose/Out of Position or Excessive Amount of Adhesive (Install New Gasket Using Updated Retainer Tightening Sequence)

| Subject: | Rear License Plate Pocket Perimeter Gasket Loose/Out of Position Or Excessive Amount Of Adhesive (Install New Gasket Using Updated Retainer Tightening Sequence) |
| Models: | 2004-2007 Buick Rainier |
| 2002-2007 Chevrolet TrailBlazer, TrailBlazer EXT |
| 2002-2007 GMC Envoy, Envoy XL |
| 2002-2004 Oldsmobile Bravada |
| 2005-2007 Saab 9-7X |
This bulletin is being revised to add a part number. Please discard Corporate Bulletin Number 04-08-66-001C (Section 08 -- Body & Accessories).
Condition
Some customers may comment that the insulating perimeter seal or gasket on the backside edge of the license plate housing/pocket appears to be shrinking or becomes pulled away from the edge of the license plate housing/pocket. Some customers may also comment about excessive amounts of adhesive oozing from the gasket.
Cause
This condition may be caused by changes in temperature, which may cause the plastic license plate housing to expand and contract. When this occurs, the license plate housing gasket seal may be caught and pulled under the housing/pocket.
Correction
Technicians are to replace the rear license plate pocket perimeter gasket using the following procedure:
Important: Excessive amounts of adhesive, which may have oozed from the gasket, may be cleaned using GM Tar and Road Oil Remover, GM P/N 1050172 (in Canada, P/N 992856), or the equivalent. Replacement of the gasket is not necessary in this situation.
- Remove the rear license plate pocket assembly. Refer to the License Plate Pocket Replacement procedure in the Body Rear End sub-section of SI.
- Remove the rear license plate pocket perimeter gasket.
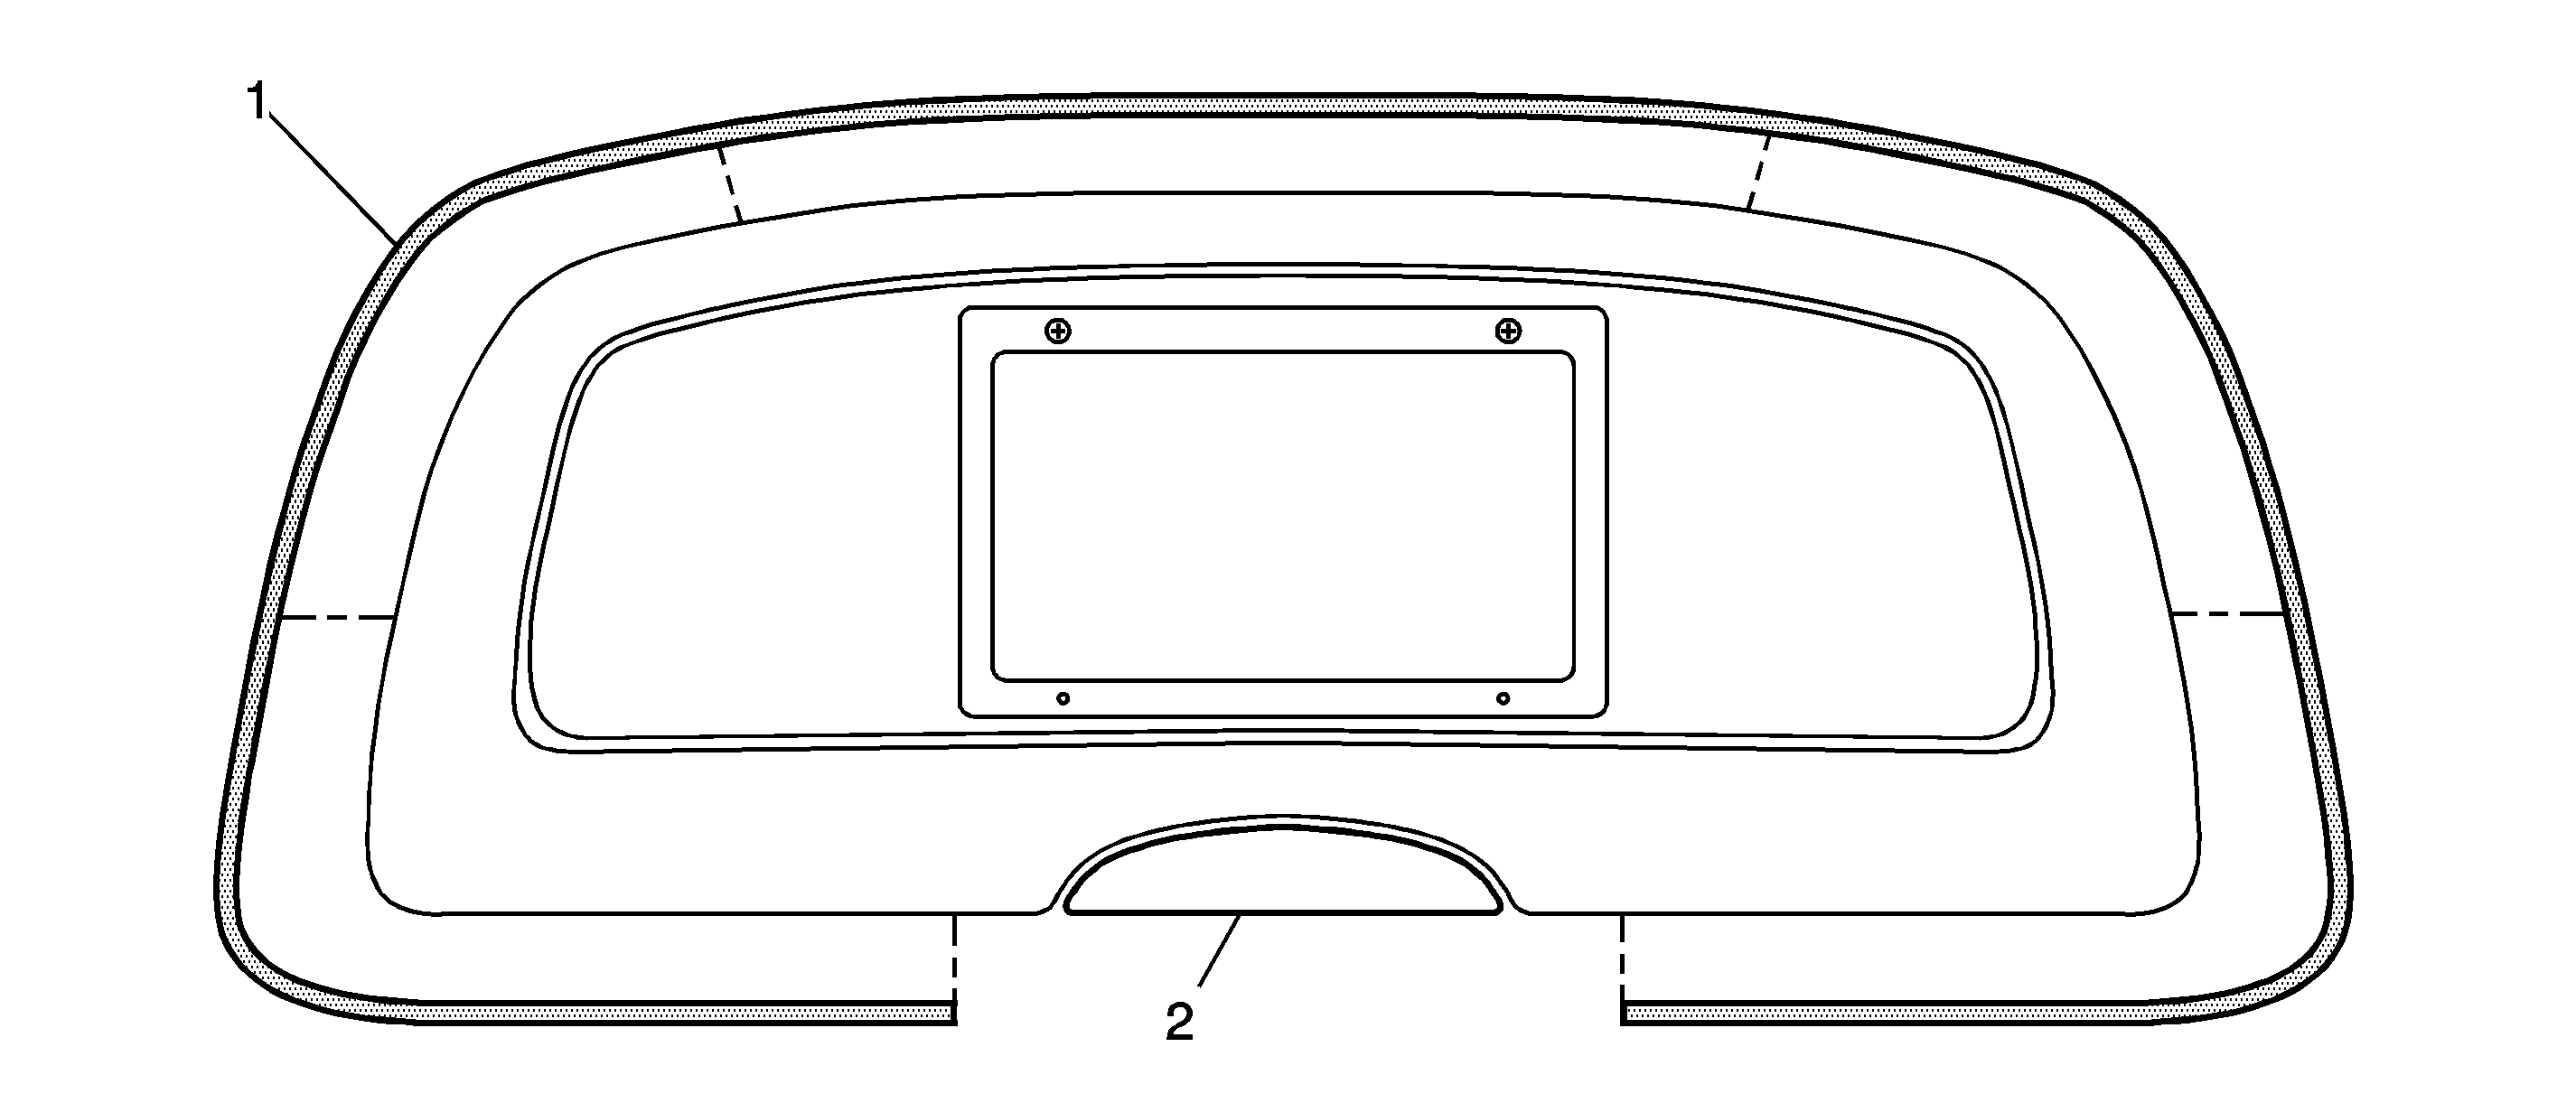
- Install a new license plate pocket perimeter gasket onto the backside edge of the pocket housing as shown above, starting at the middle of the seal at the top center of the pocket. This will ensure that the seal will be even. When properly installed, there will be 25-50 mm (1-2 in) on either side of the liftgate release handle (2) that the seal (1) does not reach. DO NOT attempt to install the seal on the liftgate directly below the release handle.
- Install the license plate pocket assembly onto the liftgate. Refer to the License Plate Pocket Replacement procedure in the Body Rear End sub-section of SI. Modify the tightening sequence for the screws that retain the pocket assembly to the liftgate as follows:
| • | Push the entire rear license plate pocket assembly upward in the opening of the liftgate. Inspect the perimeter gasket to see if it is properly retained. |
Tighten
Tighten the rear license plate pocket assembly retaining
nuts to 5 N·m (44 lb in) in the following order.
| • | Tighten the upper left retaining nut first. |
| • | Tighten the upper right retaining nut second. |
| • | Tighten the three lower retaining nuts in any order. |
Parts Information
Part Number | Description | Qty |
|---|---|---|
15170981 | *Seal, Liftgate O/S Pull Handle (All Except Rainier) | 1 |
89045647 | *Seal, Liftgate O/S Pull Handle (2004-2005 Rainier Only) | 1 |
19120838 | *Seal, Liftgate O/S Pull Handle (2006-2007 Rainier Only) | 1 |
19121203 | *Seal, Liftgate O/S Pull Handle (Saab Only) | 1 |
*These parts are commonly referred to as the License Plate Pocket Perimeter Gasket.
Warranty Information (excluding Saab U.S. Models)
For vehicles repaired under warranty, use:
Labor Operation | Description | Labor Time |
|---|---|---|
B8990 | Molding And/Or Pocket, License Plate-R&R Or Replace | Use Published Labor Operation Time |
Warranty Information (Saab U.S. Models)
For vehicles repaired under warranty, use:
Labor Operation | Description | Failed Object | Fault/Reason Code | Location Code | Warranty Type | Repair/Action Code | Labor Time |
|---|---|---|---|---|---|---|---|
8618102 | Molding And/Or Pocket, License Plate-R&R Or Replace | 86181 | 78 | 0 | 01 | 01 | Use Published Labor Operation Time |
