REAR ROOF PIN ALIGNMENT AND LOCK LATCH CABLE ADJUSTMENTS

MODELS AFFECTED: 1990 REATTA CONVERTIBLE
Some Reatta convertibles may experience a condition of the top stack rear roof pins popping loose from the stowage panel. To repair this condition perform the following adjustments:
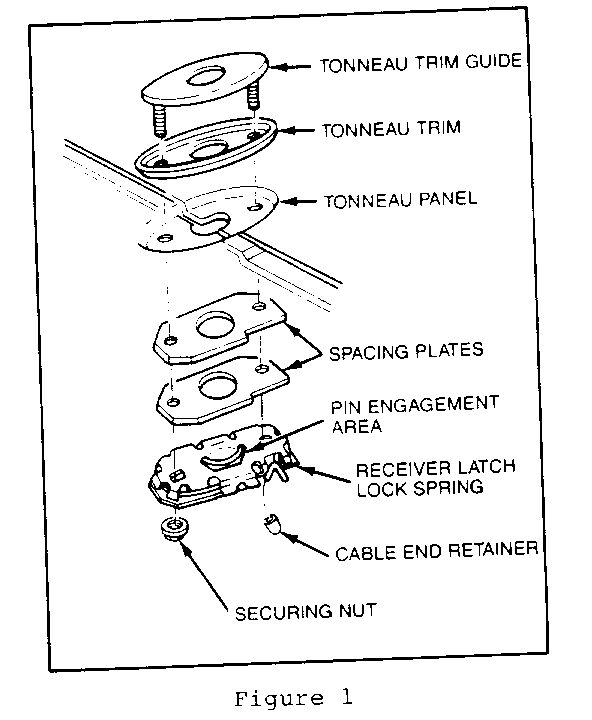
Open the driver door, open the stowage compartment door behind driver seat, operate the rear roof pin release handle by pulling forward and up until pins release. If the rear roof pins do not release, the stowage panel pin latches can be accessed through the rear compartment by pulling forward on the latch spring, each side must be operated separately. Refer to Figure 1.
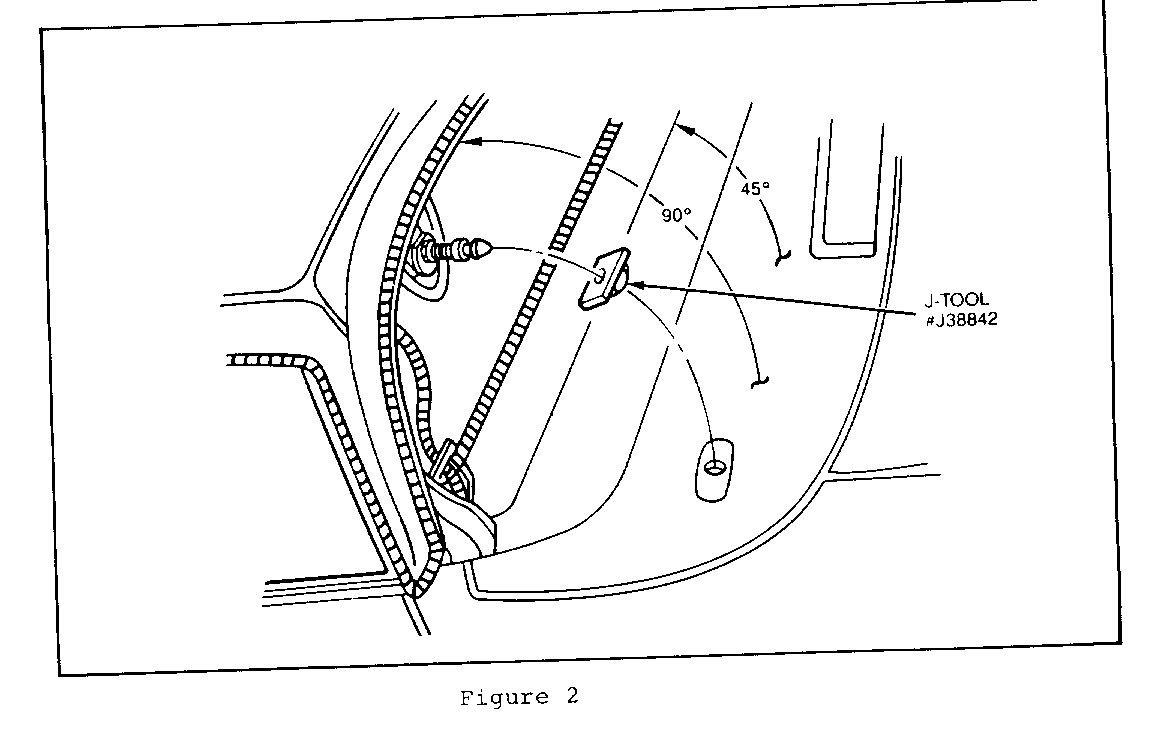
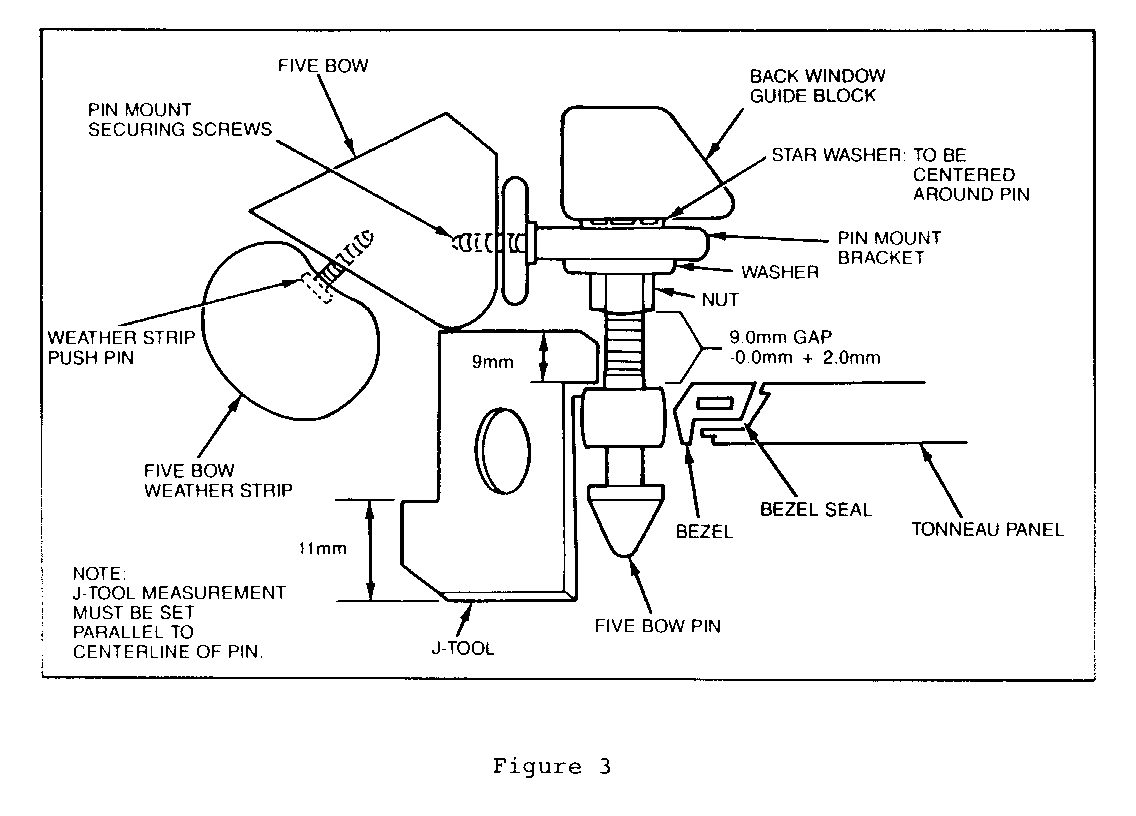
Raise the five bow 90 DEG (vertical) from the closed position. Refer to Figure 2. Disengage Velcro from five bow that attaches the carpet valance. Loosen the two pin mount securing screws on both brackets, right and left. Refer to Figure 3. Check to ensure stowage panel is in the full closed position with both latches engaged. Insert the two alignment tools in the stowage bezel, tool number J-38842. Refer to Figure 2.
Set the five bow down to the 45 DEG detent position. From the inside of the passenger compartment, operate the five bow red detent release lever and lower the five bow allowing the rear roof pins to engage into the aligning tools. The bevel end of the pins must be placed firmly in the latch aligning tools. It may be necessary to loosen the locking nut on the rear roof pins to allow for fore/aft and side-to-side adjustment (ensure the lock nut is retaining the rear roof pins and allows movement; refer to Figure 3). From inside the passenger compartment, hold the rear roof pins firmly in place in the latch aligning tool. Tighten the two mount securing screws snug to the pin lock nut washer assembly. Perform this operation on both pin mounts R/L. Refer to Figure 3.
Raise the five bow to the full 90 DEG vertical position and measure the pin length to the five bow. Refer to Figure 3. Collar of pin to bottom of five bow must be set at 9.0mm + 2.0mm/-0.0mm. Use tool J-38842 for pin length setting and verification. Tighten lock nut and washer assembly then recheck the five bow pin assembly for alignment and pin length. Measurement must be parallel to the center line of the pin. Refer to Figure 3. Remove the two latch alignment tools. Reinstall valance carpet to five bow. Operate the five bow red detent release lever and lower the five bow to the stowage bezel. Check to ensure proper alignment during the slow engagement process. With correct pin alignment ensured, raise the five bow 90 DEG (vertical) from the closed position.
Turn the ignition key on, operate the electric stowage panel release switch. Raise the stowage panel cover to the full open position and ensure stowage panel hinge is locked into the hold open clip.
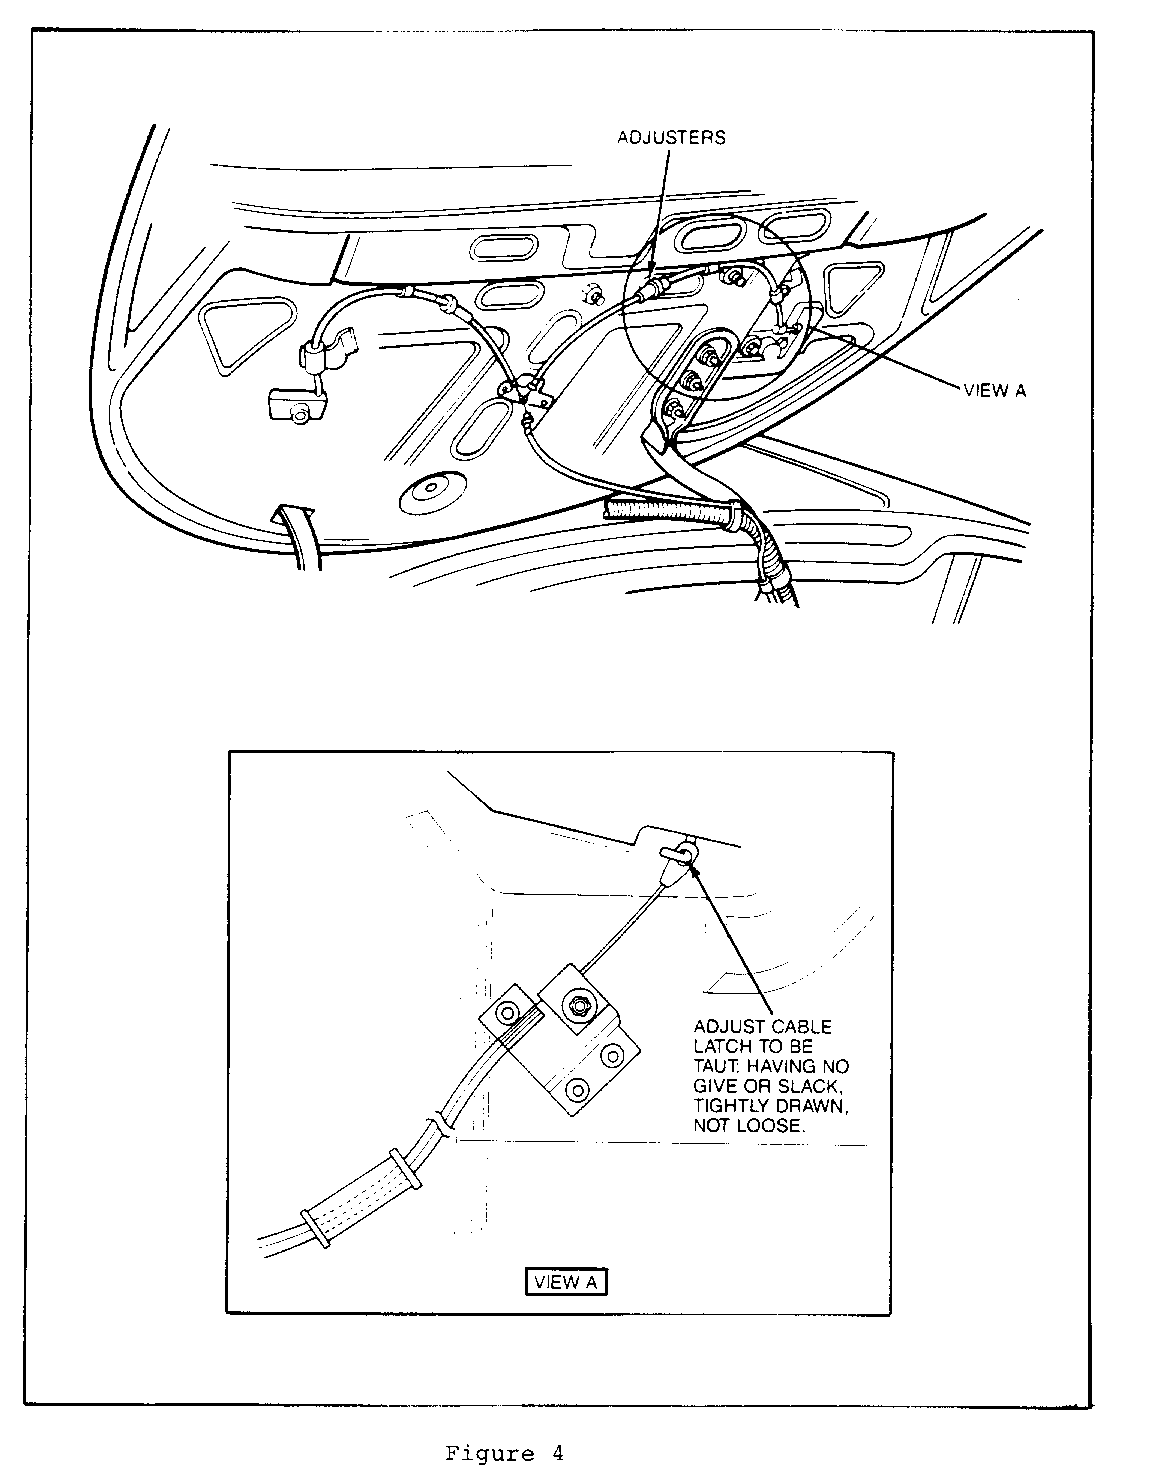
Readjust the latch cables to latches by turning the cable adjuster counterclockwise. This will loosen the cable attachment at the latch. Turn the cable adjuster clockwise until the cable hook up at the latch is just taut. Refer to Figure 4, view A. Fine tuning of the adjuster may be required in order to achieve simultaneous releasing of the rear roof pins. However, the latch spring lock should not be over-adjusted (too tight). This will cause insufficient engagement of the latch spring to the rear roof pin retaining groove. Refer to Figure 1.
Ensure the five bow is raised 90 DEG to vertical open position. Slam the stowage panel closed and ensure stowage panel is latched. Move the five bow to the 45 DEG detent position, operate the five bow red detent release lever, and slam the five bow to the full closed position. To ensure the pin popping condition is eliminated, pull upward on the five bow.
Essential tool J-38842 will be shipped to all Buick dealers from Kent-Moore by July 2, 1990.
WARRANTY INFORMATION:
Labor Operation T6442 Labor Time: .6 hour.


General Motors bulletins are intended for use by professional technicians, not a "do-it-yourselfer". They are written to inform those technicians of conditions that may occur on some vehicles, or to provide information that could assist in the proper service of a vehicle. Properly trained technicians have the equipment, tools, safety instructions and know-how to do a job properly and safely. If a condition is described, do not assume that the bulletin applies to your vehicle, or that your vehicle will have that condition. See a General Motors dealer servicing your brand of General Motors vehicle for information on whether your vehicle may benefit from the information.
