CRACKED AND/OR DAMAGED A/C CONTROL BUTTONS-NEW PART

MODELS AFFECTED: 1988-89 REGALS WITH C67 AIR CONDITIONING
Some of the above vehicles, built prior to the following breakpoints, may exhibit the subject condition to the A/C control buttons. This condition may now be addressed by a replacement button service kit and the following procedure, instead of replacing the complete control assembly. The VIN breakpoint for vehicles with new design A/C control buttons is as follows:
Option VIN
C67 A/C w/C49 K1463835 C67 A/C w/o C49 K1463879
The service kit part number is 16141719.
Parts are currently available from GMSPO.
Service Procedure:
1. Remove the A/C control from the car.
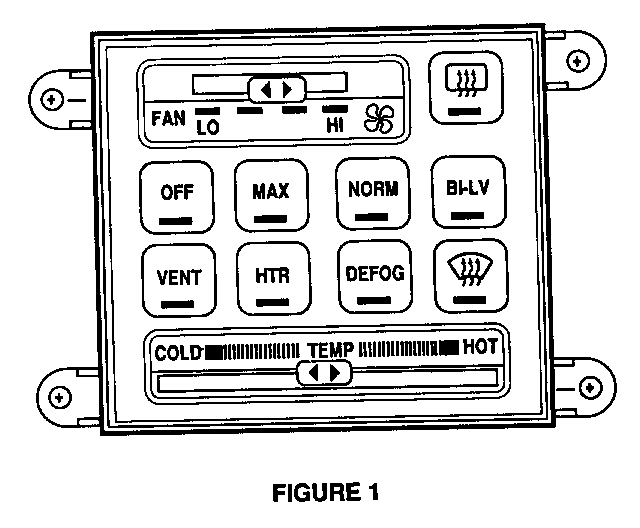
IMPORTANT: Before you disassemble the control, observe the orientation of the fan and temp buttons. The fan buttons overlaps the bottom of the slot and the temp button overlaps the top of the slot.
2. Move the Fan lever to one of the mid positions and the Temp lever to the full COLD position.
3. Being careful not to scratch the face plate of the control, pry off the Fan and Temp buttons from the shafts.
NOTICE: Do not apply any up or down side forces to the shaft of the temp lever as damage may occur to the rheostat.
4. Using a long Phillips screwdriver, remove the four screws at the back of the keyboard housing.
5. With the top of the control in the palm of your hand, carefully remove the plastic face plate housing while at the same time holding the green circuit board against the keyboard housing with your thumb and index finger.
6. Still holding the control and circuit board, remove the buttons from the keyboard by pulling straight up.
7. Install the new buttons in the proper position (See Figure 1).
8. Put the housings together carefully and install the four Phillips screws.
9. Check the proper operation of the buttons.
IMPORTANT: The rear Defog button does not latch.
10. Apply a small amount of clear nail polish into the cavity of the Fan and Temp buttons. Wait a few moments for the polish to soften the plastic.
11. Remembering the orientation of the Fan and Temp buttons, press the buttons onto the shafts with just enough force to seat the buttons. Make sure not to apply pressure in the up or down direction. If any of the polish gets on the face plate wipe immediately with a soft cloth or tissue.
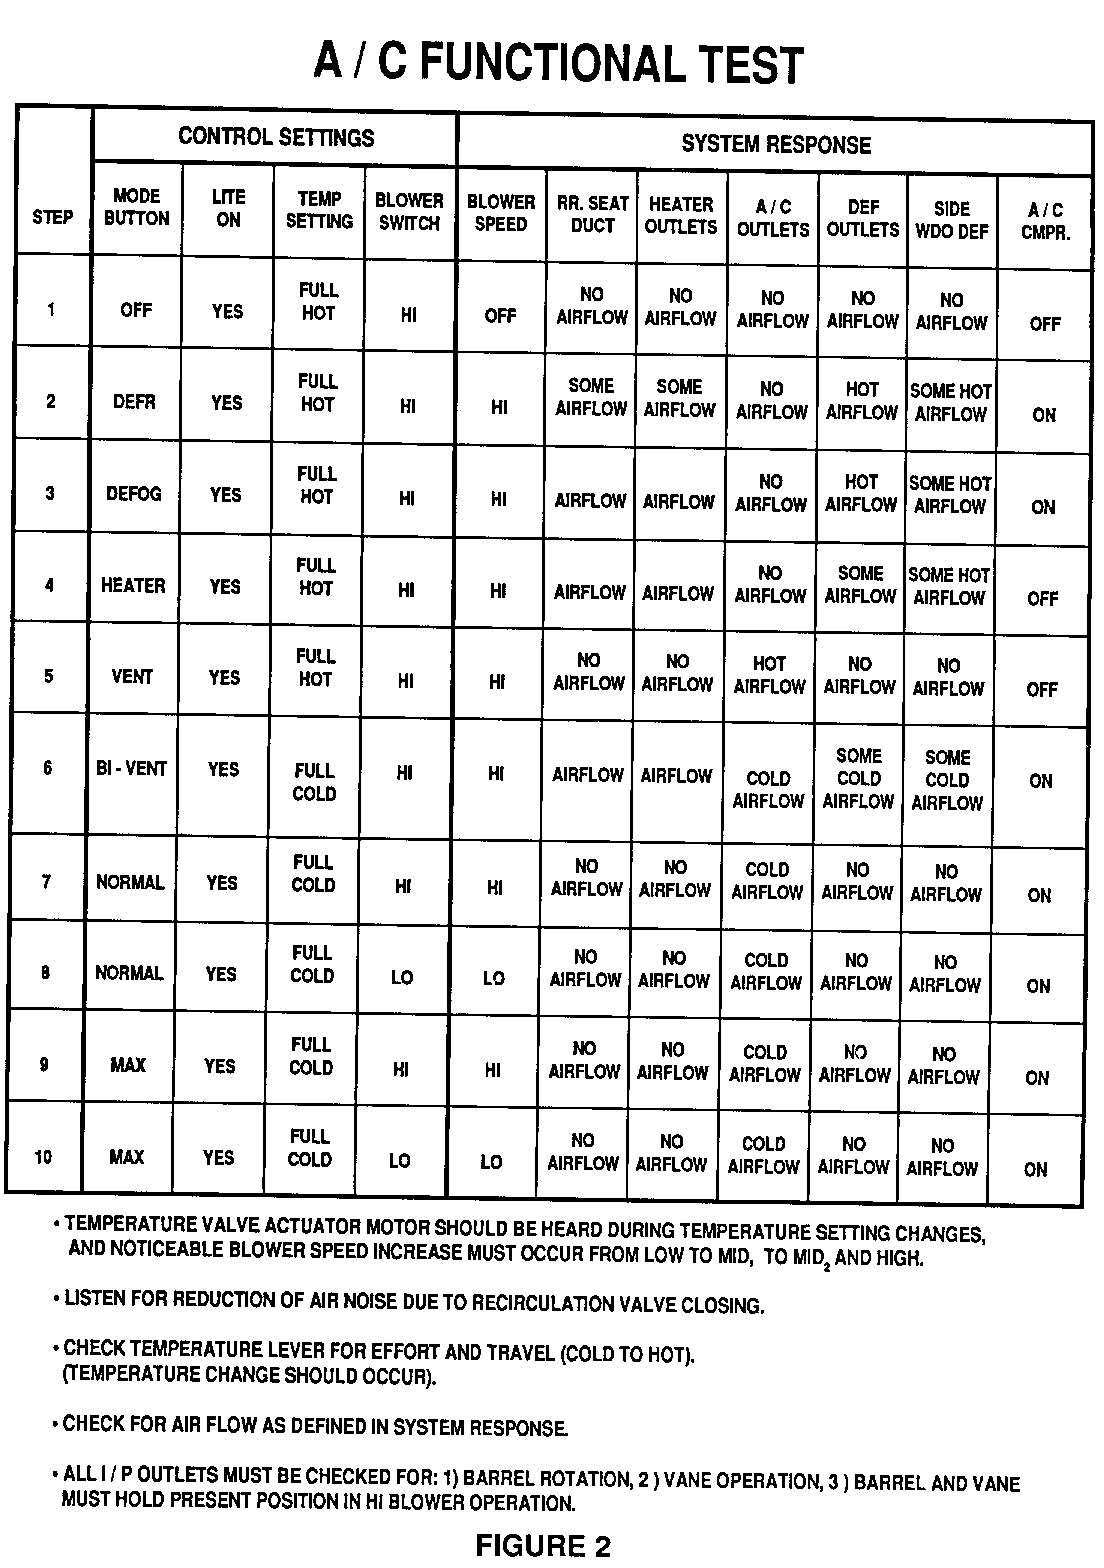
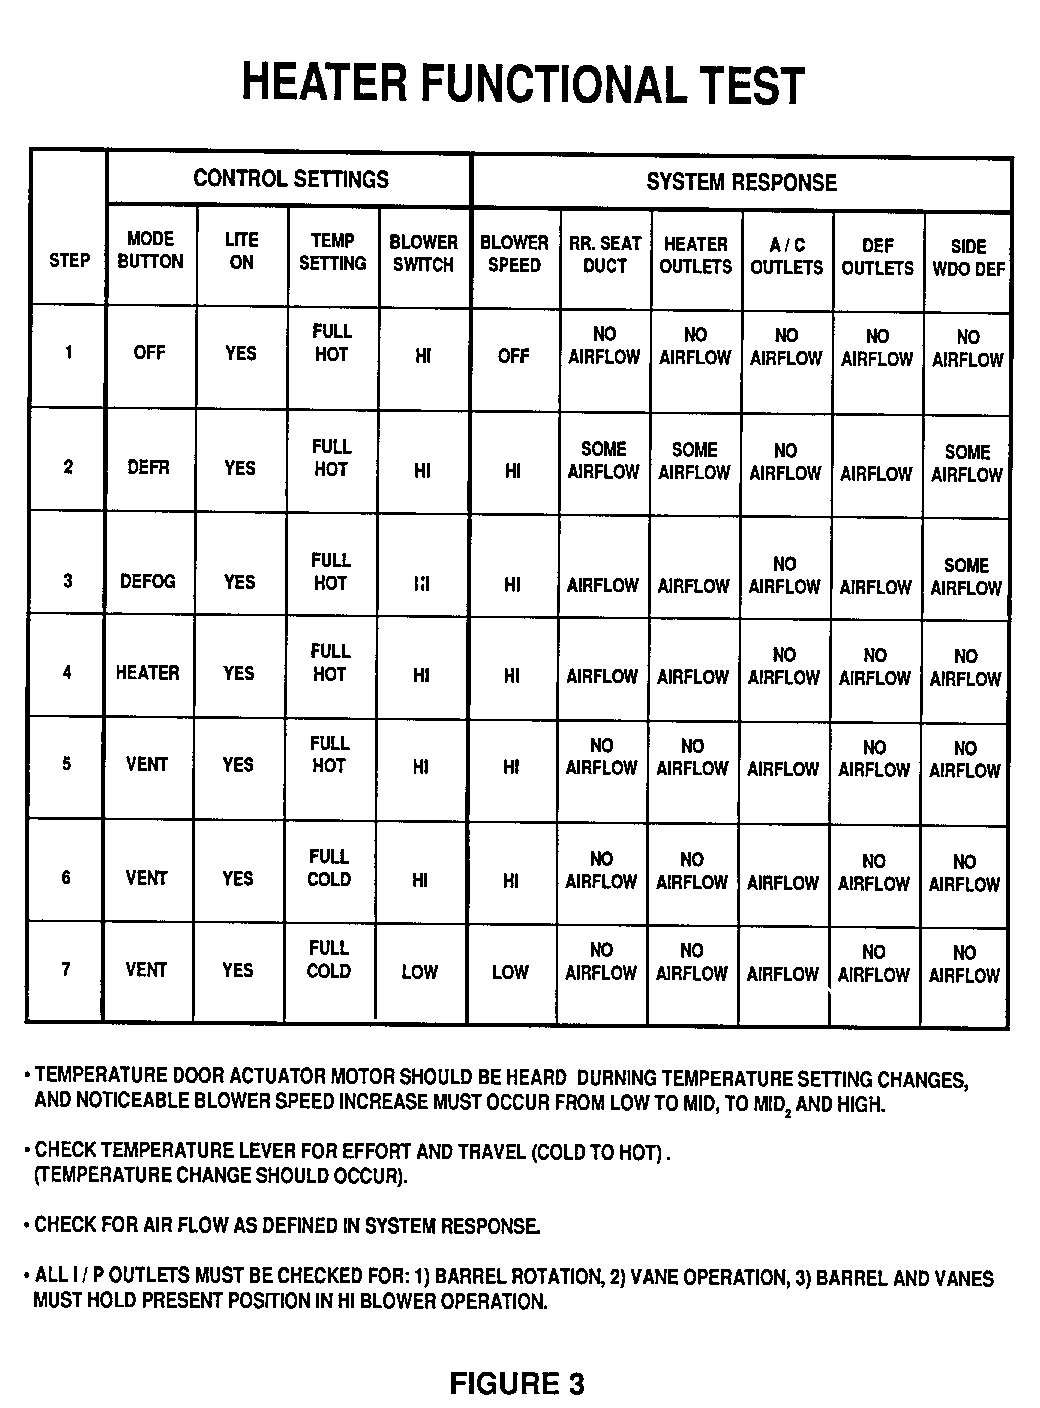
12. Install the control in the car and verify the proper operation of the control by using the Heater and A/C functional test procedures shown in Figures, 2 and 3.
WARRANTY INFORMATION
Labor Operation Number: T1452 Labor Time: 0.7 Hours Trouble Code: 92


General Motors bulletins are intended for use by professional technicians, not a "do-it-yourselfer". They are written to inform those technicians of conditions that may occur on some vehicles, or to provide information that could assist in the proper service of a vehicle. Properly trained technicians have the equipment, tools, safety instructions and know-how to do a job properly and safely. If a condition is described, do not assume that the bulletin applies to your vehicle, or that your vehicle will have that condition. See a General Motors dealer servicing your brand of General Motors vehicle for information on whether your vehicle may benefit from the information.
