BROKEN GLOVE BOX DOOR LATCH HANDLE

BROKEN GLOVE BOX DOOR LATCH HANDLE (NEW LATCH ASSEMBLY AVAILABLE)
MODELS AFFECTED: 1988 REGAL ---------------- NOTICE: The bulletin revision changes the service procedure and illustrations. The revision replaces 88-10-29 which should be discarded.
CONDITION
Broken glove box door latch handle.
CAUSE
Some glove box door latch handles were produced with internal voids which weakened the handle.
CORRECTION
Replace the glove box door latch assembly with a new assembly available in the following colors from GMSPO:
INTERIOR TRIM COLOR PART NUMBER ------------------- ----------- Red 17986908 Gray 17988038 Blue 17986905 Tan 17986906
The following procedure should be used when replacing the latch assembly:
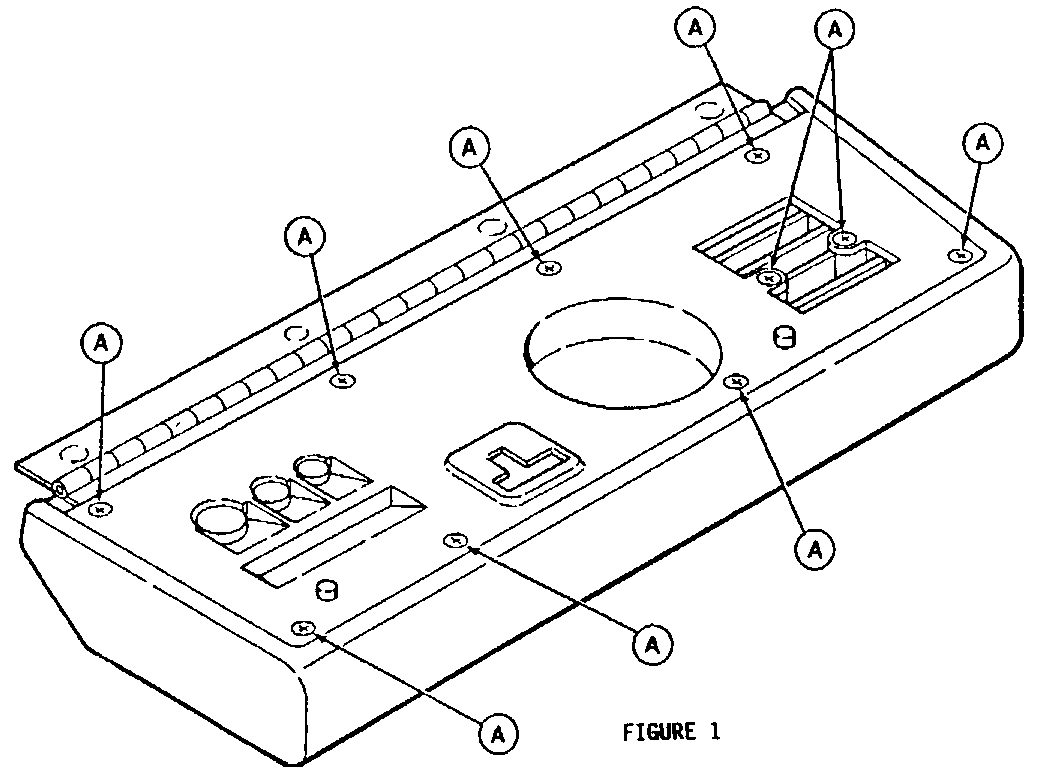
1. Remove (10) screws marked "A" to remove inner glove box door (Figure 1).
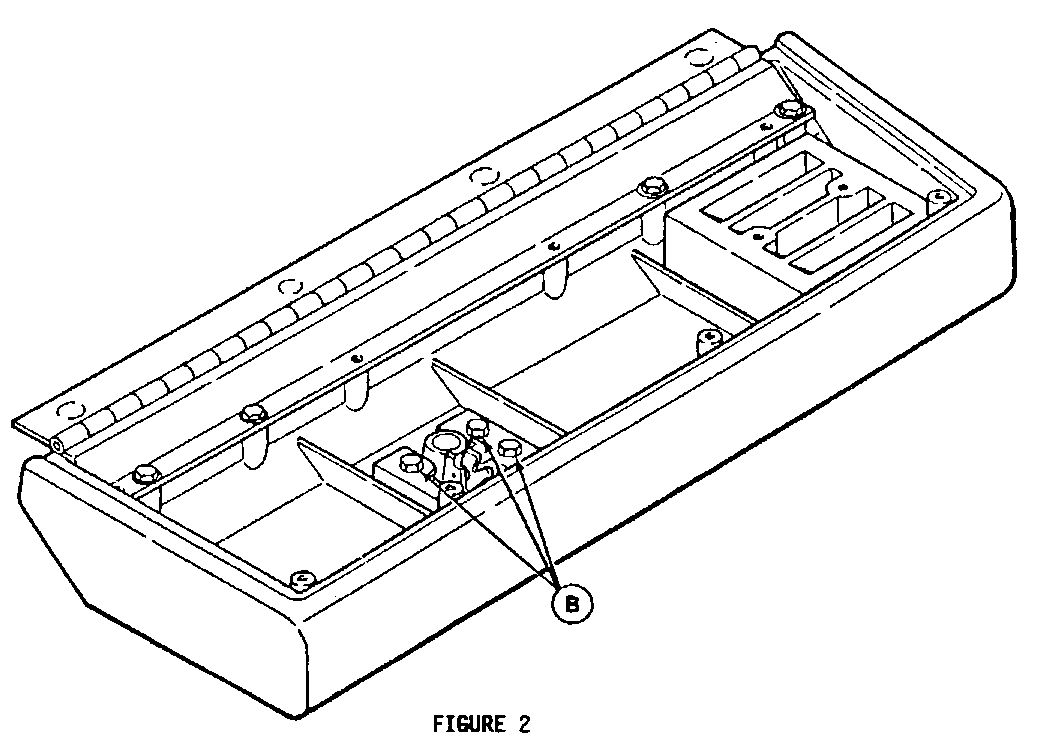
2. Remove (3) screws marked "B" to remove latch assembly (Figure 2).
3. Removal of Cylinder Latch Assembly:
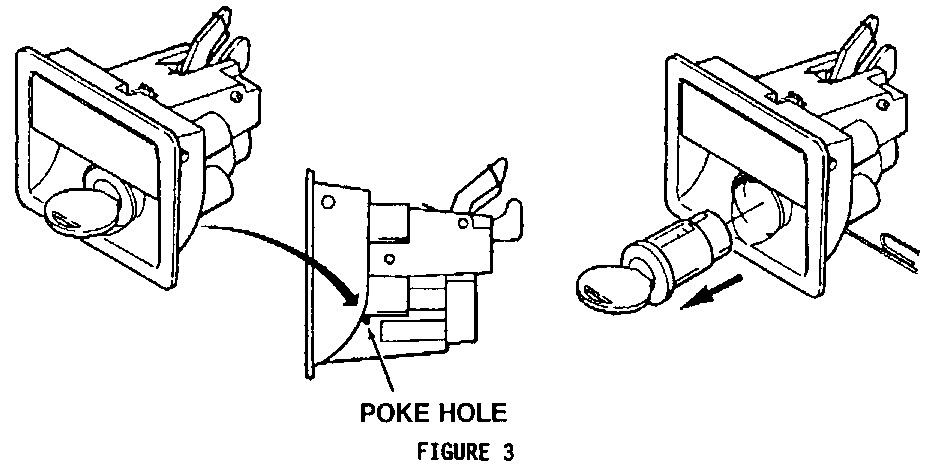
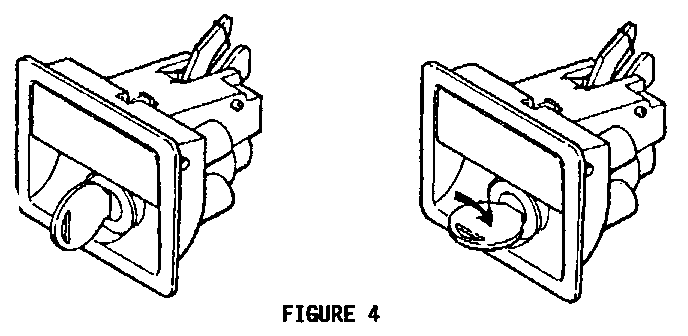
a. Take key and place in lock. b. Turn key in clockwise direction until key is horizontal. c. Remove key (Figure 3). d. On back side of housing is a little "poke" hole (Figure 3). Straighten out a paper clip (or use a similar size and shaped device) and place end in hole. Push in until paper clip won't go in any further. e. While maintaining pressure on paper clip in poke hole, reinsert key. Turn key clockwise while removing paper clip. Continue turning key until it is vertical. Rearward pull will now remove cylinder from housing (Figure 4).
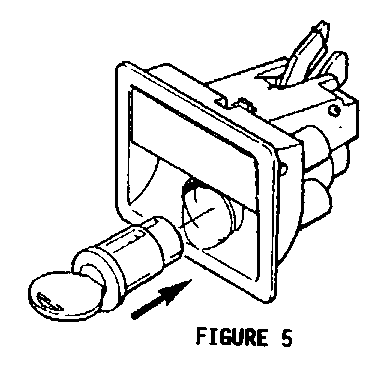
4. Insertion of New Cylinder Into Latch Assembly: a. Hold a new cylinder in hand, being sure that you are pressing down on all tumblers. b. Still holding tumblers down, insert key. c. You may now let go of the tumblers. d. Insert cylinder with key in it into latch assembly, making sure that the bitted side of key faces upward (tumbler openings will be on top). (Figure 5). e. Once cylinder is inside of latch assembly, rotate 180 degrees counterclockwise. f. Pull key out. (Hold cylinder in place with thumb before pulling key out.)
5. Reassembly of Latch Assembly and Inner Glove Box Door: a. See procedure outlined in Steps 1 & 2.
WARRANTY INFORMATION
Labor Operation Number: T5178 Labor Time: 0.5 Hours Trouble Code: 92
General Motors bulletins are intended for use by professional technicians, not a "do-it-yourselfer". They are written to inform those technicians of conditions that may occur on some vehicles, or to provide information that could assist in the proper service of a vehicle. Properly trained technicians have the equipment, tools, safety instructions and know-how to do a job properly and safely. If a condition is described, do not assume that the bulletin applies to your vehicle, or that your vehicle will have that condition. See a General Motors dealer servicing your brand of General Motors vehicle for information on whether your vehicle may benefit from the information.
