Water Pump Replacement 3.1L
Removal Procedure
- Partially drain the coolant. Refer to Cooling System Draining and Filling .
- Remove the coolant recovery reservoir. Refer to Coolant Recovery Reservoir Replacement .
- Remove the accessory drive belt guard, the bolts, and the nuts. Refer to Drive Belt Replacement in Engine Mechanical.
- Loosen the coolant pump pulley bolts.
- Remove the accessory drive belt. Refer to Drive Belt Replacement in Engine Mechanical.
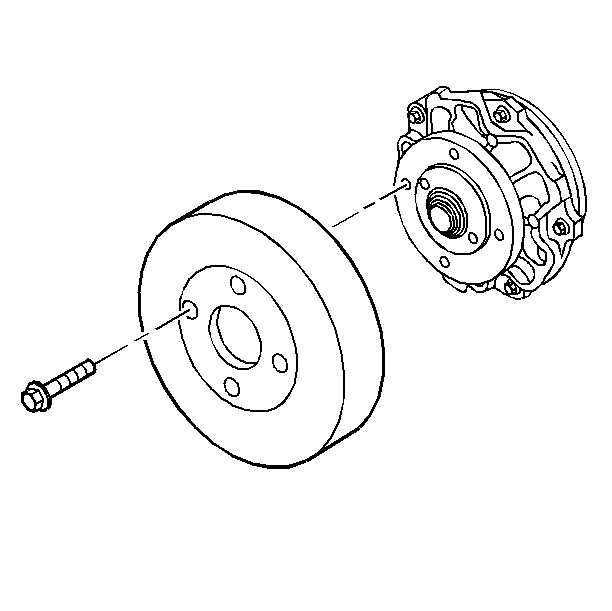
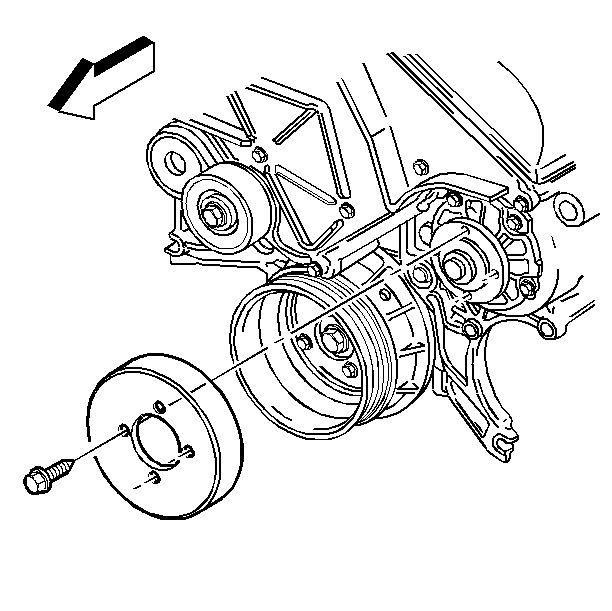
- Remove the coolant pump pulley attaching bolts and the pulley.
- Remove the coolant pump attaching bolts.
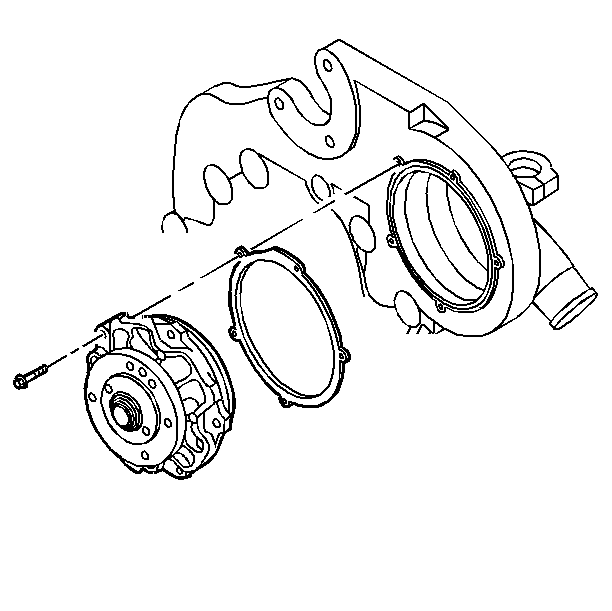
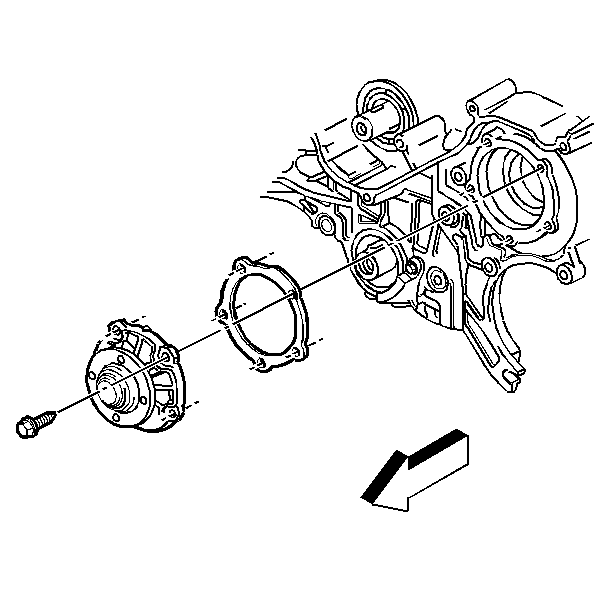
- Remove the coolant pump and the gasket.
- Clean the coolant pump mating surfaces.
Notice: When adding coolant, use DEX-COOL® coolant. If silicated coolant is added to the system, premature engine, heater core or radiator corrosion may result. In addition, the engine coolant will require change sooner-at 50 000 km (30,000 mi) or 24 months.
Installation Procedure
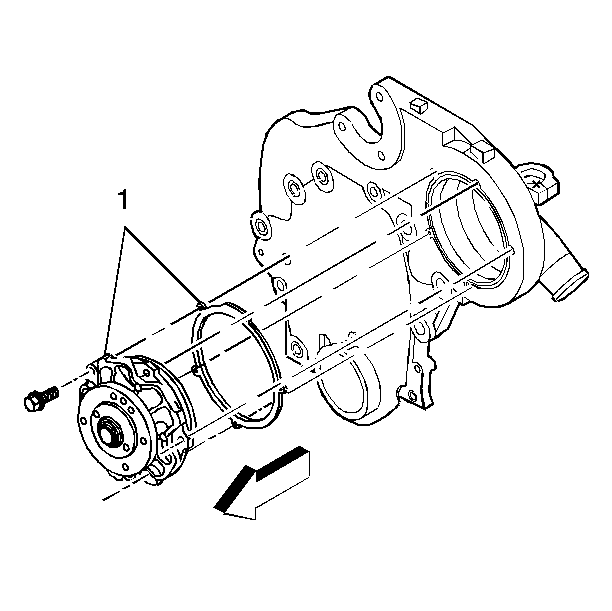
- Install the gasket and the coolant pump. The locator (1) on the coolant pump must be in the vertical position.
- Install the coolant pump attaching bolts.
- Install the coolant pump pulley. Loosely install the pulley attaching bolts.
- Install the accessory drive belt. Refer to Drive Belt Replacement in Engine Mechanical.
- Tighten the coolant pump pulley bolts to specification.
- Install the accessory drive belt guard, the bolts, and the nuts. Refer to Drive Belt Replacement in Engine Mechanical.
- Install the coolant recovery reservoir. Refer to Coolant Recovery Reservoir Replacement .
- Refill the coolant. Refer to Cooling System Draining and Filling .
- Start the engine. After the engine reaches normal operating temperature, check for coolant leaks.
Tighten
Tighten the bolts to 10 N·m (89 lb in).
Notice: Use the correct fastener in the correct location. Replacement fasteners must be the correct part number for that application. Fasteners requiring replacement or fasteners requiring the use of thread locking compound or sealant are identified in the service procedure. Do not use paints, lubricants, or corrosion inhibitors on fasteners or fastener joint surfaces unless specified. These coatings affect fastener torque and joint clamping force and may damage the fastener. Use the correct tightening sequence and specifications when installing fasteners in order to avoid damage to parts and systems.
Tighten
Tighten the bolts to 25 N·m (18 lb ft).
Important: Use the air bleed vents in order to properly fill a completely drained system.
Water Pump Replacement 3.4L
Removal Procedure
- Remove the air cleaner and duct assembly.
- Remove the coolant recovery reservoir. Refer to Coolant Recovery Reservoir Replacement .
- Partially drain the coolant. Refer to Cooling System Draining and Filling .
- Remove the accessory drive belt. Refer to Drive Belt Replacement in Engine Mechanical.
- Remove the bolts of the coolant pump pulley.
- Remove the coolant pump pulley.
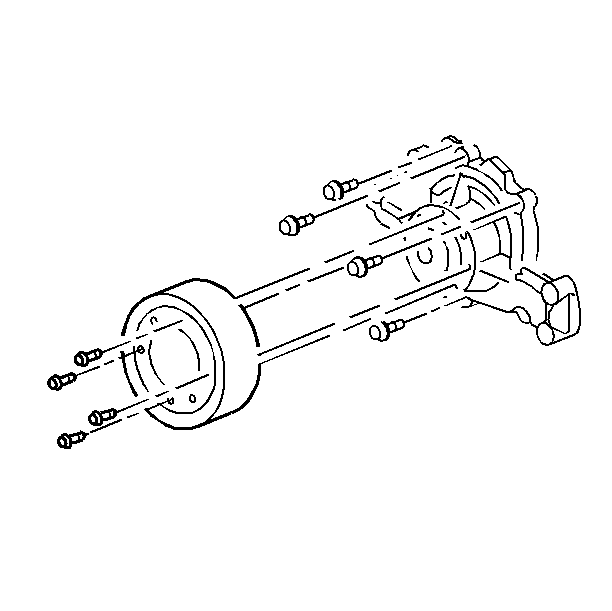
- Remove the bolts from the coolant pump.
- Remove the coolant pump and the gasket.
- Clean the gasket mating surfaces.
Notice: When adding coolant, use DEX-COOL® coolant. If silicated coolant is added to the system, premature engine, heater core or radiator corrosion may result. In addition, the engine coolant will require change sooner-at 50 000 km (30,000 mi) or 24 months.
Installation Procedure
- Install the gasket and the coolant pump.
- Install the bolts to the coolant pump.
- Install the coolant pump pulley. Loosely install the pulley attaching bolts.
- Install the accessory drive belt. Refer to Drive Belt Replacement in Engine Mechanical.
- Tighten the coolant pump pulley bolts to specifications.
- Install the coolant recovery reservoir. Refer to Coolant Recovery Reservoir Replacement .
- Refill the coolant. Refer to Cooling System Draining and Filling .
- Install the air cleaner and duct assembly.
- Start the engine. After the engine reaches normal operating temperature, check for coolant leaks.
Tighten
Tighten the bolts to 10 N·m (89 lb in).
Notice: Use the correct fastener in the correct location. Replacement fasteners must be the correct part number for that application. Fasteners requiring replacement or fasteners requiring the use of thread locking compound or sealant are identified in the service procedure. Do not use paints, lubricants, or corrosion inhibitors on fasteners or fastener joint surfaces unless specified. These coatings affect fastener torque and joint clamping force and may damage the fastener. Use the correct tightening sequence and specifications when installing fasteners in order to avoid damage to parts and systems.
Tighten
Tighten the bolts to 25 N·m (18 lb ft).
Water Pump Replacement 3.8L
Removal Procedure
- Drain the engine coolant. Refer to Cooling System Draining and Filling .
- Remove the coolant recovery reservoir. Refer to Coolant Recovery Reservoir Replacement .
- Remove the accessory drive belt. Refer to Drive Belt Replacement in Engine Mechanical.
- Remove the power steering pump pulley. Refer to Power Steering Pump Pulley Replacement in Power Steering Gear and Pump.
- Remove the coolant pump pulley bolts and the pulley.
- Remove the bolts from the coolant pump.
- Remove the coolant pump and gasket.
- Clean the coolant pump gasket mating surfaces.
Notice: When adding coolant, use DEX-COOL® coolant. If silicated coolant is added to the system, premature engine, heater core or radiator corrosion may result. In addition, the engine coolant will require change sooner-at 50 000 km (30,000 mi) or 24 months.

Installation Procedure
Tools Required
J 36660-A Torque Angle Meter
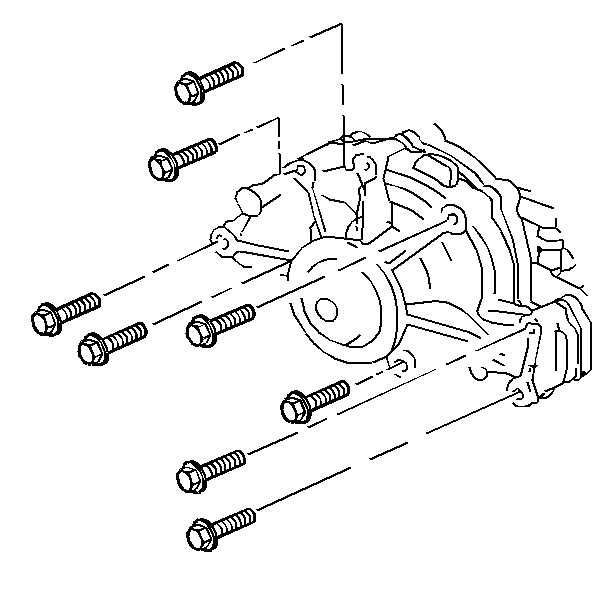
- Install the gasket and the coolant pump.
- Install the bolts to the coolant pump.
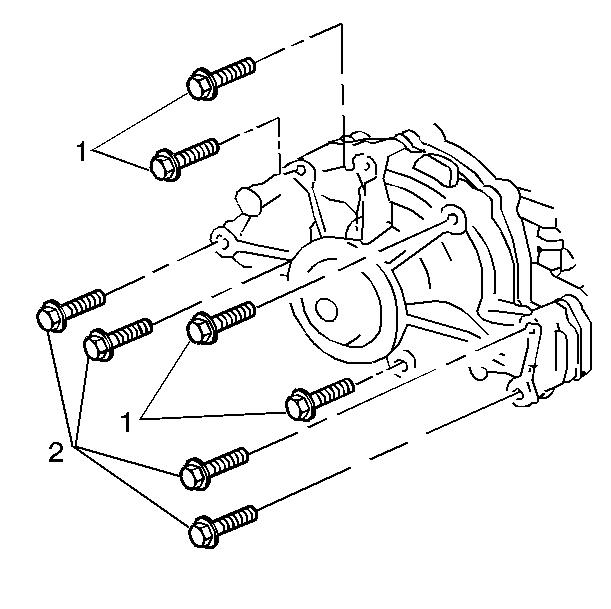
- Tighten the long bolts (2) to 30 N·m (22 lb ft).
- Tighten the short bolts (1) to 15 N·m (11 lb ft) plus 80 degrees using the J 36660-A .
- Install the coolant pump pulley to the coolant pump.
- Install the coolant pump pulley bolts.
- Install the power steering pump pulley. Refer to Power Steering Gear Pump Pulley Replacement in Power Steering Gear and Pump.
- Install the accessory drive belt. Refer to Drive Belt Replacement in Engine Mechanical.
- Install the coolant recovery reservoir. Refer to Coolant Recovery Reservoir Replacement .
- Refill the coolant. Refer to Cooling System Draining and Filling .
- Start the engine. After the engine reaches normal operating temperature, check for coolant leaks.
Tighten
Notice: Use the correct fastener in the correct location. Replacement fasteners must be the correct part number for that application. Fasteners requiring replacement or fasteners requiring the use of thread locking compound or sealant are identified in the service procedure. Do not use paints, lubricants, or corrosion inhibitors on fasteners or fastener joint surfaces unless specified. These coatings affect fastener torque and joint clamping force and may damage the fastener. Use the correct tightening sequence and specifications when installing fasteners in order to avoid damage to parts and systems.
Tighten
Tighten the bolts to 13 N·m (115 lb in).
