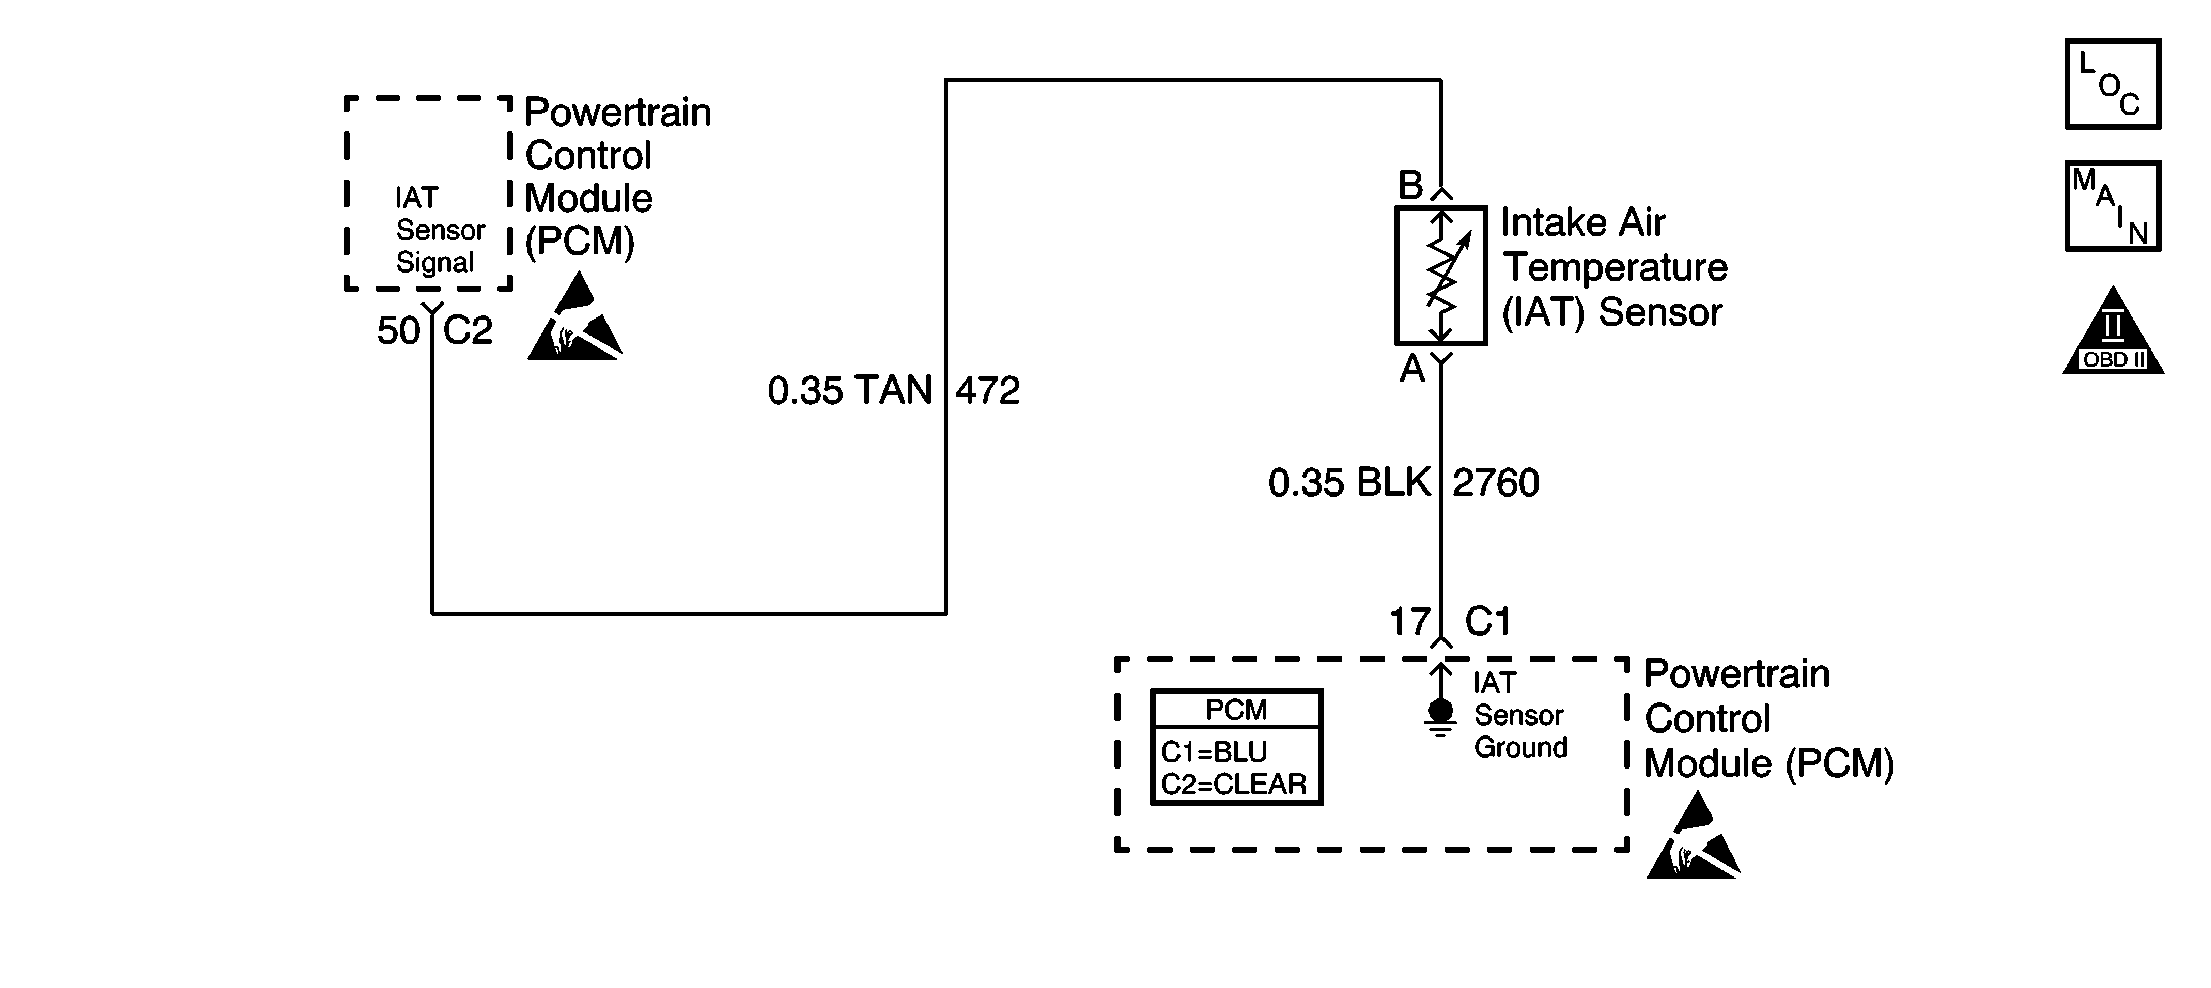
Circuit Description
The intake air temperature (IAT) sensor is a thermistor which measures the temperature of the air entering the engine. The powertrain control module (PCM) applies 5 volts through a pull-up resistor to the IAT sensor. When the intake air is cold, the sensor resistance is high and the PCM will monitor a high signal voltage on the IAT signal circuit. If the intake air is warm, the sensor resistance is lower causing the PCM to monitor a lower voltage. When the PCM detects an excessively high signal voltage on the intake air temperature sensor signal circuit. DTC P0113 will set.
Conditions for Running the DTC
| • | No ECT Sensor, MAF sensor, or VSS DTC present. |
| • | The engine has been running for over 3 minutes. |
| • | Vehicle speed is less than 35 mph. |
| • | Mass air flow is less than 12 g/s. |
| • | Engine coolant temperature is more than 60°C (140°F). |
Conditions for Setting the DTC
| • | IAT signal voltage indicates an intake air temperature less than -34°C (-30°F). |
| • | The above condition is present for at least 20 seconds. |
Action Taken When the DTC Sets
| • | The PCM will illuminate the malfunction indicator lamp (MIL) during the second consecutive trip in which the diagnostic test has been run and failed. |
| • | The PCM will store conditions which were present when the DTC set as Freeze Frame/Failure Records data. |
Conditions for Clearing the MIL/DTC
| • | The PCM will turn OFF the malfunction indicator lamp (MIL) during the third consecutive trip in which the diagnostic has run and passed. |
| • | The history DTC will clear after 40 consecutive warm-up cycles have occurred without a malfunction. |
| • | The DTC can be cleared by using a scan tool. |
Diagnostic Aids
Inspect for a skewed or mis-scaled IAT sensor.
Refer to Temperature Versus Resistance .
Many situations may lead to an intermittent condition. Perform each inspection or test as directed.
Important: : Remove any debris from the connector surfaces before servicing a component. Inspect the connector gaskets when diagnosing or replacing a component. Ensure that the gaskets are installed correctly. The gaskets prevent contaminate intrusion.
| • | Loose terminal connection |
| - | Use a corresponding mating terminal to test for proper tension. Refer to Testing for Intermittent Conditions and Poor Connections , and to Connector Repairs in Wiring Systems for diagnosis and repair. |
| - | Inspect the harness connectors for backed out terminals, improper mating, broken locks, improperly formed or damaged terminals, and faulty terminal to wire connection. Refer to Testing for Intermittent Conditions and Poor Connections , and to Connector Repairs in Wiring Systems for diagnosis and repair. |
| • | Damaged harness--Inspect the wiring harness for damage. If the harness inspection does not reveal a problem, observe the display on the scan tool while moving connectors and wiring harnesses related to the sensor. A change in the scan tool display may indicate the location of the fault. Refer to Wiring Repairs in Wiring Systems for diagnosis and repair. |
| • | Inspect the powertrain control module (PCM) and the engine grounds for clean and secure connections. Refer to Wiring Repairs in Wiring Systems for diagnosis and repair. |
If the condition is determined to be intermittent, reviewing the Snapshot or Freeze Frame/Failure Records may be useful in determining when the DTC or condition was identified.
Test Description
The numbers below refer to the step numbers on the diagnostic table.
-
This step verifies that the fault is present.
-
If DTC P0113 can be repeated only by duplicating the Failure Records conditions, refer to the Temperature vs Resistance table. The table may be used to test the IAT sensor at various temperatures to evaluate the possibility of a shifted sensor that may be open above or below a certain temperature. If this is the case, replace the IAT sensor. Refer to IAT Sensor Replacement. If the IAT sensor appears to be OK, the fault is intermittent, refer to Diagnostic Aids.
-
Use a fused jumper during this test. If the IAT signal circuit is shorted to battery or ignition positive voltage the fuse in the jumper will open, indicating a short in the signal circuit.
-
This vehicle is equipped with a PCM which utilizes an Electrically Erasable Programmable Read Only Memory (EEPROM). When the PCM is being replaced, the new PCM must be programmed.
Step | Action | Values | Yes | No |
|---|---|---|---|---|
1 | Did you perform the Powertrain On Board Diagnostic (OBD) System Check? | -- | ||
Does the parameter measure less than the specified value? | -37°C (-34°F) | |||
Does the DTC reset? | -- | Go to Diagnostic Aids | ||
4 |
Does the parameter measure more than the specified value? | 135°C (275°F) | ||
Does the parameter measure more than the specified value? | 135°C (275°F) | |||
6 |
Did you find and correct the condition? | -- | ||
7 |
Did you find and correct the condition? | -- | ||
8 |
Did you find and correct the condition? | -- | ||
9 |
Did you find and correct the condition? | -- | ||
10 |
Did you find and correct the condition? | -- | ||
11 | Replace the IAT sensor. Refer to Intake Air Temperature Sensor Replacement . Is the action complete? | -- | -- | |
|
Important: : The replacement PCM must be programmed. Replace the PCM. Refer to Powertrain Control Module Replacement/Programming . Is the action complete? | -- | -- | ||
13 |
Does the DTC reset? | -- | System OK |
