Removal Procedure
Caution: Remove the fuel tank cap and relieve the fuel system pressure before servicing the fuel system in order to reduce the risk of personal injury. After you relieve the fuel system pressure, a small amount of fuel may be released when servicing the fuel lines, the fuel injection pump, or the connections. In order to reduce the risk of personal injury, cover the fuel system components with a shop towel before disconnection. This will catch any fuel that may leak out. Place the towel in an approved container when the disconnection is complete.
Notice: Servicing of the supercharger unit itself is limited to replacement only. No attempt should be made to disassemble the supercharger, as parts damage may result.
- Disconnect the battery ground (negative) cable. Refer to Battery Negative Cable Disconnection and Connection in Engine Electrical.
- Remove the fuel injector sight shield. Refer to Fuel Injector Sight Shield Replacement .
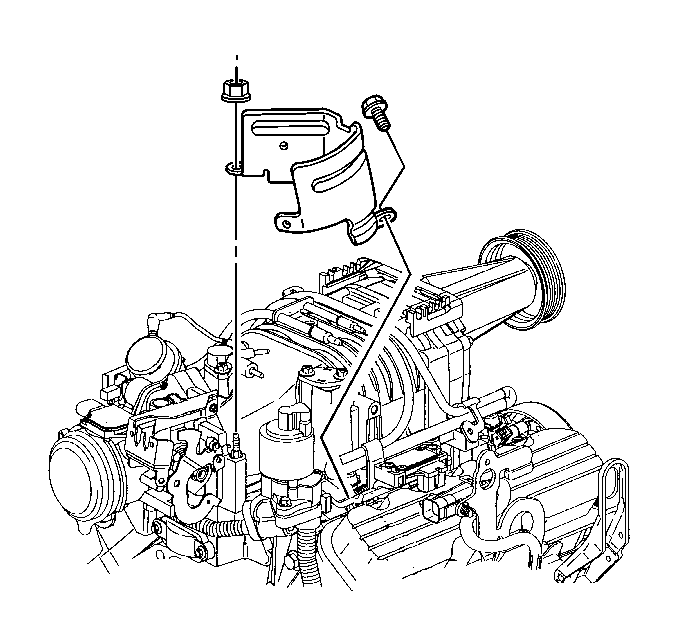
- Remove the exhaust gas recirculation (EGR) valve heat shield.
- Depressurize the fuel system. Refer to Fuel Pressure Relief in Engine Controls - 3.8L.
- Remove the supercharger drive belt. Refer to Fuel Injector Sight Shield Replacement .
- Disconnect the right spark plug wires from the ignition module and set the spark plug wires aside. Refer to Spark Plug Wire Harness Replacement in Engine Electrical.
- Remove the generator brace. Refer to Generator Brace Replacement in Engine Electrical.
- Disconnect the electrical connectors from the fuel injectors. Refer to Fuel Injector Replacement in Engine Controls - 3.8L.
- Remove the MAP sensor bracket. Refer to Manifold Absolute Pressure Sensor Replacement in Engine Controls - 3.8L.
- Disconnect the fuel lines. Refer to Fuel Hose/Pipes Replacement - Filter to Engine in Engine Controls - 3.8L.
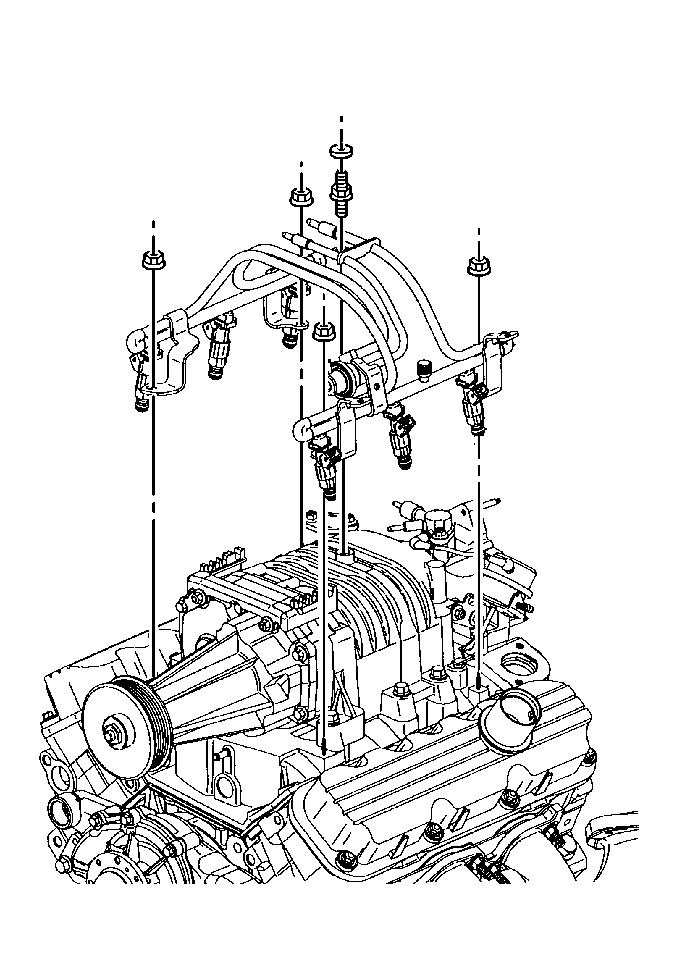
- Remove the fuel rail mounting bolts and the fuel rail with the fuel injectors. Refer to Fuel Injection Fuel Rail Assembly Replacement in Engine Controls - 3.8L.
- Remove the boost control solenoid. Refer to Boost Control Solenoid Replacement in Engine Controls - 3.8L.
- Disconnect any upper vacuum connections, as required.
- Disconnect any electrical connectors, as required.
- Remove the throttle control and the cruise control cables with the bracket. Refer to Accelerator Control Cable Bracket Replacement in Engine Controls - 3.8L.
- Carefully remove the throttle body air inlet duct.
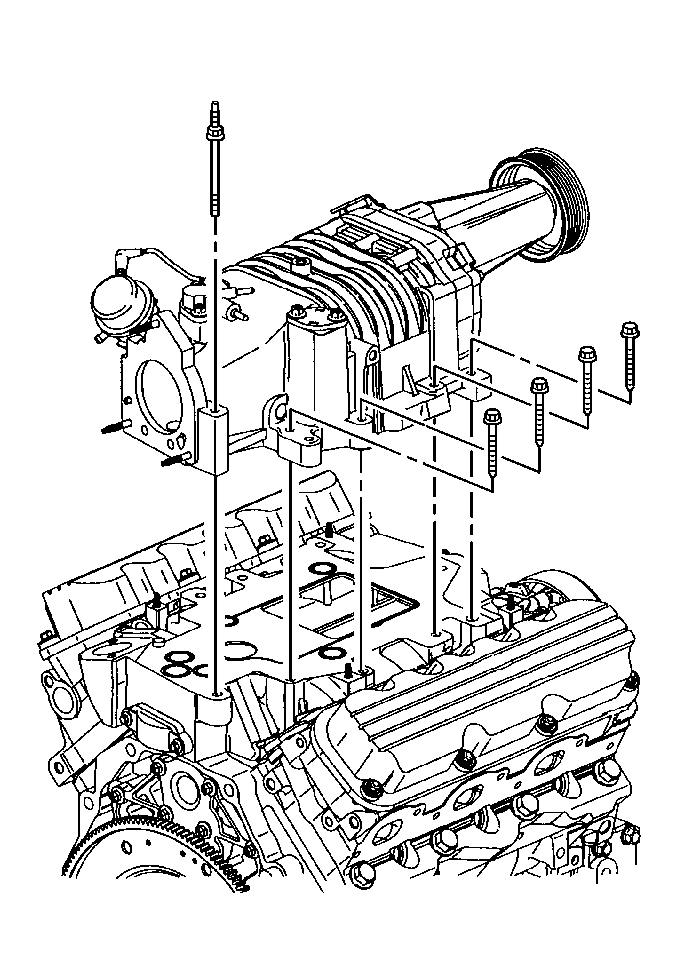
- Remove the supercharger left bolts.
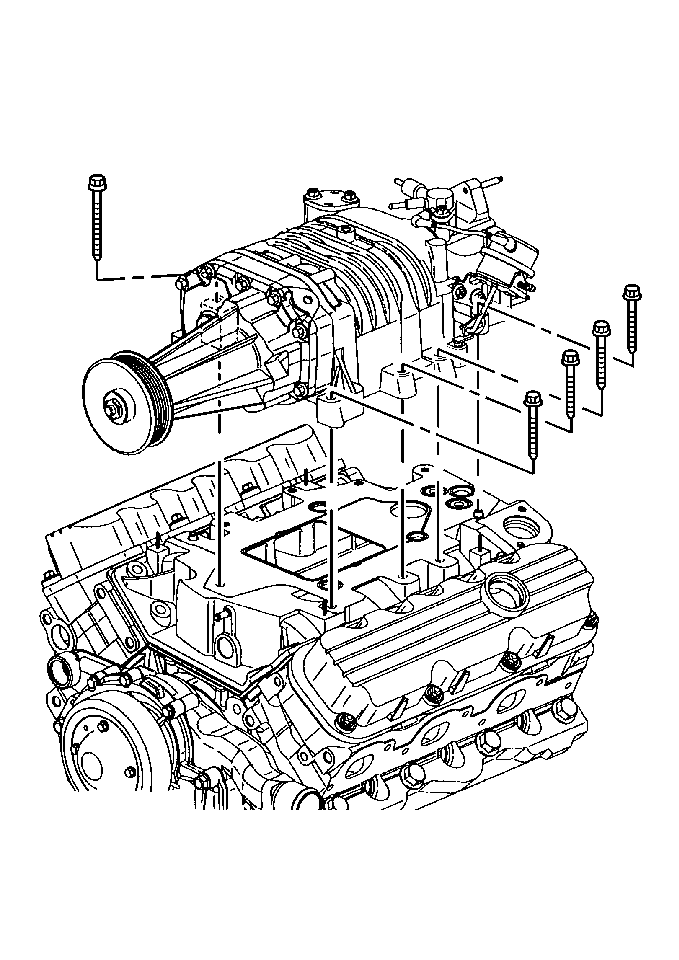
- Remove the supercharger right bolts.
- Remove the supercharger.
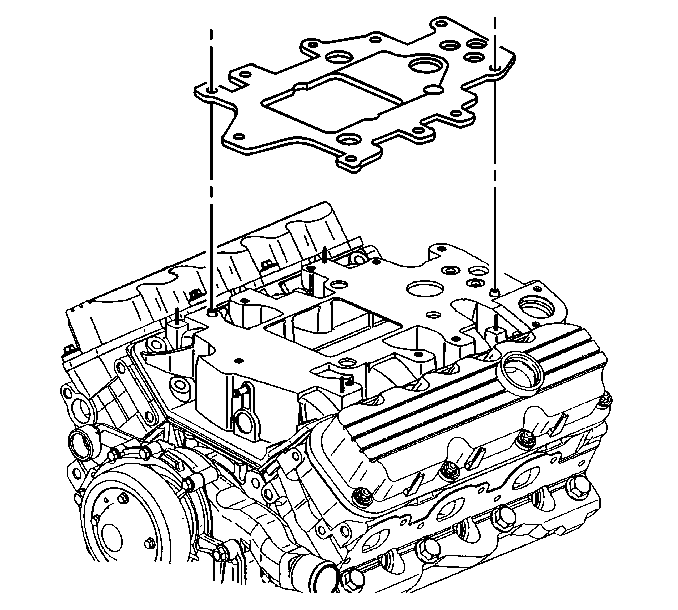
- Remove the supercharger gasket.
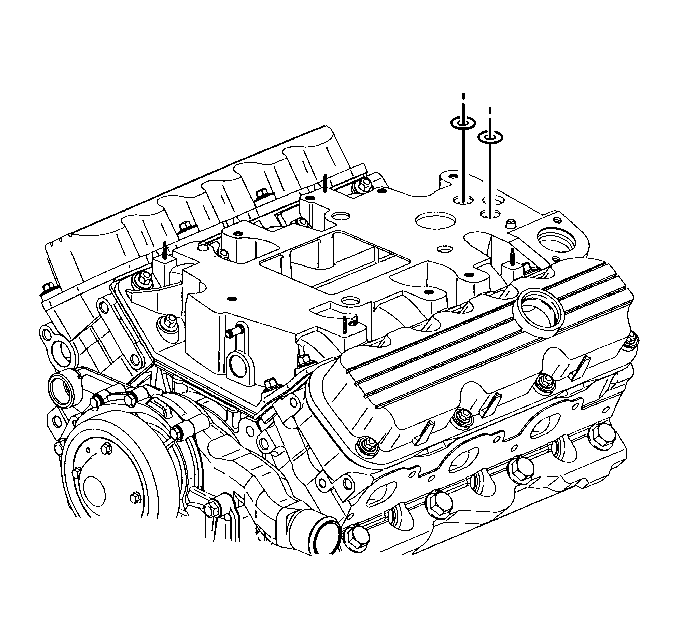
- Remove the supercharger O-ring seals.
- Clean the lower intake manifold-to-supercharger mating surfaces.
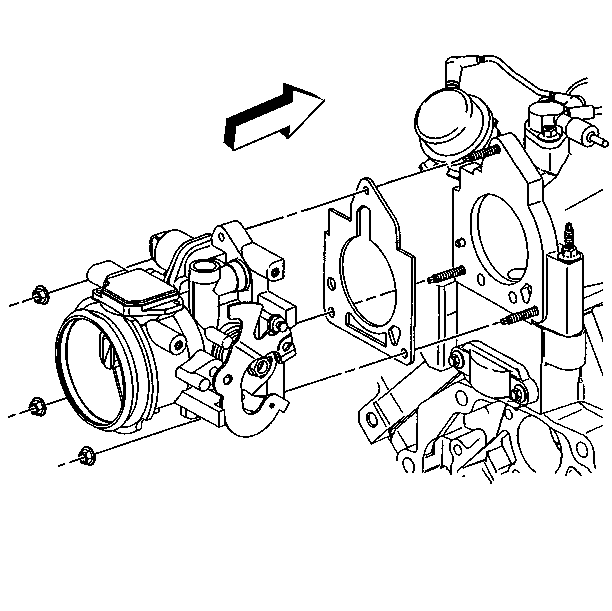
- If replacing the supercharger, remove the throttle body. Refer to Throttle Body Assembly Replacement in Engine Controls - 3.8L.
Installation Procedure
- If removed, install the throttle body to the supercharger. Refer to Throttle Body Assembly Replacement in Engine Controls - 3.8L.
- Install the new supercharger O-ring seals.
- Install the new supercharger gasket.
- Install the supercharger.
- Loosely install the supercharger right bolts.
- Loosely install the supercharger left bolts.
- Install the supercharger bolts.
- Carefully install the throttle body air inlet duct.
- Install the throttle control and the cruise control cables with the bracket. Refer to Accelerator Control Cable Bracket Replacement in Engine Controls - 3.8L.
- Connect any electrical connectors, as required.
- Connect any upper vacuum connections, as required.
- Install the boost control solenoid. Refer to Boost Control Solenoid Replacement in Engine Controls - 3.8L.
- Install the fuel injectors with the fuel rail. Refer to Fuel Injection Fuel Rail Assembly Replacement in Engine Controls - 3.8L.
- Connect the fuel lines. Refer to Fuel Hose/Pipes Replacement - Filter to Engine in Engine Controls - 3.8L.
- Install the MAP sensor bracket. Refer to Manifold Absolute Pressure Sensor Replacement in Engine Controls - 3.8L.
- Connect the electrical connectors to the fuel injectors. Refer to Fuel Injector Replacement in Engine Controls - 3.8L.
- Install the generator brace. Refer to Generator Brace Replacement in Engine Electrical.
- Connect the right spark plug wires to the ignition module. Refer to Spark Plug Wire Harness Replacement in Engine Electrical.
- Install the supercharger drive belt. Refer to Fuel Injector Sight Shield Replacement .
- Install the exhaust gas recirculation (EGR) valve heat shield
- Install the fuel injector sight shield. Refer to Fuel Injector Sight Shield Replacement .
- Connect the battery ground (negative) cable. Refer to Battery Negative Cable Disconnection and Connection in Engine Electrical.


Important: Do not use any sealer on the gasket.


Notice: Use the correct fastener in the correct location. Replacement fasteners must be the correct part number for that application. Fasteners requiring replacement or fasteners requiring the use of thread locking compound or sealant are identified in the service procedure. Do not use paints, lubricants, or corrosion inhibitors on fasteners or fastener joint surfaces unless specified. These coatings affect fastener torque and joint clamping force and may damage the fastener. Use the correct tightening sequence and specifications when installing fasteners in order to avoid damage to parts and systems.
Tighten
Tighten the supercharger bolts to 23 N·m (17 lb ft).


