Low Engine Coolant Level Indicator Always on (Diagnose Low Coolant Level System Operation/Check Sensor for Oil Contamination)

| Subject: | Low Engine Coolant Level Indicator Always On (Diagnose Low Coolant Level System Operation/Check Sensor for Oil Contamination) |
| Models: | 2000-2002 Buick Century, Regal |
| 2000-2001 Chevrolet Lumina |
| 2000-2002 Chevrolet Impala, Monte Carlo |
| 2000-2002 Pontiac Grand Prix |
| 2000-2002 Oldsmobile Intrigue |
Condition
Some customers may comment that the low engine coolant level indicator is always illuminated.
Cause
The cause of this condition may be due to engine oil contaminating the coolant. Possible sources of oil contamination are internal engine leaks, improper service procedures, or the addition of some types of anti-leak additives to the cooling system. Once in the coolant, the oil leaves deposits on the level sensor creating an insulating film. This film results in a false activation of the coolant level indicator.
Correction
Diagnose low coolant level system operation and check the sensor for oil contamination using the procedure listed below.
Important: No coolant supplements should be used in GM cooling systems, other than what is approved and recommended by GM. The use of "aftermarket" over-the-counter sealing and cooling supplements may affect the operation of the low coolant level sensor. Discoloration of the coolant recovery bottle is normal and does not necessarily indicate that coolant contamination is present. Flush cooling system only when instructed by this bulletin.
- Verify that the coolant is at proper level in the radiator and the coolant recovery bottle. If the coolant is low, add proper amount of 50/50 water and DEX-COOL® mixture. If the low coolant light operates properly, diagnose the cooling system for loss of coolant as outlined in SI. DO NOT proceed further with this bulletin.
- Remove the low coolant level sensor. Refer to Coolant Level Module Replacement in the Engine Cooling sub-section.
- With the key on, the engine off and the coolant level sensor disconnected from the vehicle wiring harness, observe the low coolant light:
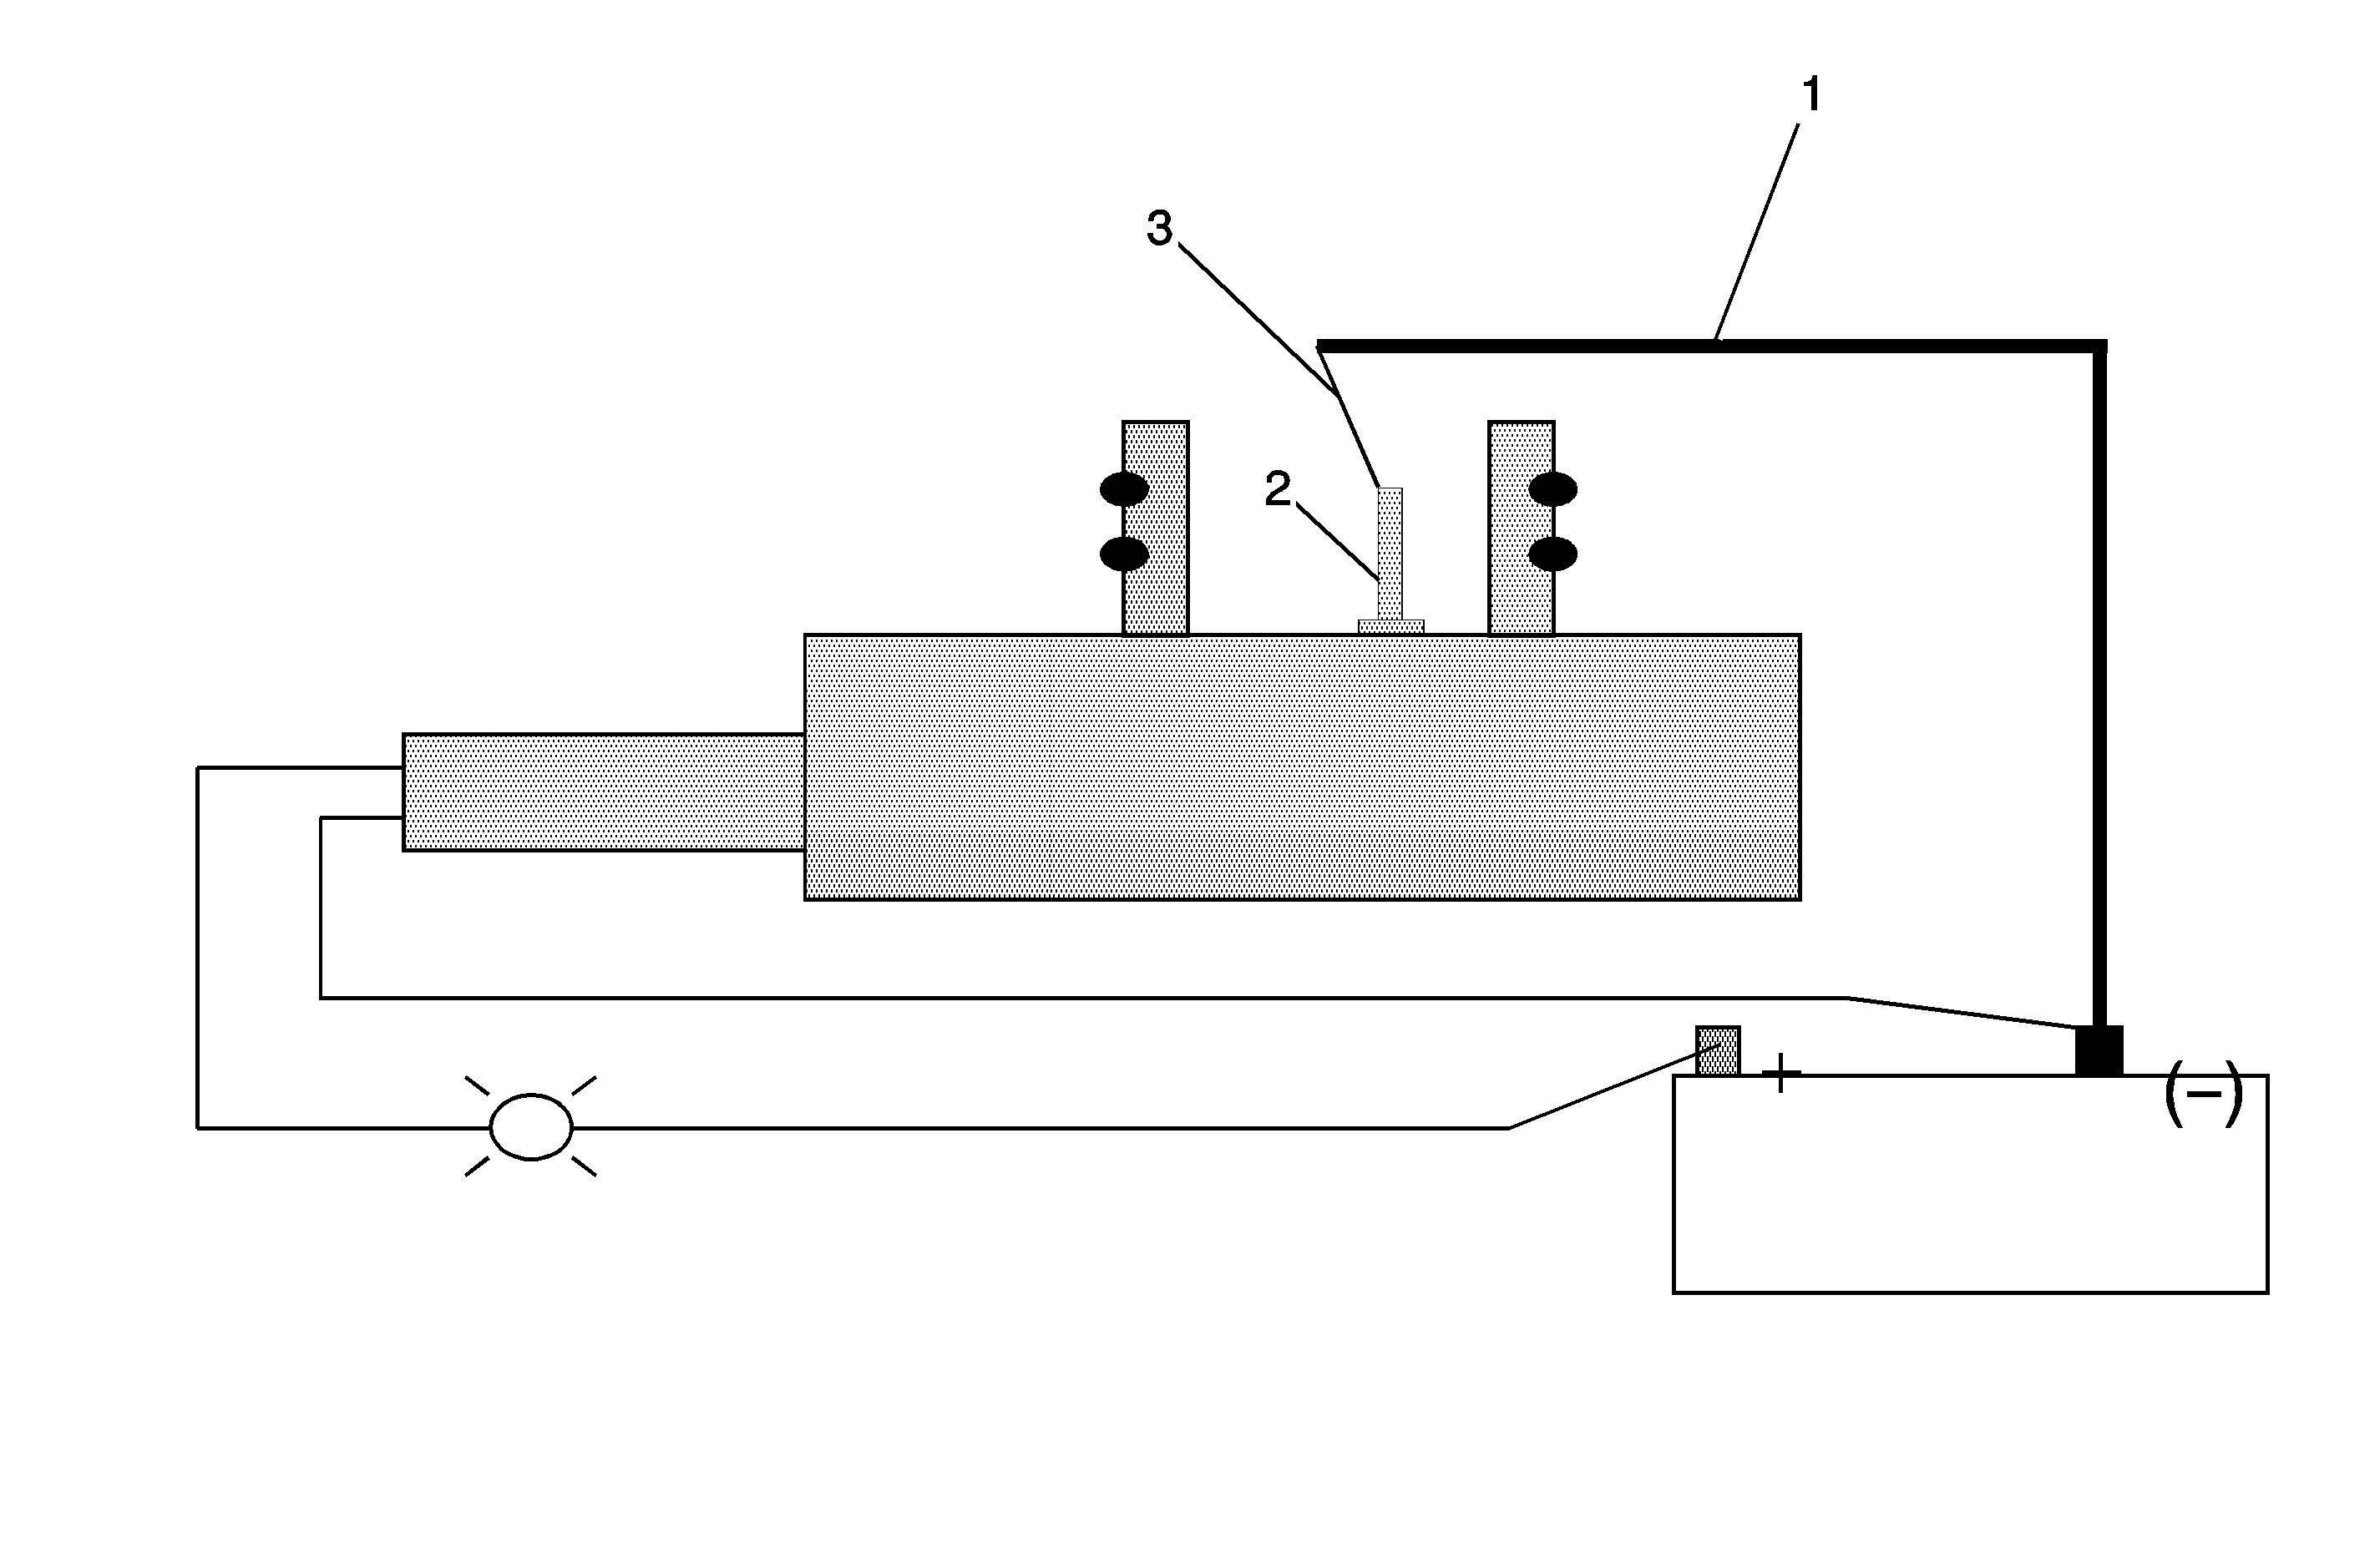
- With the key off, connect the coolant level sensor into the vehicle's wiring harness. Connect a ground wire (1) to the battery negative terminal. Using a sharp probe (3) attached to the ground wire, ground the coolant sensor probe (2) as shown in the illustration. Make sure a good contact is made. With the key on and the engine off, observe the low coolant light for at least 15 seconds.
- Using a small wire brush or emery cloth, polish the low coolant level sensor probe to remove any film or oxidation. The probe should be a bright brass color when finished. Use Brake Parts Cleaner to flush removed deposits from the low coolant sensor probe. Re-install the low coolant sensor into the vehicle and proceed to Step 6.
- Flush the cooling system and install new DEX-COOL® mixture as outlined in the SI. Check the vehicle's warranty history to determine if any engine gasket had recently been changed. If there has not been a recent gasket replacement, locate and repair the source of the engine oil contamination.
| • | Light is on -- Chassis wiring or instrument cluster concern. Follow the appropriate diagnostic information in SI. |
| • | Light is out -- Proceed to Step 4. |

| • | Light is on -- Replace the low coolant sensor and re-check system operation. |
| • | Light is out -- Proceed to Step 5. |
Warranty Information
For vehicles repaired under warranty, use:
Labor Operation | Description | Labor Time |
|---|---|---|
J7602* | Low Coolant Level System Check | 0.6 hr |
Add | To Flush Cooling System | 0.8 hr |
* This is a unique labor operation number for use only with this bulletin. This number will not be published in the Labor Time Guide. | ||
