Rattle Type Noise Coming from Front of Vehicle (Install Front Brake Caliper Service Kit)

| Subject: | Rattle Type Noise Coming from Front of Vehicle (Install Front Brake Caliper Service Kit) |
| Models: | 2000-01 Buick Century, Regal |
| 2000-01 Chevrolet Impala, Monte Carlo, Venture |
| 2000-01 Oldsmobile Intrigue, Silhouette |
| 2000-01 Pontiac Grand Prix, Montana |
This bulletin is being revised to remove Chevrolet Lumina from the Models section and to update the condition information. Please discard Corporate Bulletin Number 01-05-23-011 (Section 5 -- Brakes).
Built Prior to the Following VIN Breakpoints:
Make | Model | VIN Breakpoint |
|---|---|---|
Buick | Century Regal | 11286911 |
Chevrolet | Impala Monte Carlo | 19300322 |
Venture | 1D273276 | |
Oldsmobile | Intrigue | 1F230496 |
Silhouette | 1D273277 | |
Pontiac | Grand Prix | 1F230497 |
Montana | 1D273274 |
Condition
Some customers may comment about a rattle type noise coming from the front of the vehicle. This noise usually occurs at vehicle speeds under 48 km/h (30 mph) and while driving over bumps. The noise can usually be eliminated by a light application of the brake pedal.
Cause
This condition may be caused by too much clearance between the front brake caliper bracket and the caliper pins in the bottom of the bracket bores.
Correction
Install front brake caliper service kits to both sides of the vehicle using the following service procedure. Each kit contains 2 pins, 2 boots, and 2 packets of grease.
Service Procedure
- Raise and suitably support the vehicle. Refer to Lifting and Jacking the Vehicle in General Information.
- Remove both the front tire and wheel assemblies.
- Hand tighten 2 wheel nuts to retain the rotor to the hub.
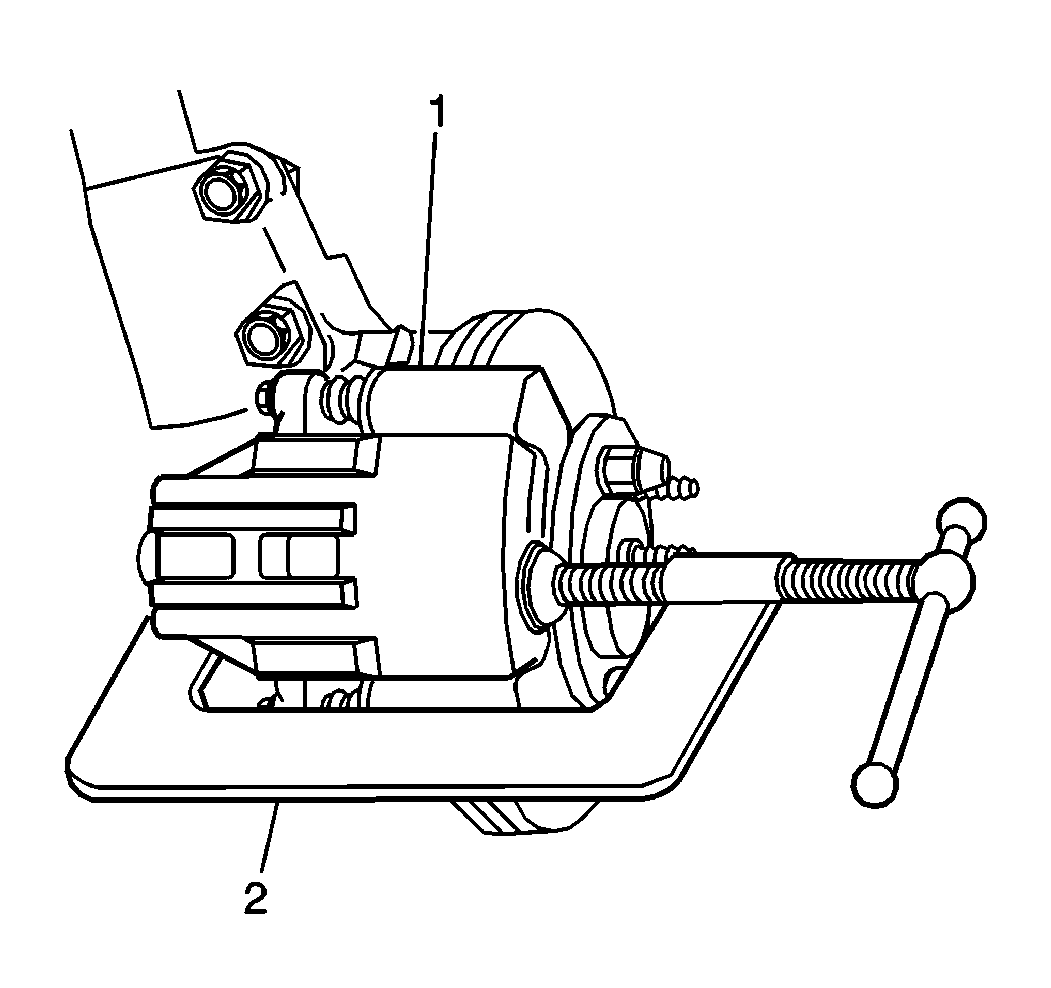
- Install a large C-clamp (2) over the top of the brake caliper and against the back of the outboard brake pad.
- Tighten the C-clamp until the caliper piston is pushed into the caliper bore enough to slide the caliper off the rotor.
- Remove the C-clamp from the caliper.
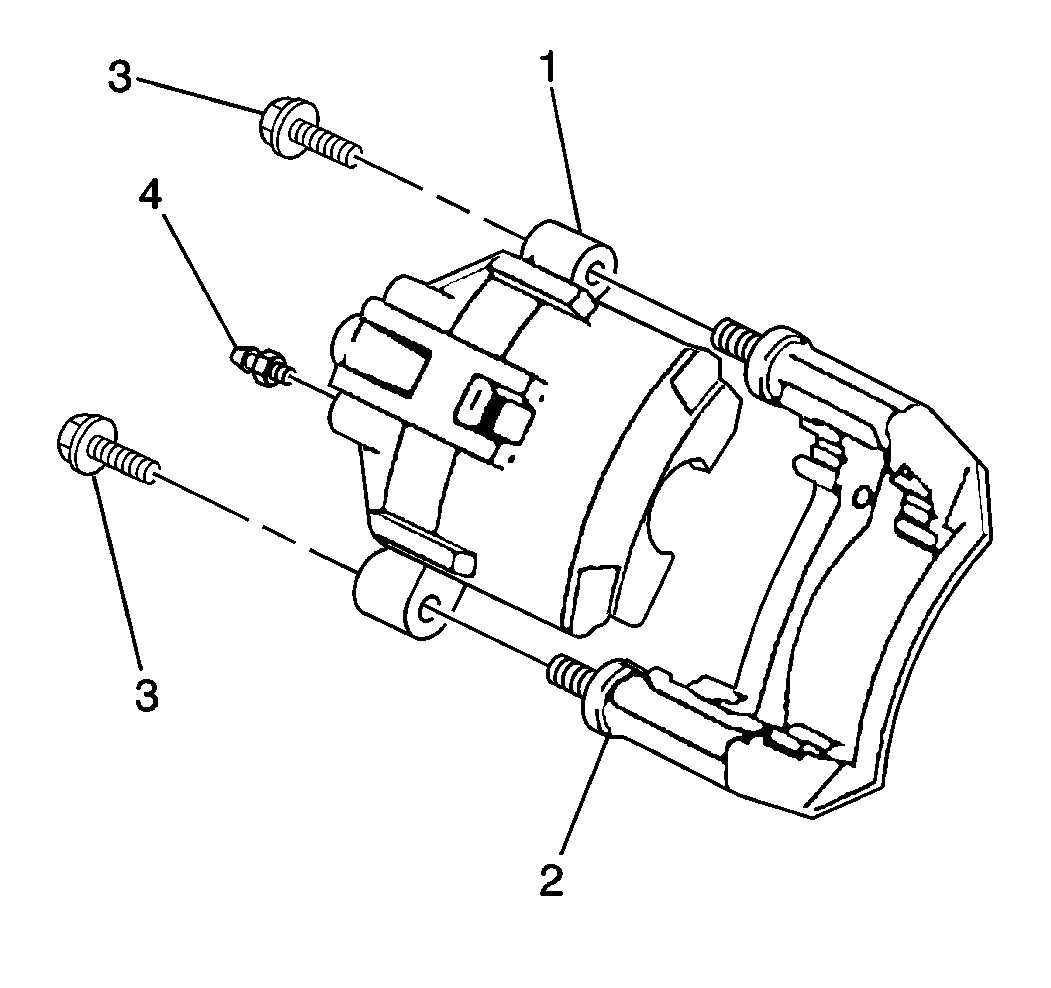
- Remove the caliper pin bolts (3) and discard. New bolts are supplied with the service kit.
- Remove the caliper (1) from the caliper bracket (2) and support the caliper with heavy mechanic's wire, or equivalent.
- Using a flat bladed tool or punch, carefully tap the caliper pin boots from the brake caliper bracket and discard.
- Remove and discard the bushings from the brake caliper bracket bores. Carefully insert a small screwdriver into the brake caliper bracket bore, then rotate and pull the bushing outward to remove.
- Remove the brake pads from the brake caliper bracket.
- Thoroughly clean the brake caliper bracket bores of all lubricant.
- Install the brake pads to the brake caliper bracket.
- Lubricate the brake caliper bracket bores. Divide the large packet of grease, P/N 18046532; put one-half packet into each bore.
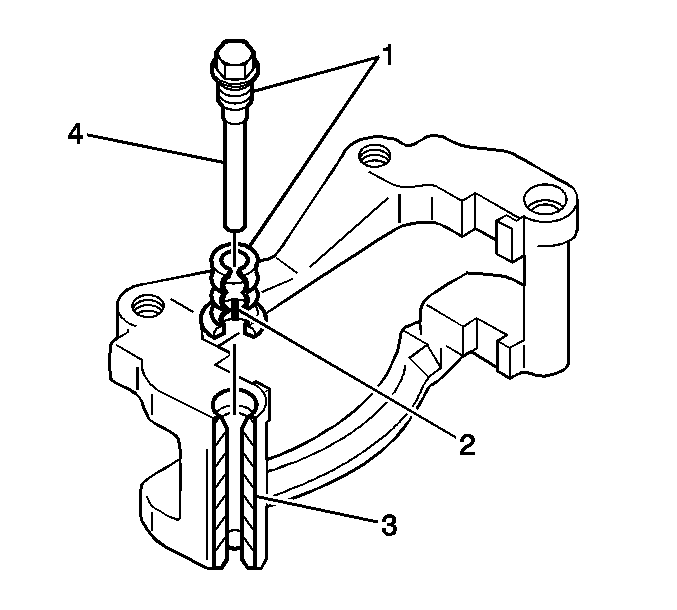
- Lubricate the new caliper pin boots. Use the small packet of grease, P/N 18046645, only on the bottom internal threads (2).
- Install the new caliper pin boots into the caliper pin bores (3) on the bracket. Carefully tap boots into bores using a deep well socket or equivalent.
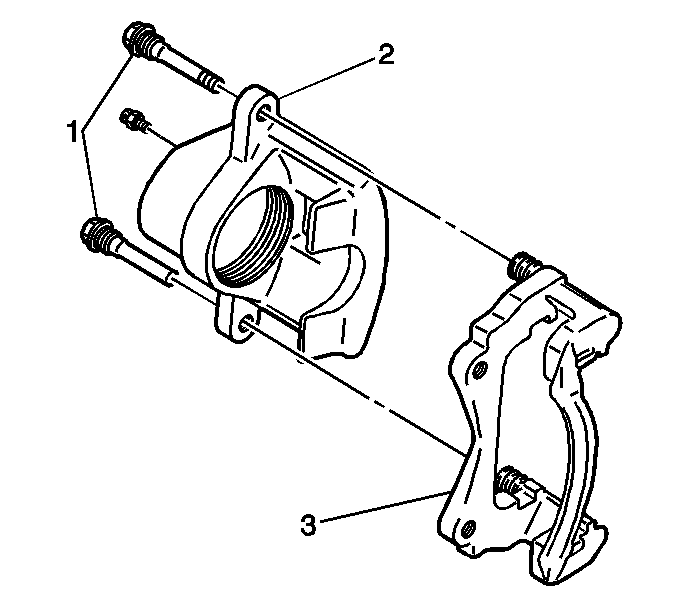
- Install the caliper over the rotor and onto the caliper bracket. Ensure that the caliper pin boots are not pinched.
- Install the new caliper pin bolts (1). It is important to note which caliper pin is designed for the correct bore. The leading caliper pin, or top pin, has a bushing as part of the assembly. The trailing caliper pin, or bottom pin, is a solid design. Ensure that the bolt boots fit securely in the groove of the pin bolts. Be sure not to pinch or tear the boots. If the boots are damaged, they must be replaced.
- Remove the 2 wheel nuts retaining the rotor to the hub.
- Repeat the above steps for the other side.
- Install both the front tire and wheel assemblies. Tighten the wheel nuts using the J 39544 kit.
- Lower the vehicle.


Important: The leading caliper pin, or top pin, has a bushing as part of the assembly. The trailing caliper pin, or bottom pin, is a solid design.
Tighten
Tighten the bolts to 95 N·m (70 lb ft).
Parts Information
Part Number | Description | Qty |
|---|---|---|
18046457 | Kit, Caliper Service | 2 |
Parts are currently available from GMSPO.
Warranty Information
For vehicles repaired under warranty, use:
Labor Operation | Description | Labor Time |
|---|---|---|
H0087 | Installation of Front Brake Caliper Service Kit | 1.0 hr |
