For 1990-2009 cars only
Rear Compartment Trim Panel Replacement One Piece
Tools Required
J 38778 Door Trim Pad and Garnish Clip Remover
Removal Procedure
- Open the rear compartment.
- Remove the rear compartment convenience net, if equipped. Refer to Compartment Convenience Net Replacement - Rear .
- Remove the rear compartment convenience net retainers, if equipped.
- Remove the OnStar® vehicle communication unit (VCU) if equipped. Refer to OnStar Vehicle Communication Unit Replacement .
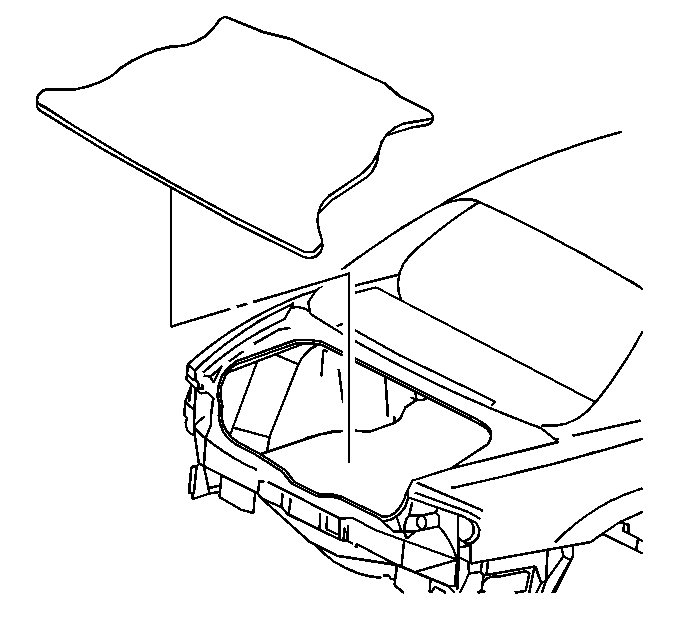
- Remove the rear compartment mat from the rear compartment.
- Remove the spare tire cover from the rear compartment.
- Remove the spare tire.
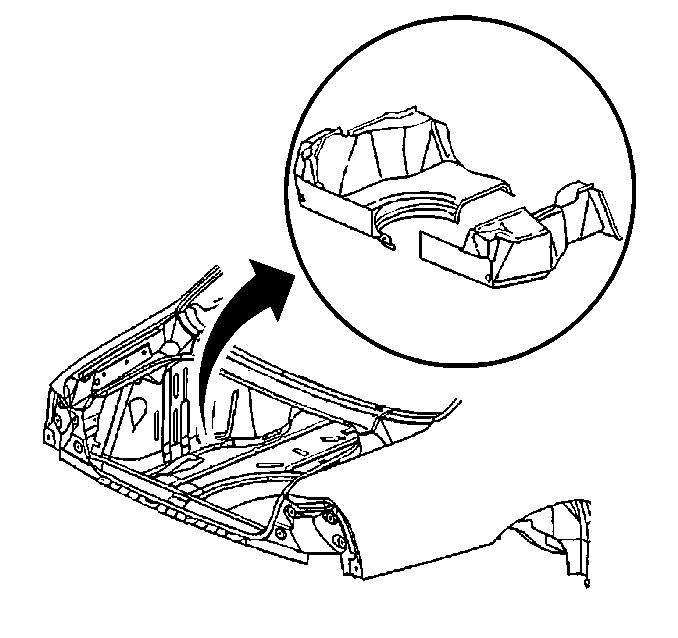
- Use the J 38778 in order to remove the push-in retainers located near the lock striker.
- Slide the trim panels out from under the weatherstrip.
- Slide each side of the rear compartment trim panels toward the center of the car.
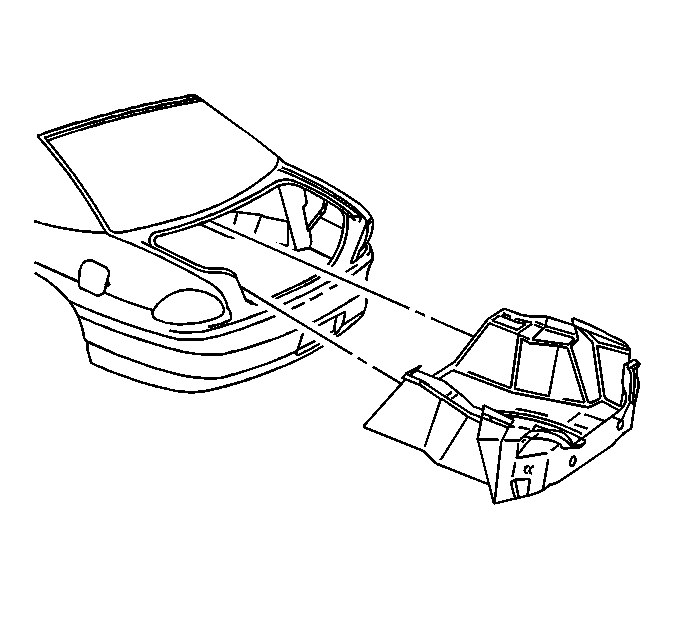
- Remove the rear compartment trim panels from the rear compartment.
Installation Procedure
- Install the rear compartment trim panels to the rear compartment.
- Install the push-in retainers located by the lock striker.
- Install the spare tire.
- Install the rear compartment mat to the rear compartment.
- Install the OnStar® vehicle communication unit (VCU) if equipped. Refer to OnStar Vehicle Communication Unit Replacement in Cellular Communication.
- Replace the rear compartment convenience net retainers, if equipped.
- Install the rear compartment convenience net, if equipped. Refer to Compartment Convenience Net Replacement - Rear .
- Close the rear compartment.
Important: The right side of the rear compartment trim panel fits over the left side.
Install the spare tire cover to the rear compartment.
Rear Compartment Trim Panel Replacement Two Piece
Removal Procedure
- Open the rear compartment.
- Remove the rear compartment sill plate. Refer to Rear Compartment Sill Trim Plate Replacement .
- Remove the rear compartment convenience net and retainers, if equipped. Refer to Compartment Convenience Net Replacement - Rear .
- Remove the OnStar® vehicle communication unit (VCU) if equipped. Refer to OnStar Vehicle Communication Unit Replacement in Cellular Communication.
- Remove the rear seat back. Refer to Rear Seat Back Replacement in Seats.
- Remove the spare tire cover from the rear compartment.
- Remove the push-in retainers from the rear compartment trim panel.
- Pull back the rear compartment trim panel from the rear seating area.
- Remove the rear compartment trim panel from the rear compartment.


Installation Procedure
- Install the rear compartment trim panel to the rear compartment.
- Pull back the rear compartment trim panel to the rear seating area.
- Press the rear compartment trim over the rear shock tower studs.
- Install the push-in retainers to the rear compartment trim panel.
- Install the spare tire cover to the rear compartment.
- Install the rear seat back. Refer to Rear Seat Back Replacement in Seats.
- Install the OnStar® vehicle communication unit (VCU) if equipped. Refer to OnStar Vehicle Communication Unit Replacement in cellular communication.
- Install the rear compartment convenience net and retainers, if equipped. Refer to Compartment Convenience Net Replacement - Rear .
- Install the rear compartment sill plate. Refer to Rear Compartment Sill Trim Plate Replacement .
- Close the rear compartment.
