Slips, Harsh Upshift or Garage Shifts, Launch Shudders, Flares, Erratic Shifts and Intermittent Concerns, DTC P1811 or P0748 Set (Replace Pressure Control Solenoid Valve Assembly)

| Subject: | Slips, Harsh Upshift or Garage Shifts, Launch Shudders, Flares, Erratic Shifts and Intermittent Concerns, DTC P1811 or P0748 Set (Replace Pressure Control Solenoid Valve Assembly) |
| Models: | 1997-1999 Buick Riviera |
| 1997-2002 Buick Park Avenue |
| 1998-2002 Buick LeSabre |
| 1999-2002 Buick Regal |
| 2000-2002 Buick Century |
| 2002 Buick Rendezvous |
| 1997-2001 Chevrolet Lumina |
| 1997-2002 Chevrolet Monte Carlo |
| 1999-2002 Chevrolet Venture |
| 2000-2002 Chevrolet Impala |
| 1997- 1999 Oldsmobile Eighty Eight |
| 1997-2002 Oldsmobile Silhouette |
| 1998-2002 Oldsmobile Intrigue |
| 2001-2002 Oldsmobile Aurora (3.5L) |
| 1997-2002 Pontiac Bonneville, Grand Prix |
| 1999-2002 Pontiac Transport/Montana |
| 2001-2002 Pontiac Aztek |
| with Hydra-Matic 4T65-E (RPOs MN3, MN7, M15, M76) |
This bulletin is being revised to add additional models and model years. Please discard Corporate Bulletin Number 00-07-30-002A (Section --Automatic Transmission).
Condition
Some owners of the above vehicles with a Hydra-Matic 4T65-E transaxle may comment on harsh upshifts or harsh garage shifts, soft shifts, shudders on hard acceleration, or shifts erratic. These conditions may appear intermittently or set a DTC P1811 or P0748. During diagnosis, a low or high line pressure (actual versus desired) may be observed.
Cause
The above condition may be due to any one of the following which may affect line pressure output:
| • | Sediment inside the pressure control (PC) solenoid valve, causing the PC solenoid valve to mechanically bind. |
| • | Sediment in the valve body, causing the torque signal regulator valve to stick. |
| • | Incorrect transaxle oil level. |
Correction
Important: Any of the above conditions may be intermittent, therefore, this test should be performed at least three times.
Refer to the Line Pressure Check Procedure in SI, along with the Line Pressure Specification Table below, to determine if actual versus desired pressures are within the values specified. The Scan Tool is only able to control the PC solenoid valve in PARK and NEUTRAL with the vehicle stopped. This protects the clutches from extremely high or low pressures in DRIVE or REVERSE ranges.
Refer to the Line Pressure Specification Table below. The pressures in the table assume a temperature of 70°C. The pressure will vary with a change in temperature.
Pressure Control Solenoid Valve Current | Approximate Line Pressure* | |
|---|---|---|
Metric | English | |
0 amp | 1675-2137 kPa | 243-310 psi |
0.1 amp | 1662-2124 kPa | 241-308 psi |
0.2 amp | 1613-2103 kPa | 234-305 psi |
0.3 amp | 1551-2068 kPa | 225-300 psi |
0.4 amp | 1448-1986 kPa | 210-288 psi |
0.5 amp | 1310-1903 kPa | 190-276 psi |
0.6 amp | 1172-1751 kPa | 170-254 psi |
0.7 amp | 1000-1531 kPa | 145-222 psi |
0.8 amp | 793-1227 kPa | 115-178 psi |
0.9 amp | 565-896 kPa | 82-130 psi |
1 amp | 469-641 kPa | 68-93 psi |
1.1 amp | 448-552 kPa | 65-80 psi |
*Approximate Line Pressure is measured at an engine speed of 1400 RPM. | ||
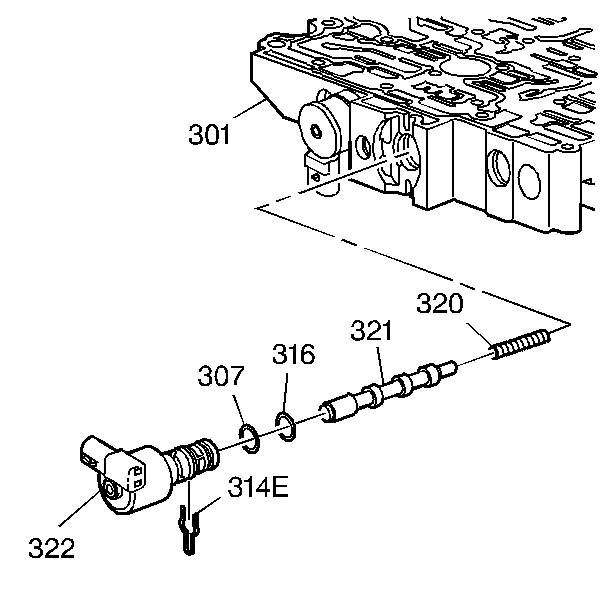
If the actual versus desired pressures are not within the values specified, clean the valve body and replace the PC solenoid valve, if necessary.
Check the PC solenoid valve actual versus desired pressures to verify the new PC solenoid valve is responding correctly.
Refer to the Automatic Transaxle Section of the Service Manual for the proper repair procedure.
Line Pressure Check Procedure
Tools Required
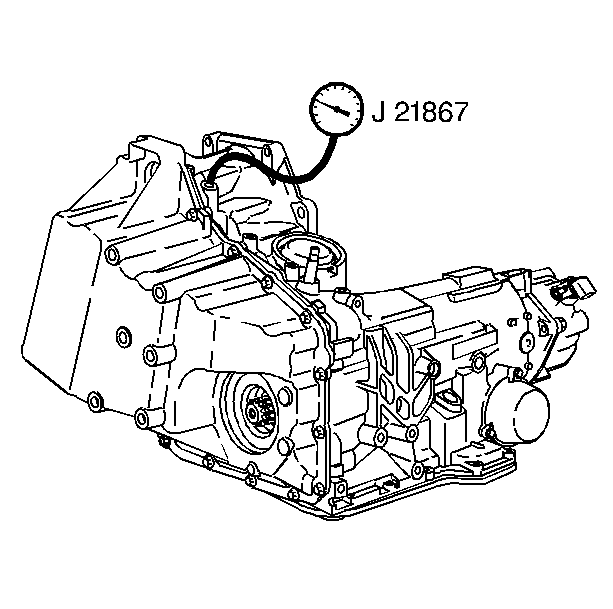
J 21867 Universal Pressure Gauge Set
Important: Before performing a line pressure check, verify that the pressure control (PC) solenoid valve is receiving the correct electrical signal from the PCM.
- Install a Scan Tool.
- Start the engine and set the parking brake.
- Check for a stored Diagnostic Trouble Code (DTC).
- Repair the vehicle, if necessary.
- Check the fluid level. Refer to the Transmission Fluid Checking Procedure.
- Check the manual linkage for proper adjustment.
- Turn the engine OFF. Remove the oil pressure test hole plug and install the J 21867.
- Put the gear selector in PARK range and set the parking brake.
- Start the engine and allow the engine to warm up at idle.
- Access the PC solenoid valve control test on the Scan Tool.
- Increase the PC solenoid actual current from 0.0 to 1.0 amps in 0.1 amp increments. Allow the pressure to stabilize for five seconds after each pressure change. Read the corresponding line pressure on the J 21867.
- Refer to the Line Pressure specification table. Compare the data to the table.
- If pressure readings differ greatly from the table, refer to Incorrect Line Pressure.
- Remove the J 21867.
- Apply sealant, P/N 12345382 (in Canada, P/N 10953489), to the oil pressure test hole plug.
- Install the oil pressure test hole plug.
Caution: Keep the brakes applied at all times in order to prevent unexpected vehicle motion. Personal injury may result if the vehicle moves unexpectedly.

Notice: Total test running time should not be longer than two minutes, or else transmission damage could occur.
Notice: Refer to Fastener Notice in Cautions and Notices.
Tighten
Tighten the oil pressure test hole plug to 12 N·m (106 lb in).
Pressure Control Solenoid

Parts Information
Part Number | Description |
|---|---|
10478146 | Pressure Control Solenoid - Valve Asm. |
Parts are currently available from GMSPO.
Warranty Information
For vehicles repaired under warranty, use:
Labor Operation | Description | Labor Time |
|---|---|---|
K6353 | Pressure Control Solenoid Replacement | Use published labor operation time |
K6560 | Valve Body Replacement | Use published labor operation time |
