For 1990-2009 cars only
Front Compartment Front Inner Side Rail Extension Replacement for Buick Regal 2009
Removal Procedure
- Remove the front wheelhouse front liner. Refer to Front Wheelhouse Front Liner Replacement.
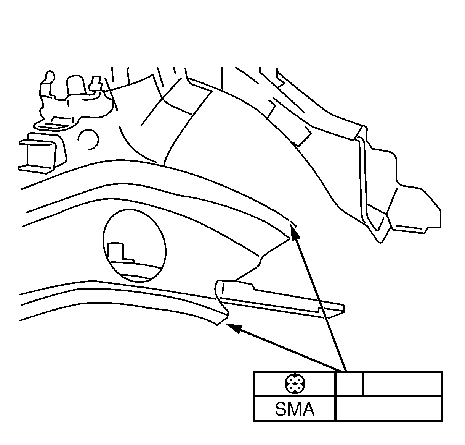
- Locate and drill out all of the battery tray support bracket factory welds.
- Cut out the front compartment front inner side rail extension.
- Locate and drill out all of the necessary factory welds.
- Cut out the front compartment front outer side rail (1) 10 mm (0.4 in) staggered to the front compartment front inner side rail extension.
- Locate and drill out all of the necessary factory welds.
- Remove the damaged front compartment front inner side rail extension and front compartment front outer side rail.
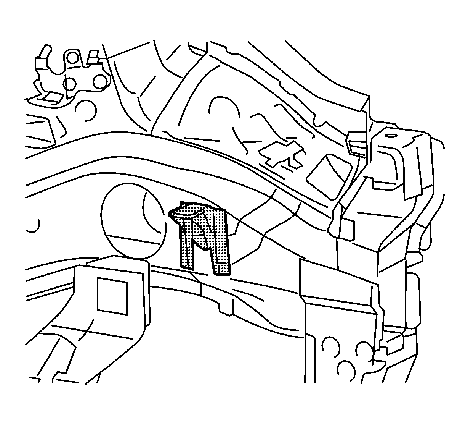
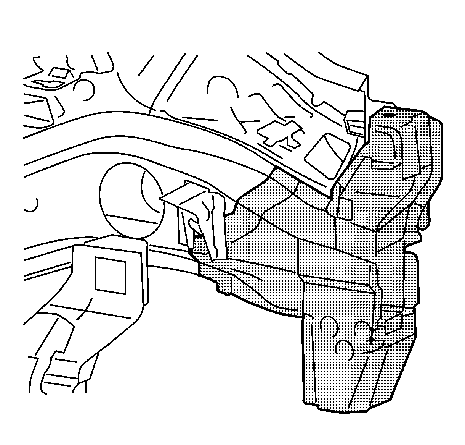
Note: Do not damage any inner panels or reinforcements.
Note: Note the number and location of the welds for installations of the service part.
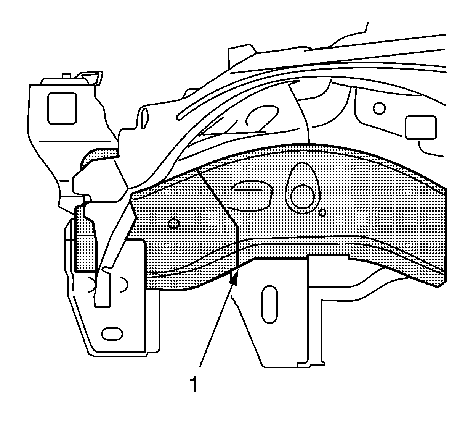
Note: Do not damage any inner panels or reinforcements.
Note: Note the number and location of the welds for installations of the service part.
Installation Procedure
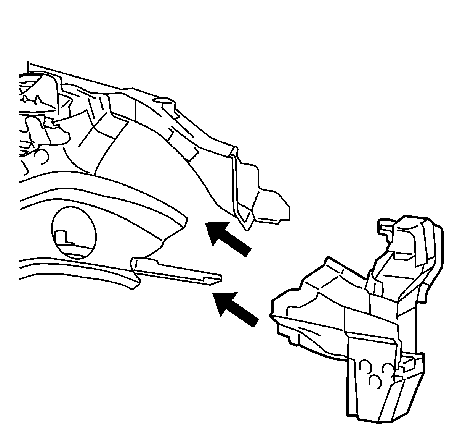
- Prepare battery tray support bracket in the area (1).
- Apply bodywork repair through structural adhesive to body. Refer to Structural Adhesive Body Repairs.
- Position the front compartment front inner side rail extension.
- Spot weld the headlamp mount panel inner accordingly.
- Apply bodywork repair through structural adhesive to body. Refer to Structural Adhesive Body Repairs.
- Position the front compartment front outer side rail.
- Spot weld the front compartment front outer side rail accordingly.
- MIG-braze the front compartment front outer side rail.
- Spot weld the drivetrain and front suspension frame front outer support accordingly
- Spot weld the front end sheet metal cross panel reinforcement accordingly.
- MIG-braze the battery tray support bracket.
- Grind all MIG brazed seams.
- Apply the sealers and anti-corrosion materials to the repair area, as necessary. Refer to Anti-Corrosion Treatment and Repair.
- Install all related panels and components.
- Connect the negative battery cable. Refer to Battery Negative Cable Disconnection and Connection.
- Enable the SIR system. Refer to SIR Disabling and Enabling.
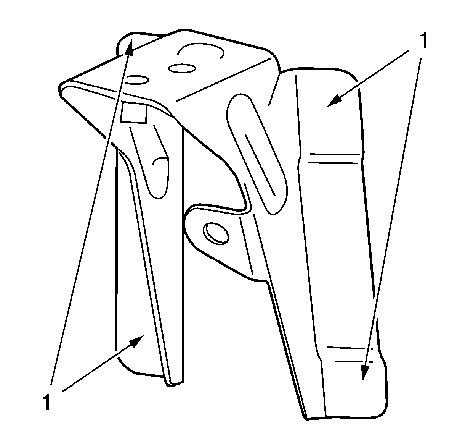
4x slots 6x20 mm (0.2x0.8 in).
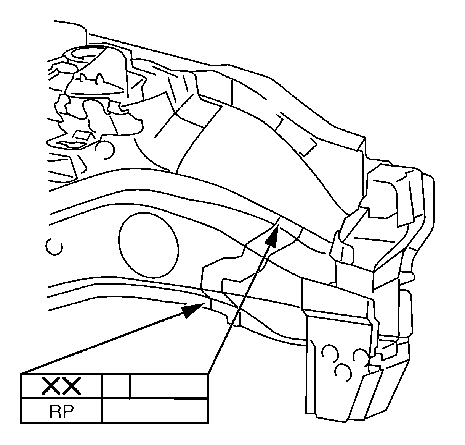
Note: Refer to Welded, Brazed, and Riveted Joint Specifications.
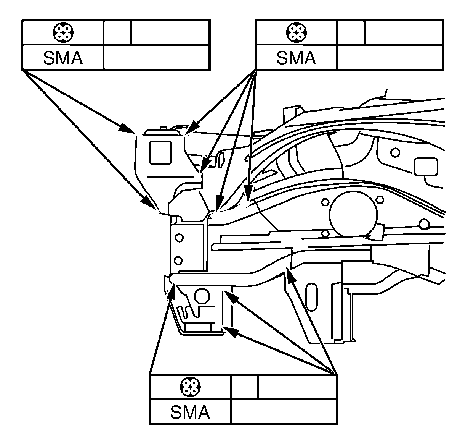
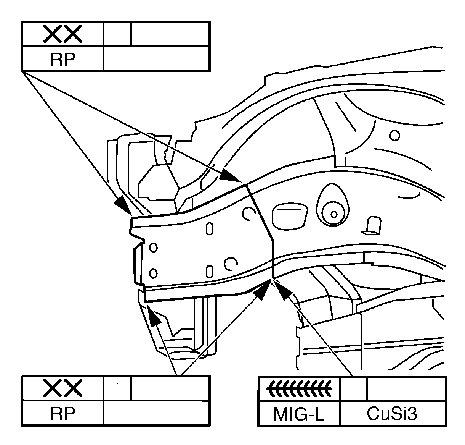
Note: Refer to Welded, Brazed, and Riveted Joint Specifications.
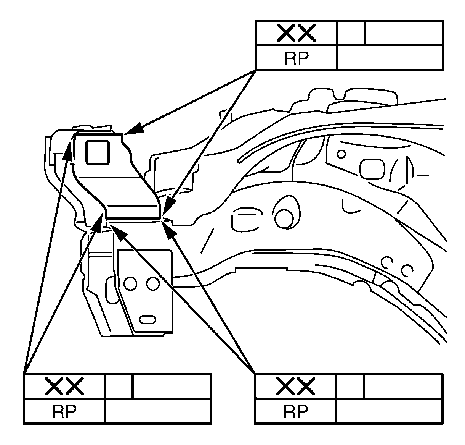
Note: Refer to Welded, Brazed, and Riveted Joint Specifications.
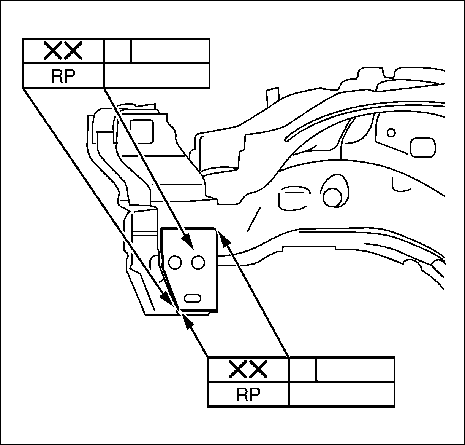
Note: Refer to Welded, Brazed, and Riveted Joint Specifications.
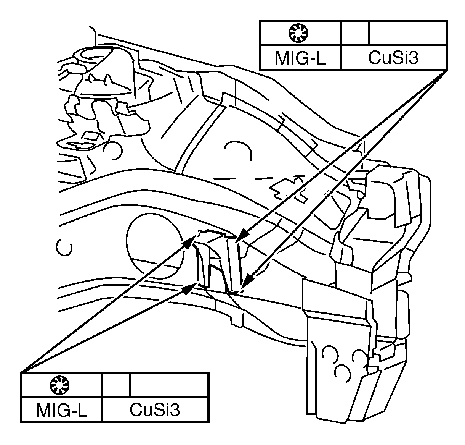
Remove the front wheelhouse front liner. Refer to Front Wheelhouse Front Liner Replacement.
