For 1990-2009 cars only
Removal Procedure
- Remove the air cleaner and duct assembly. Refer to Air Cleaner Assembly Replacement in Engine Controls.
- Recover the refrigerant. Refer to Refrigerant Recovery and Recharging .
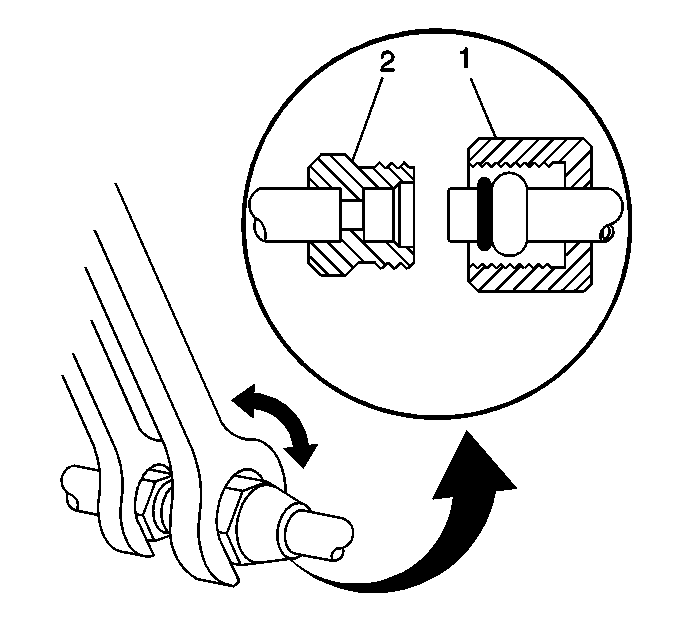
- For compression-style fittings, use a back-up wrench on the A/C refrigerant component (smaller size) fitting (2), then loosen the A/C refrigerant hose (larger size) fitting (1).
- For banjo-style fittings, remove the bolt/nut retaining the A/C refrigerant hose to the A/C refrigerant component.
- Disconnect the A/C refrigerant hose from the A/C refrigerant component, discard the O-ring seal and cap or tape the A/C refrigerant hose and the A/C refrigerant component to prevent contamination.
Important: Cap or tape the open A/C refrigerant hose and the A/C refrigerant component immediately.
Installation Procedure
- Remove the cap or tape from the A/C refrigerant hose and the A/C refrigerant component.
- Using a lint-free clean, dry cloth, carefully clean the sealing surfaces of the A/C refrigerant hose and the A/C refrigerant component.
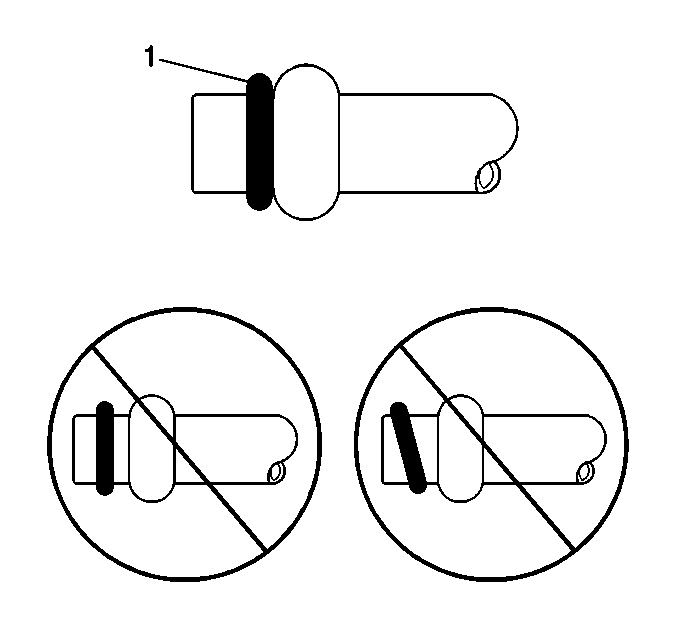
- For compression-style fittings; carefully slide the new O-ring seal (1) onto the A/C refrigerant hose until seated.
- Lightly lubricate the new O-ring seal (1) with mineral base 525 viscosity refrigerant oil.
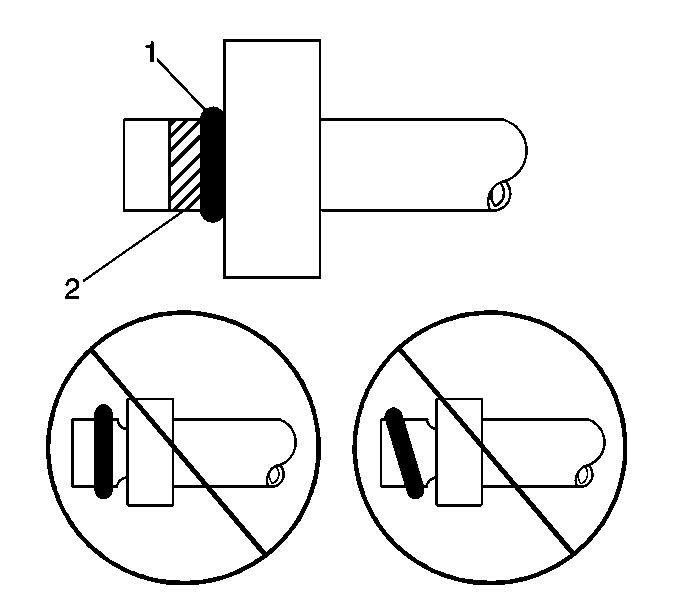
- For banjo-style fittings, carefully slide the new O-ring seal (1) onto the A/C refrigerant hose until seated.
- Lightly lubricate the new O-ring seal (1) with mineral base 525 viscosity refrigerant oil.
- Install the A/C refrigerant hose to the A/C refrigerant component.
- For compression-style fittings; use a back-up wrench on the A/C refrigerant component (smaller size) fitting (2), then tighten the A/C refrigerant hose (larger size) fitting (1) to specification.
- For banjo-style fittings; install the bolt/nut retaining the A/C refrigerant hose to the A/C refrigerant component, then tighten to specification.
- Evacuate and charge the refrigerant system. Refer to Refrigerant Recovery and Recharging .
- Check the A/C refrigerant hose(s) to the A/C component(s) joints for leaks. Refer to Leak Testing .
- Install the air cleaner and duct assembly. Refer to Air Cleaner Assembly Replacement in Engine Controls.
Important: DO NOT allow any of the mineral base 525 viscosity refrigerant oil on the new O-ring seal to enter the refrigerant system.
Important: DO NOT allow any of the mineral base 525 viscosity refrigerant oil on the new O-ring seal to enter the refrigerant system.
Leave a light coating of the refrigerant oil to remain on the A/C refrigerant hose in the area indicated (2) ONLY.
