Tools Required
| • | J 28467-B Universal Engine Support Fixture |
| • | J 36462-A Engine Support Adapter Leg Set |
| • | J 39505 Torque Wrench Adapter |
Removal Procedure
- Disconnect the battery ground cable. Refer to Battery Negative Cable Disconnection and Connection in Engine Electrical.
- Remove the engine mount struts from the engine. Refer to Engine Mount Strut Replacement .
- Install J 28467-B and J 36462-A .
- Raise and suitably support the vehicle. Refer to Lifting and Jacking the Vehicle in General Information.
- Remove the A/C compressor mounting bolts and set the compressor aside. Refer to Air Conditioning Compressor Replacement in HVAC.
- Disconnect the exhaust resonator or catalytic converter pipe from the right exhaust manifold. Refer to Resonator Replacement or to Catalytic Converter Replacement in Engine Exhaust.
- Drain the engine oil. Refer to Engine Oil and Oil Filter Replacement .
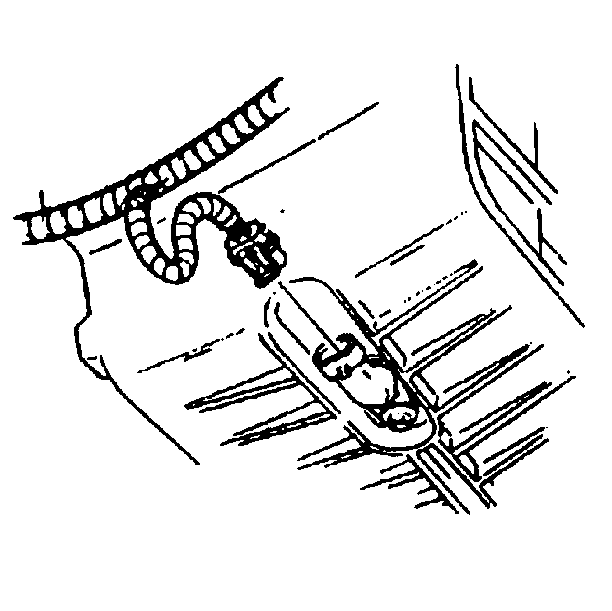
- Remove the oil level sensor wiring harness connection.
- Remove the starter motor. Refer to Starter Motor Replacement in Engine Electrical.
- Remove the transaxle brace from the oil pan. Refer to Transmission Brace Replacement in Automatic Transaxle - 4T65-E.
- Loosen the transaxle mount lower nuts. Refer to Transmission Mount Replacement in Automatic Transaxle - 4T65-E.
- Remove the engine mount lower nuts. Refer to Engine Mount Replacement .
- Lower the vehicle.
- Raise the engine using the universal engine support fixture in order to gain access for oil pan removal.
- Raise and suitably support the vehicle. Refer to Lifting and Jacking the Vehicle in General Information.
- Remove the engine mount bracket with the engine mount from the oil pan. Refer to Engine Mount Bracket Replacement .
- Disconnect the right lower ball joint from the steering knuckle. Refer to Lower Control Arm Ball Joint Replacement in Front Suspension.
- Disconnect the right outer tie rod from the steering knuckle. Refer to Rack and Pinion Outer Tie Rod End Replacement in Power Steering System.
- Remove the right side frame bolts.
- Loosen the left side frame bolts.
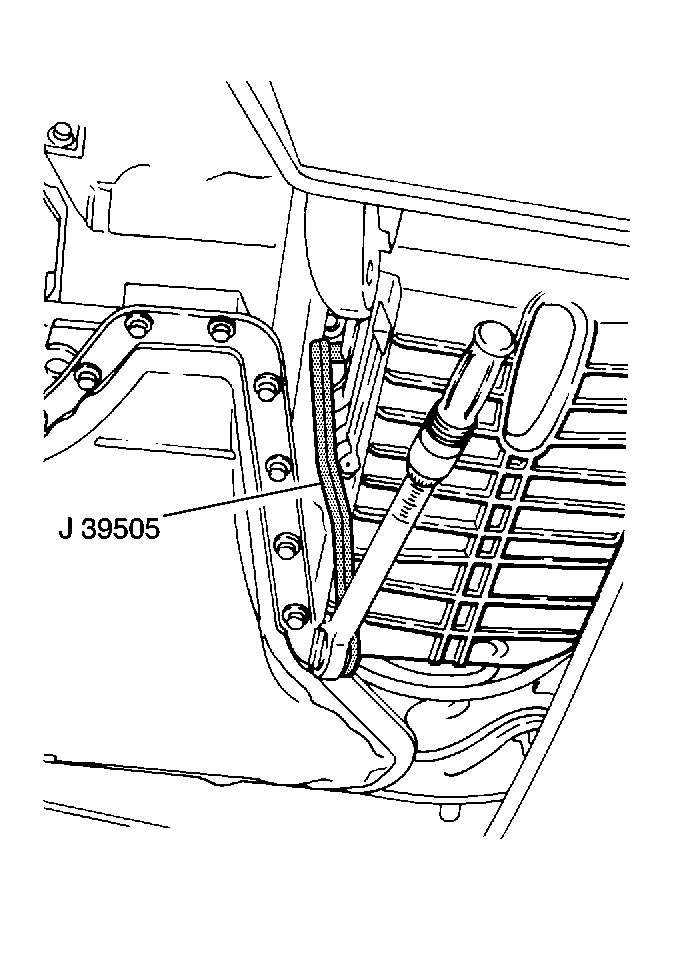
- Remove the right oil pan side bolts. Use the J 39505 .
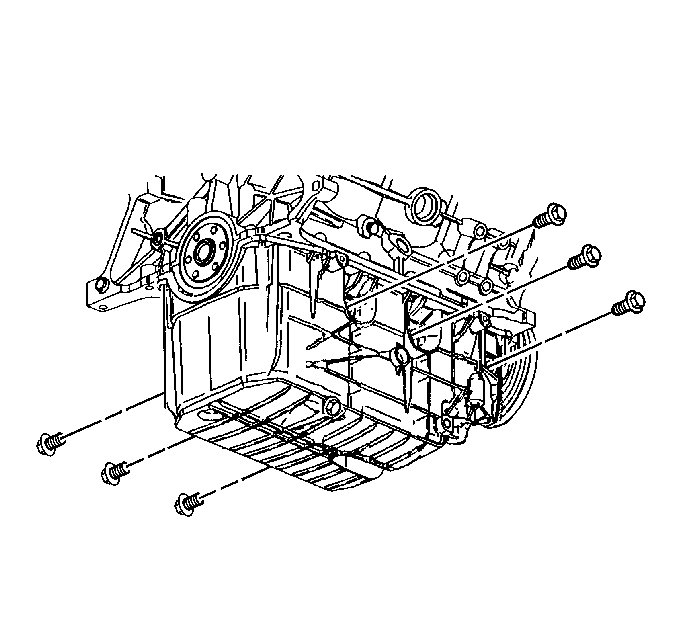
- Remove the left oil pan side bolts.
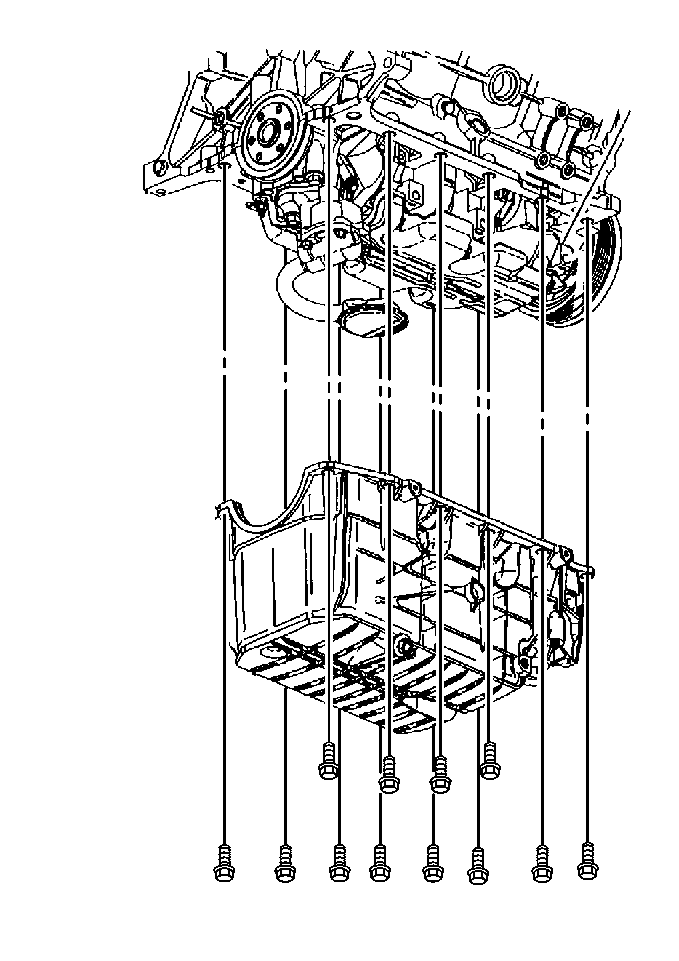
- Remove the oil pan retaining bolts.
- Remove the oil pan.
- Remove the oil pan gasket.
- Clean the oil pan and the engine block gasket surface.
Installation Procedure
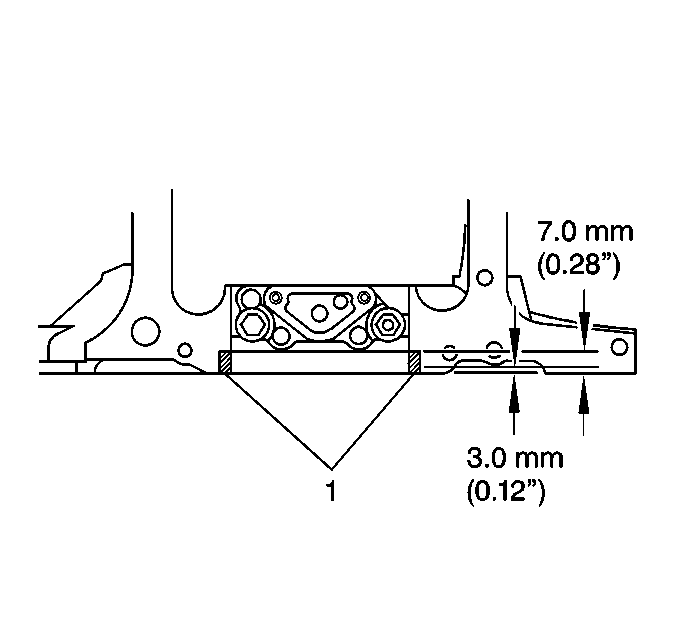
- Apply a small amount of sealer GM P/N 1234579 or equivalent on either side of the rear main bearing cap, where the seal surface on the cap meets the cylinder block (1). Press sealant into the gap with putty knife.
- Install the oil pan gasket.
- Install the oil pan.
- Install the oil pan retaining bolts.
- Install the left oil pan side bolts.
- Install the right oil pan side bolts. Use the J 39505 .
- Tighten the left side frame bolts.
- Install the right side frame bolts.
- Connect the right lower ball joint from the steering knuckle. Refer to Lower Control Arm Ball Joint Replacement in Front Suspension.
- Connect the right outer tie rod from the steering knuckle. Refer to Rack and Pinion Outer Tie Rod End Replacement in Power Steering System.
- Install the engine mount bracket with the engine mount to oil pan. Refer to Engine Mount Bracket Replacement .
- Lower the vehicle.
- Lower the engine using the engine support fixture.
- Raise and suitably support the vehicle. Refer to Lifting and Jacking the Vehicle in General Information.
- Install the engine mount lower nuts. Refer to Engine Mount Replacement .
- Install the transaxle mount lower nuts. Refer to Transmission Mount Replacement in Automatic Transaxle - 4T65-E.
- Install the transaxle brace to the oil pan. Refer to Transmission Brace Replacement in Automatic Transaxle - 4T65-E.
- Install the starter motor. Refer to Starter Motor Replacement in Engine Electrical.
- Install the oil level sensor wiring harness connection.
- Connect the exhaust resonator or catalytic converter pipe to the right exhaust manifold. Refer to Resonator Replacement or to Catalytic Converter Replacement in Engine Exhaust.
- Install the A/C compressor. Refer to Air Conditioning Compressor Replacement in HVAC.
- Lower the vehicle.
- Remove J 28467-B and J 36462-A .
- Install the engine mount struts to the engine. Refer to Engine Mount Strut Replacement .
- Fill the engine with oil. Refer to Engine Oil and Oil Filter Replacement .
- Connect the battery ground cable. Refer to Battery Negative Cable Disconnection and Connection in Engine Electrical.

Notice: Use the correct fastener in the correct location. Replacement fasteners must be the correct part number for that application. Fasteners requiring replacement or fasteners requiring the use of thread locking compound or sealant are identified in the service procedure. Do not use paints, lubricants, or corrosion inhibitors on fasteners or fastener joint surfaces unless specified. These coatings affect fastener torque and joint clamping force and may damage the fastener. Use the correct tightening sequence and specifications when installing fasteners in order to avoid damage to parts and systems.
Tighten
Tighten the oil pan retaining bolts to 25 N·m (18 lb ft).

Tighten
Tighten the oil pan side bolts to 50 N·m (37 lb ft).

Tighten
Tighten the oil pan side bolts to 50 N·m (37 lb ft).
Tighten
Tighten the bolts to 180 N·m (133 lb ft).
Tighten
Tighten the bolts to 180 N·m (133 lb ft).

