For 1990-2009 cars only
Front Floor Console Trim Plate Replacement Rear
Removal Procedure
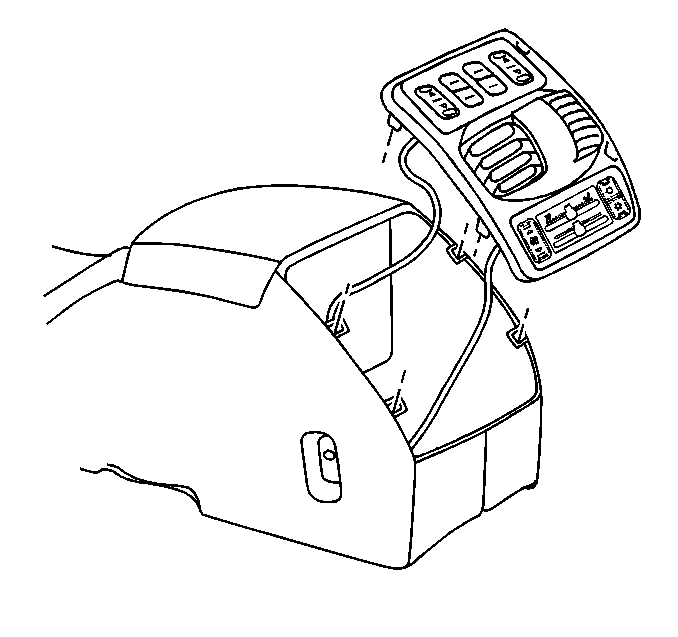
- Remove the front floor console rear seat trim plate from the front floor console by pulling up to release the retaining clips.
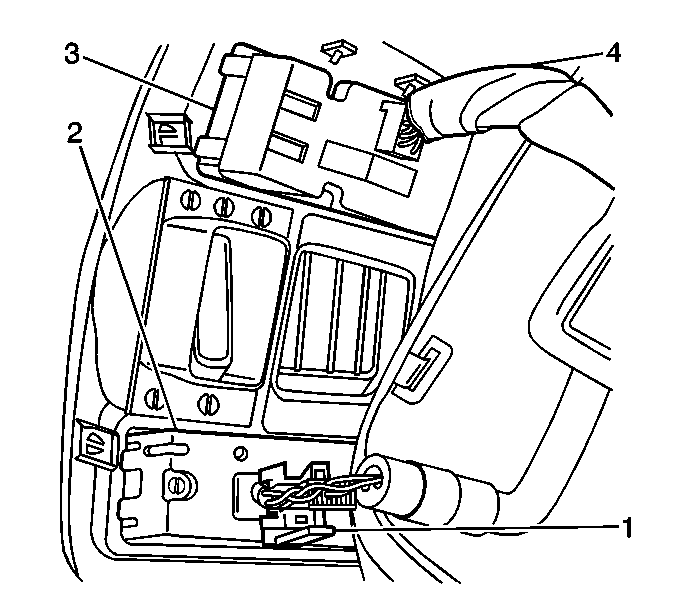
- Disconnect the electrical connector fron the rear seat HVAC control (1).
- Remove the rear seat HVAC control (2) from the rear seat trim plate by pressing in the four retaining tabs.
- Disconnect the electrical connectors (4) from the rear seat audio control.
- Remove the rear seat audio control (3) from the rear seat trim plate by pressing in the four retaining tabs.
- Remove the front floor console rear seat trim plate from the vehicle.


Installation Procedure
- Position the rear seat HVAC control (2) to the rear seat trim plate.
- Install the rear seat HVAC control (2) to the rear seat trim plate by pressing inward until the retaining tabs are fully seated.
- Position the rear seat audio control (3) to the rear seat trim plate.
- Install the rear seat audio control (3) to the rear seat trim plate by pressing inward until the retaining tabs are fully seated.
- Connect the electrical connector (1) to the rear seat HVAC control.
- Connect the electrical connector (4) to the rear seat audio control.
- Align the front floor console rear trim plate retainer tabs to the front floor console.
- Install the front floor console rear trim plate, by pressing in until the retainer tabs are fully seated.

