Front Floor Console Trim Plate Replacement Aztek
Removal Procedure
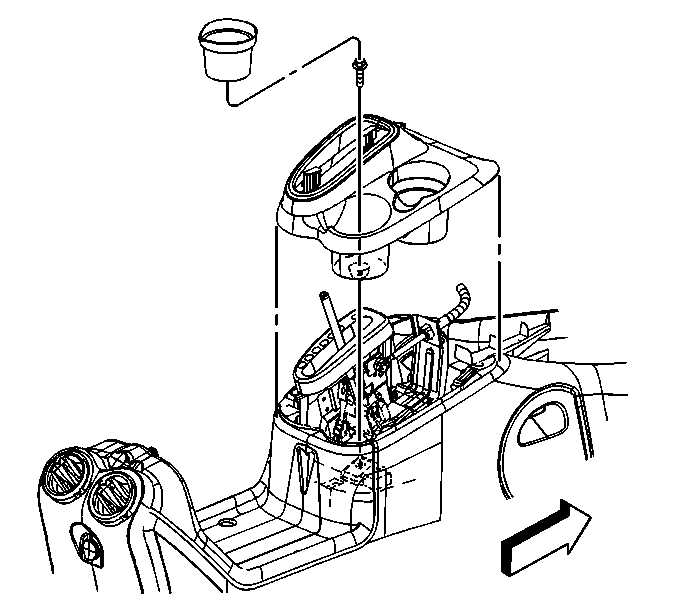
- Remove rear cup holder liner and remove the screw.
- Pull up on the trim plate to release the retainer clips.
- Lift the trim plate and turn sideways in order to lift the trim plate over the transaxle shift lever.
- Remove the trim plate from the front floor console.

Installation Procedure
- Align the trim plate to the front floor console.
- Position the trim plate over the transaxle shift lever.
- Install the trim plate to the front floor console and snap into place.
- Install the rear trim plate screw and insert the cup holder liner.

Notice: Use the correct fastener in the correct location. Replacement fasteners must be the correct part number for that application. Fasteners requiring replacement or fasteners requiring the use of thread locking compound or sealant are identified in the service procedure. Do not use paints, lubricants, or corrosion inhibitors on fasteners or fastener joint surfaces unless specified. These coatings affect fastener torque and joint clamping force and may damage the fastener. Use the correct tightening sequence and specifications when installing fasteners in order to avoid damage to parts and systems.
Tighten
Tighten the screw to 2 N·m (18 lb in).
Front Floor Console Trim Plate Replacement Rendezvous
Removal Procedure
- Lift the armrest cover and place the cover in the locked position.
- Remove the cup holder liners.
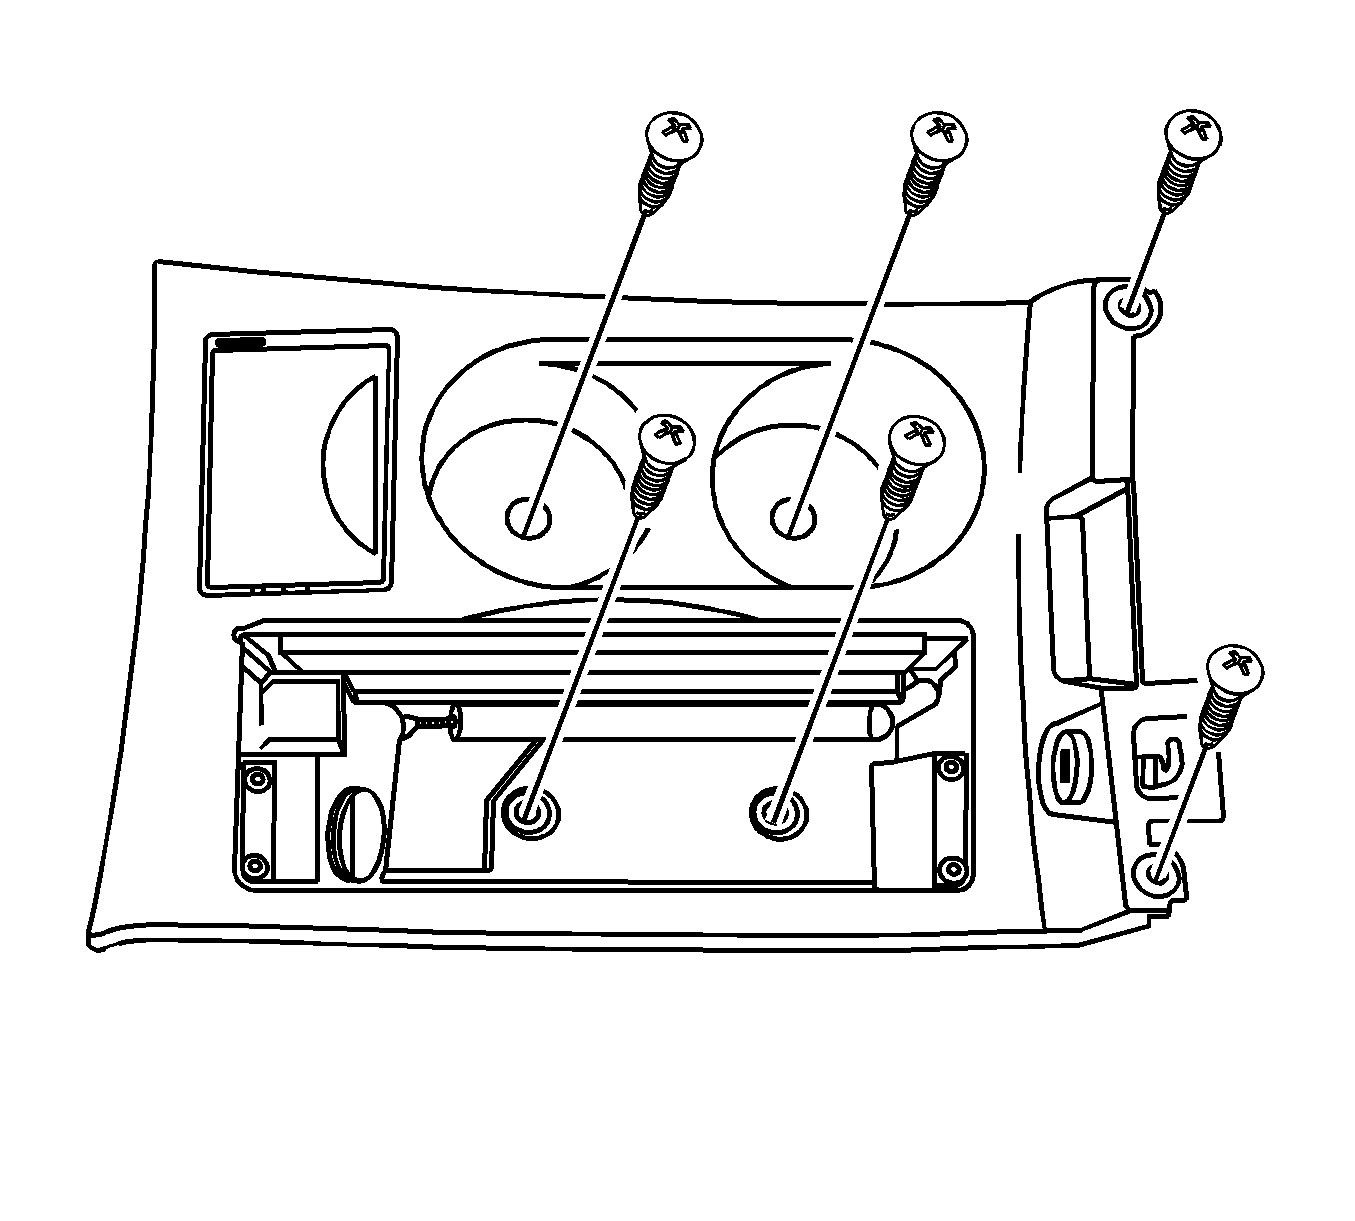
- Remove the cup holder screws.
- Remove the power accessory liner.
- Remove the liner screws.
- Disconnect the electrical connectors from the trim plate.
- Remove the trim plate assembly.

Installation Procedure
- Connect the electrical connectors to the trim plate.
- Install the trim plate assembly.
- Install the trim plate screws.
- Install the cup liners.
- Install the power accessory liners.
- Close the armrest cover.

Notice: Refer to Fastener Notice in the Preface section.
Tighten
Tighten the screws to 2 N·m (18 lb in).
