Removal Procedure
- Remove the air inlet duct. Refer to Air Cleaner Assembly Replacement for the 3.5L engine or Air Cleaner Assembly Replacement for the 3.6L engine.
- Disconnect the evaporative emission (EVAP) canister purge solenoid pipe at the intake plenum. Refer to Evaporative Emission Canister Purge Solenoid Valve Replacement for the 3.5L engine or Evaporative Emission Canister Purge Solenoid Valve Replacement for the 3.6L engine.
- Remove the engine mount struts. Refer to Engine Mount Strut Replacement - Right Side for the 3.5L engine or Engine Mount Strut Replacement - Right Side for the 3.6L engine.
- Remove the shift cable bracket from the transmission.
- Raise and support the vehicle. Refer to Lifting and Jacking the Vehicle .
- Remove the left front tire and wheel. Refer to Tire and Wheel Removal and Installation .
- Remove the left engine splash shield. Refer to Engine Splash Shield Replacement .
- Remove the left tie rod end from the steering knuckle. Refer to Rack and Pinion Outer Tie Rod End Replacement .
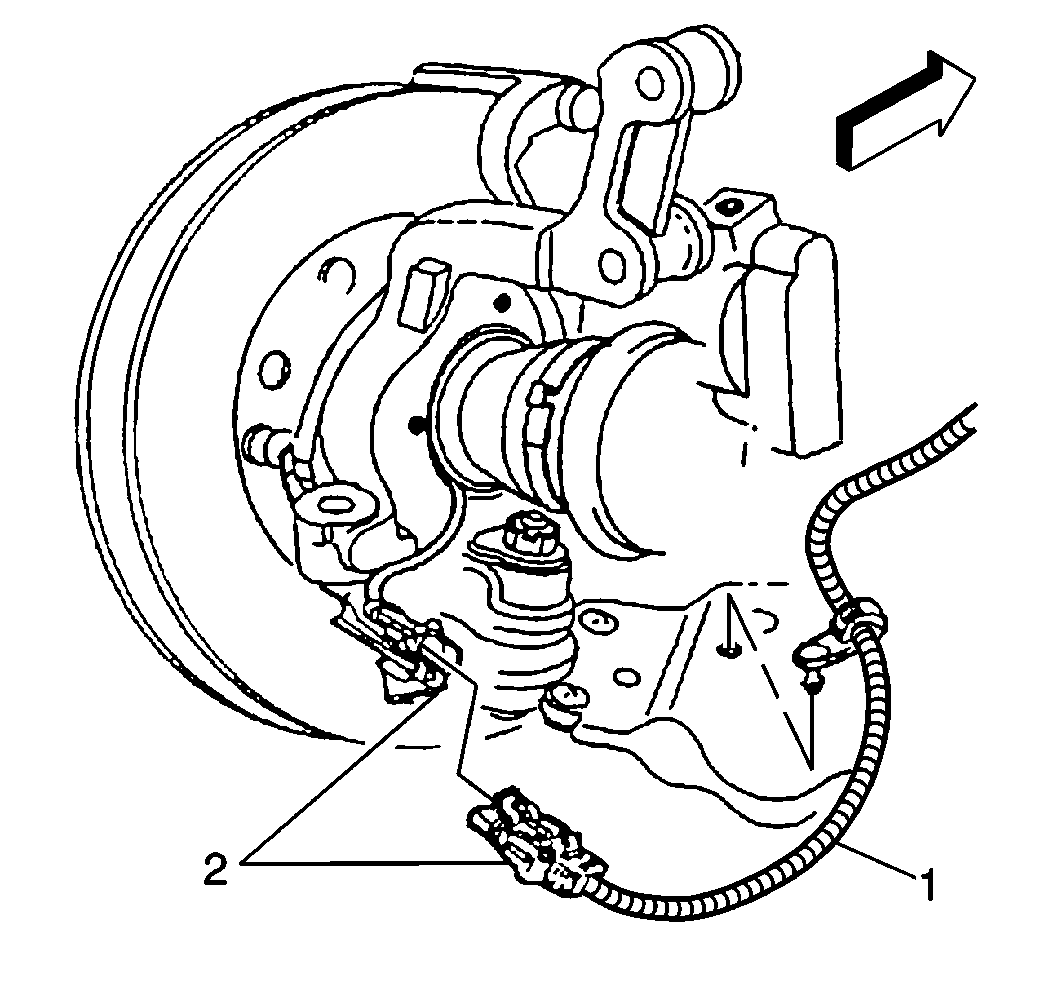
- Remove the left wheel speed sensor harness connector (2) and the harness (1) from the lower control arm.
- Remove the left lower ball joint from the left steering knuckle. Refer to Lower Control Arm Ball Joint Replacement .
- Remove the left stabilizer . Refer to Stabilizer Shaft Link Replacement .
- Reposition and secure the drive axle toward the rear of the vehicle.
- Remove the trans mount nuts at the frame.
- Remove the intermediate shaft (1) from the steering gear (2). Refer to Intermediate Steering Shaft Replacement .
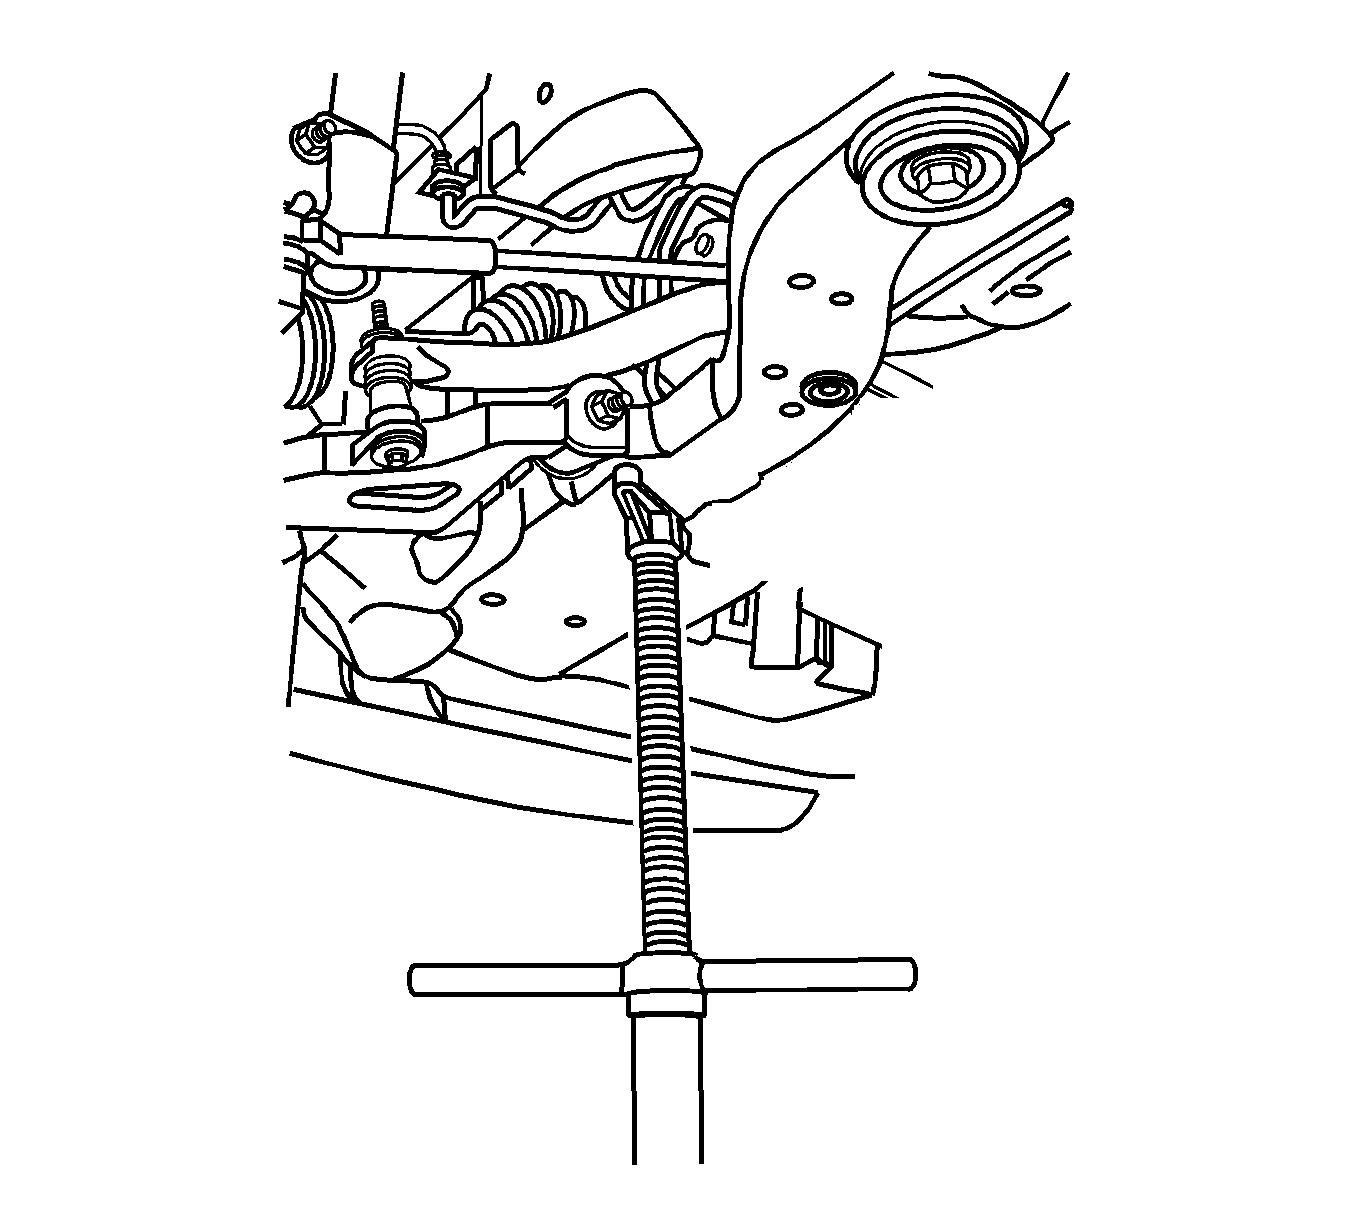
- Support the left side of the frame with a utility stand.
- Remove the left side frame bolts.
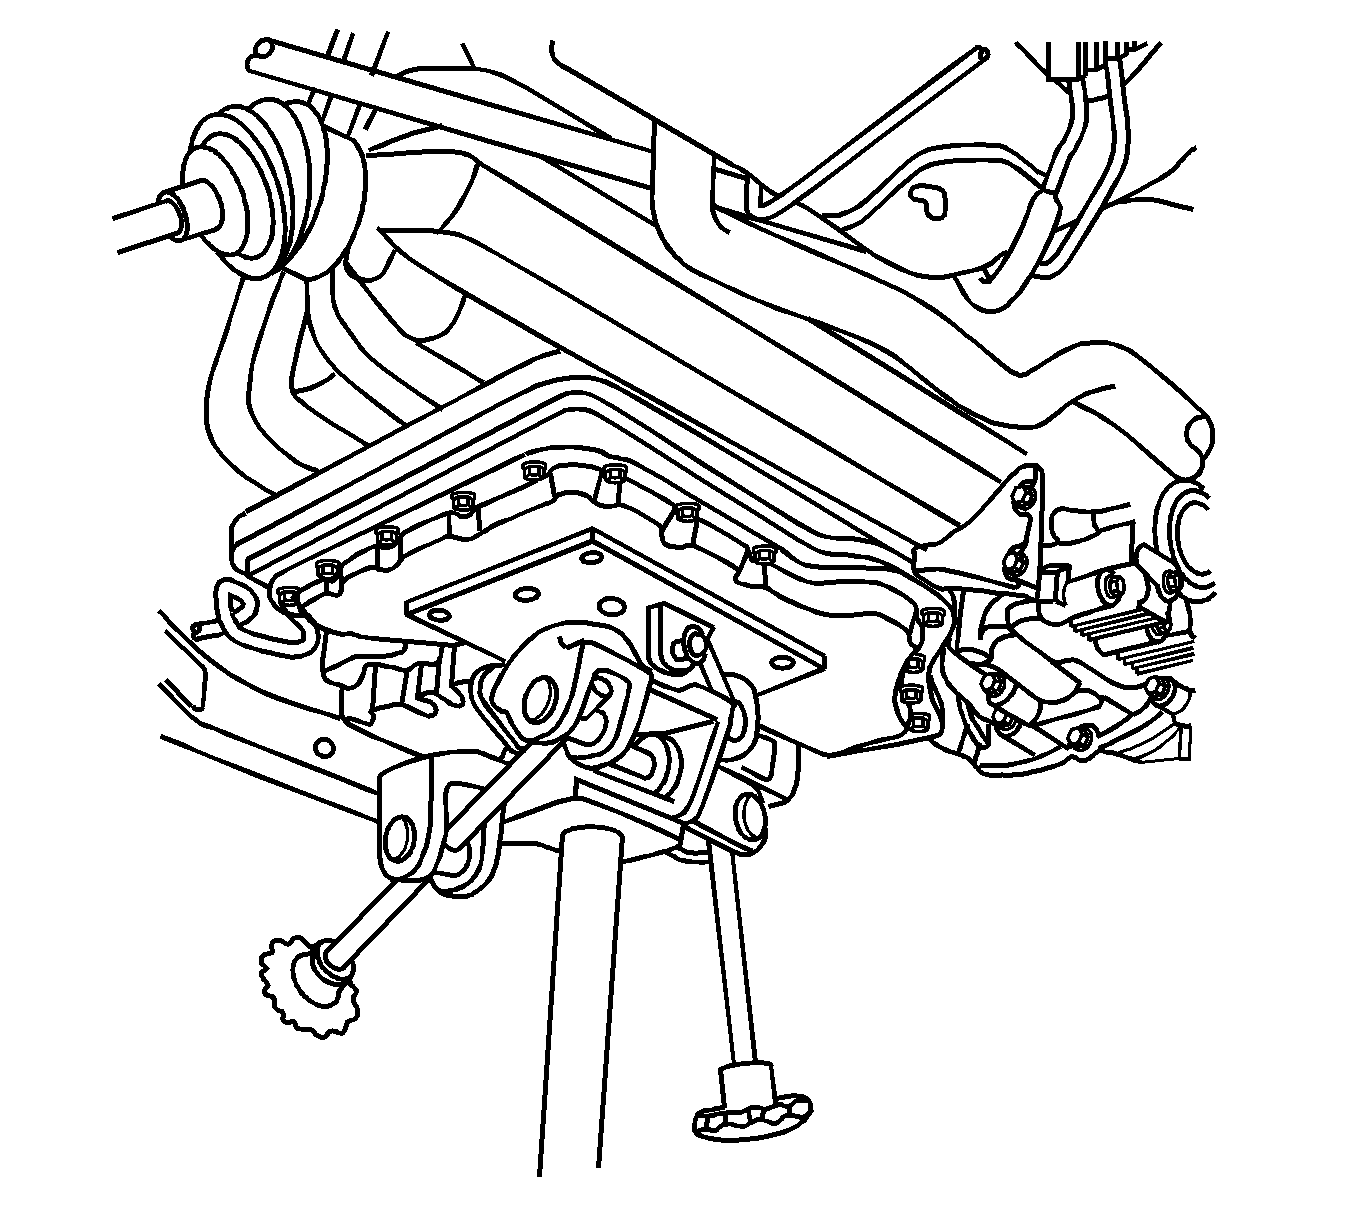
- Use the utility stand in order to lower the left side of the powertrain enough to gain access the case side cover bolts.
- Support the transmission with a transmission jack.
- Use the utility stand in order to lower the left side of the frame enough to access the case side cover lower bolts.
- Position the drain pan under the transaxle.
- Disconnect the transaxle wiring harness electrical connectors.
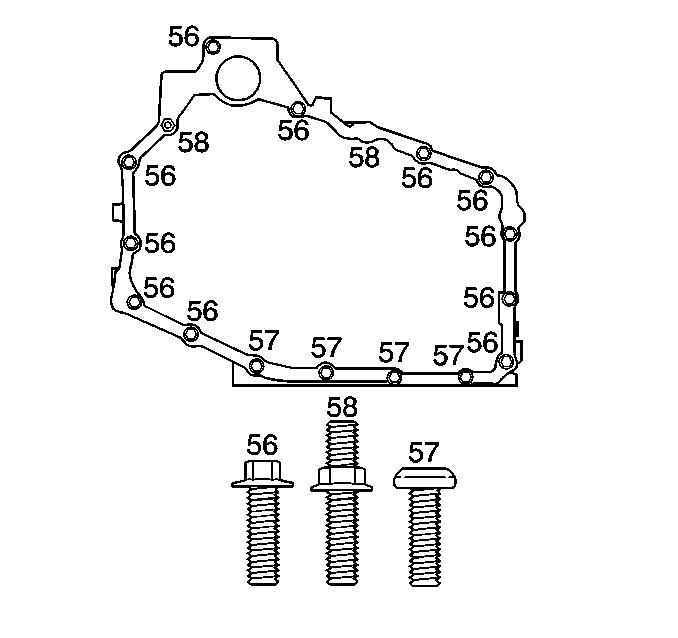
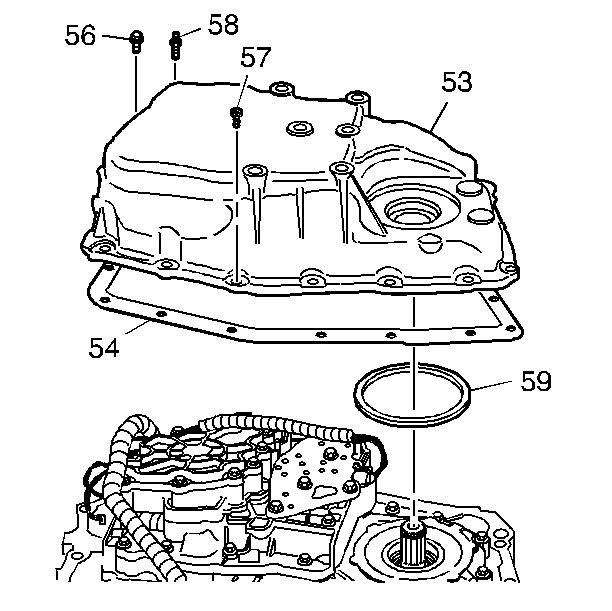
- Remove the case side cover bolts (56-58).
- Remove the case side cover pan (53).
- Remove the case side cover gasket (54).
- Remove the case side cover inner gasket (59).
- Inspect the case side cover (53) for the following conditions:
- Inspect the case side cover gasket (54) and case side cover inner gasket (59) for damage. The gaskets are reusable if they are NOT damaged.
- Clean the case side cover gasket surfaces.
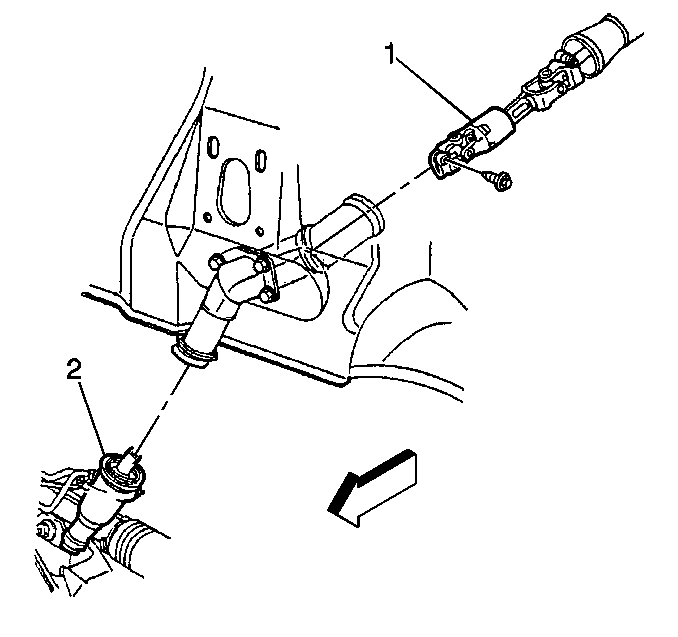
Caution: Failure to disconnect the intermediate shaft from the rack and pinion stub shaft can result in damage to the steering gear and/or damage to the intermediate shaft. This damage may cause loss of steering control which could result in personal injury.
If not replacing the side cover, steps 24, 25, 26, and 27 are not required.
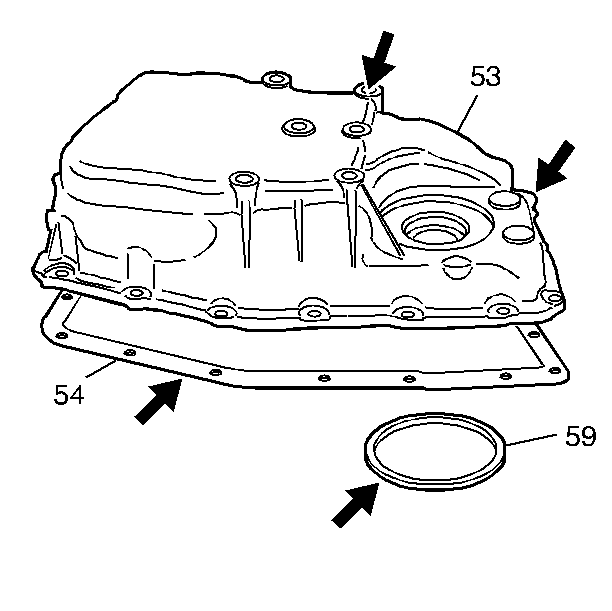
| • | Damaged or porous gasket sealing surfaces |
| • | Damaged or porous casting surfaces |
| • | Damaged or stripped bolt holes |
Installation Procedure
- If replacing with new side cover, install the case side cover inner gasket (59).
- Install the case side cover gasket (54).
- Install the case side cover pan (53).
- Install the case side cover bolts (56-58).
- Install the transaxle mount bracket. Refer to Transmission Mount Bracket Replacement .
- Connect the transaxle wiring harness connectors.
- Partially raise the frame enough to engage the intermediate shaft to the steering gear.
- Install the intermediate shaft (1) to the steering gear (2). Refer to Intermediate Steering Shaft Replacement .
- Use the utility stand in order to raise the frame and powertrain until the frame insulators contact the chassis.
- Remove the transmission jack.
- Install the left drive axle to the transaxle. Refer to Transmission Replacement .
- Remove the drain pan from under the transaxle.
- Install the left side frame bolts. Refer to Front Frame Replacement .
- Remove the utility stand support from the left side of the frame.
- Install the left lower ball joint to the steering knuckle. Refer to Lower Control Arm Ball Joint Replacement .
- Install the left stabilizer link. Refer to Stabilizer Shaft Link Replacement .
- Install the trans mount nuts at the frame.
- Install the wheel speed sensor harness connector (2) and harness (1) to the lower control arm.
- Install the left tie rod end to the steering knuckle. Refer to Rack and Pinion Outer Tie Rod End Replacement .
- Install the left engine splash shield. Refer to Engine Splash Shield Replacement .
- Install the left front tire and wheel. Refer to Tire and Wheel Removal and Installation .
- Lower the vehicle.
- Install the engine mount struts. Refer to Engine Mount Strut Replacement - Right Side for the 3.5L engine or Engine Mount Strut Replacement - Right Side for the 3.6L engine.
- Connect the EVAP canister purge solenoid pipe at the intake plenum. Refer to Evaporative Emission Canister Purge Solenoid Valve Replacement for the 3.5L engine or Evaporative Emission Canister Purge Solenoid Valve Replacement for the 3.6L engine.
- Install the air inlet duct. Refer to Air Cleaner Assembly Replacement for the 3.5L engine or Air Cleaner Assembly Replacement for the 3.6L engine.
- Install the shift cable bracket.
- Adjust the fluid level. Refer to the following procedures:
- Inspect for fluid leaks.

Notice: Refer to Fastener Notice in the Preface section.

Tighten
Tighten the case side cover bolts (56-58) to 25 N·m (18 lb ft).
Caution: When installing the intermediate shaft make sure that the shaft is seated prior to pinch bolt installation. If the pinch bolt is inserted into the coupling before shaft installation, the two mating shafts may disengage. Disengagement of the two mating shafts will cause loss of steering control which could result in personal injury.


Important: Ensure the ball joint is in position with the steering knuckle, intermediate shaft is in position with the steering gear, and the transaxle studs are aligned to the frame.
Tighten
| • | Tighten the front frame bolts to 155 N·m (114 lb ft). |
| • | Tighten the rear frame bolts to 240 N·m (177 lb ft). |

Notice: Do NOT overfill the transaxle. The overfilling of the transaxle causes foaming, loss of fluid, shift complaints, and possible damage to the transaxle.
