For 1990-2009 cars only
Removal Procedure
- Remove the knee bolster. Refer to Knee Bolster Replacement .
- Set the HVAC controls to the vent mode and full cold to position the defroster door lever.
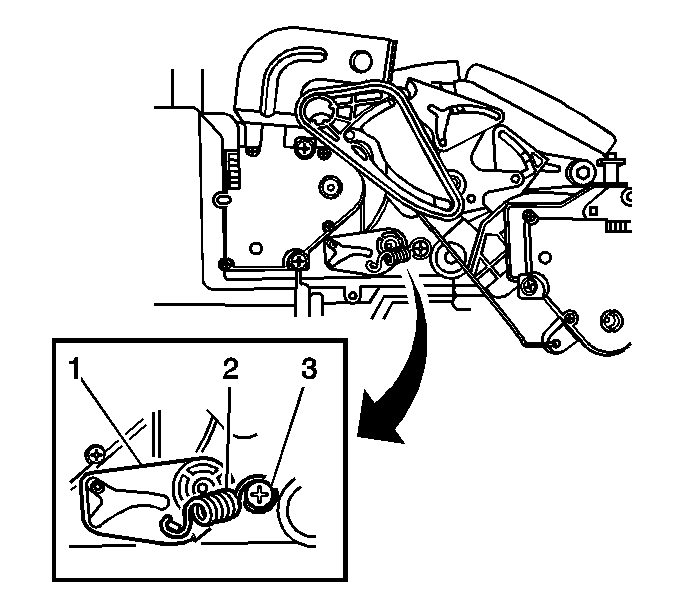
- Remove the left hand temperature door lever bolt (3) from the HVAC module.
- Disconnect and remove the left hand temperature door lever spring (2).
- Disconnect and remove the left hand temperature door lever (1) from the left hand temperature door.
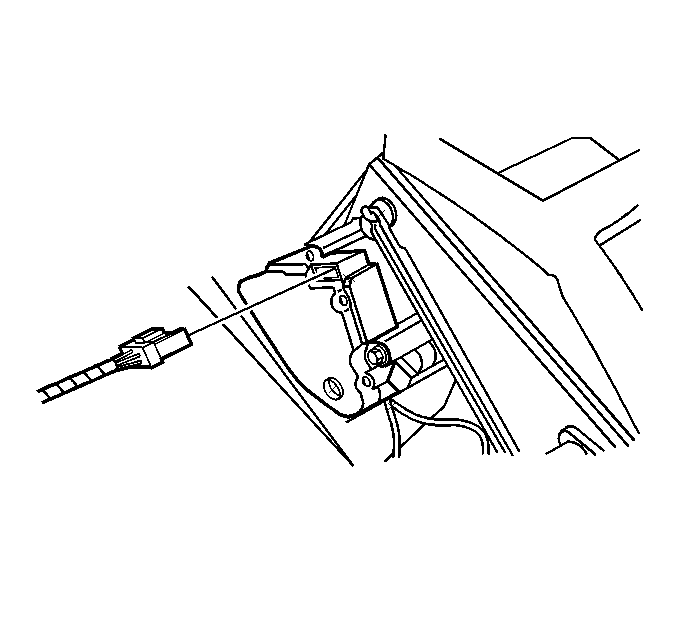
- Disconnect the left hand air temperature actuator electrical connector.
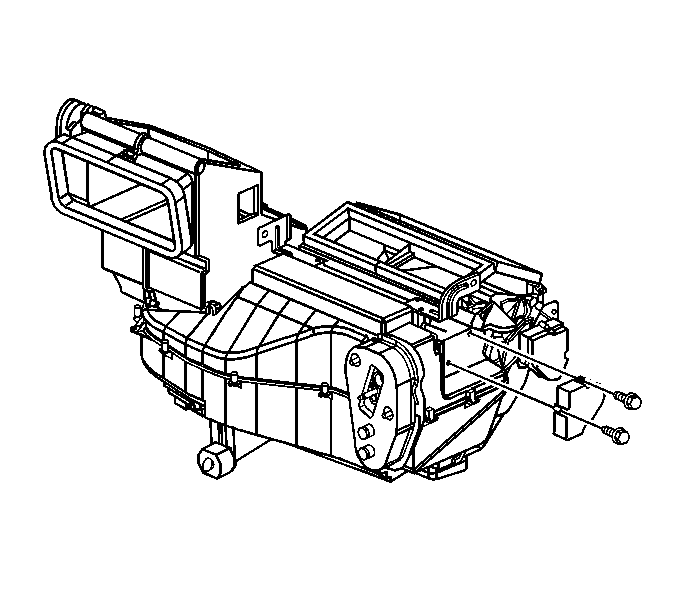
- Remove the left hand air temperature actuator mounting screws.
- Remove the left hand air temperature actuator.
Important: The HVAC controls must be set to the vent mode to position the defroster door lever for access to the air temperature actuator.


Installation Procedure
- Install the left hand air temperature actuator.
- Install the left hand air temperature actuator mounting screws.
- Connect the left hand air temperature actuator electrical connector.
- Install the left hand temperature door lever (1) to the left hand temperature door.
- Connect the left hand temperature door lever spring (2) to the left hand temperature door lever (1) and HVAC module case.
- Install the left hand temperature door lever bolt (3) to the HVAC module case.
- Install the knee bolster. Refer to Knee Bolster Replacement .

Notice: Refer to Fastener Notice in the Preface section.
Tighten
Tighten the screws to 1.6 N·m (14 lb in).

Important: Confirm the temperature mode is set to cold. Align the pin on the left hand air temperature actuator with the slot in the left hand temperature door lever.

Tighten
Tighten the bolt to 0.9 N·m (8 lb in).
