For 1990-2009 cars only
Removal Procedure
- Relieve the fuel system pressure. Refer to Fuel Pressure Relief .
- Remove the fuel filler cap.
- Drain the fuel tank. Refer to Fuel Tank Draining .
- Raise the vehicle. Refer to Lifting and Jacking the Vehicle in General Information.
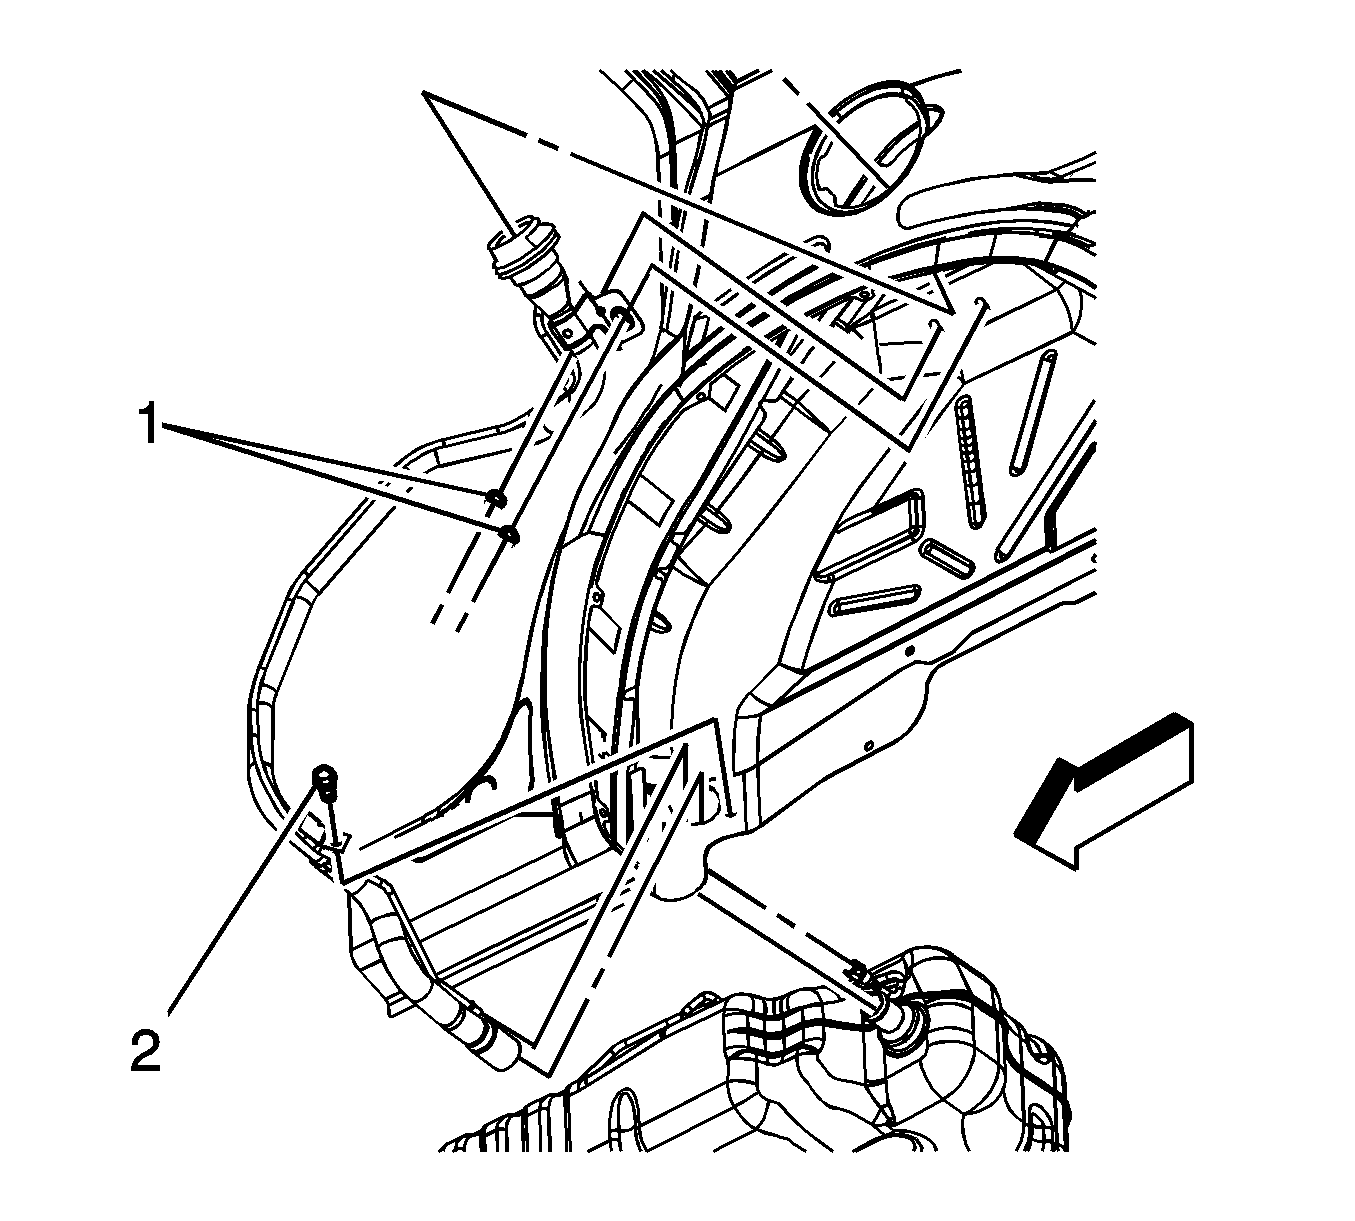
- Remove the fuel filler pipe nuts (1).
- Remove the fuel filler pipe bolt (2).
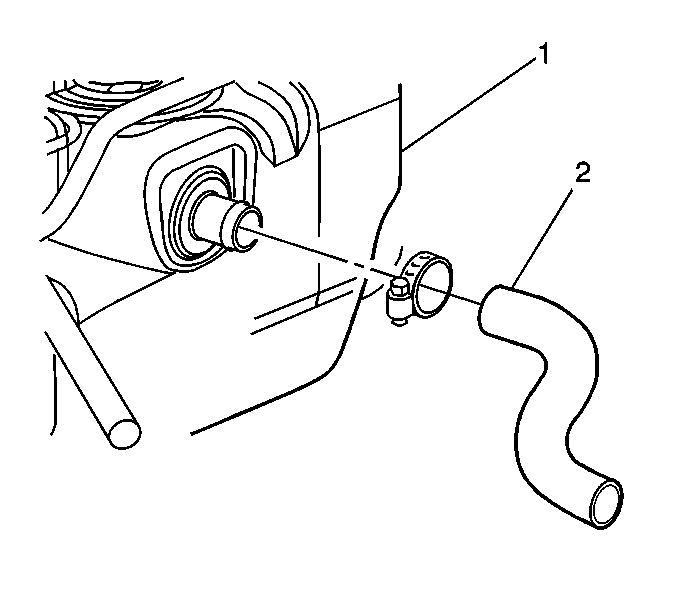
- Loosen the fuel filler pipe clamp.
- Remove the fuel filler pipe hose (2) from the fuel tank (1).
- Disconnect the vent pipe near the fill pipe hose.
- Remove the fuel filler pipe from the fuel filler pocket.

Notice: Cap the fittings and plug the holes when servicing the fuel system in order to prevent dirt and other contaminants from entering the open pipes and passages.
Important: Always maintain cleanliness when servicing fuel system components.

Installation Procedure
- Install the fuel filler pipe through the fuel filler pocket.
- Connect the vent pipe near the fill pipe hose.
- Install the fuel filler pipe (2) to the fuel tank (1). Fully seat the fill pipe to stop on the tank.
- Install the fuel filler pipe bolt (2).
- Install the fuel filler pipe nuts (1).
- Lower the vehicle.
- Refill the fuel tank.
- Tighten the fuel filler cap.
- Reconnect the negative battery cable. Refer to Battery Negative Cable Disconnection and Connection in Engine Electrical.
- Inspect for fuel leaks with the following procedure:
Notice: Refer to Fastener Notice in the Preface section.

Tighten
The fuel filler pipe hose clamp to 2.5 N·m (22 lb in).

Tighten
The fuel filler pipe bolt to 25 N·m (18 lb ft).
Tighten
Tighten the fuel filler pipe nut to 6 N·m (53 lb in).
| 10.1. | Turn ON the ignition for 2 seconds. |
| 10.2. | Turn OFF the ignition for 10 seconds. |
| 10.3. | Turn ON the ignition. |
| 10.4. | Inspect for fuel leaks. |
