For 1990-2009 cars only
Tools Required
| • | J 38185 Hose Clamp Pliers |
| • | J 39400-A Halogen Leak Detector |
Removal Procedure
- Recover the refrigerant from the A/C system. Refer to Refrigerant Recovery and Recharging .
- Drain the cooling system. Refer to Cooling System Draining and Filling .
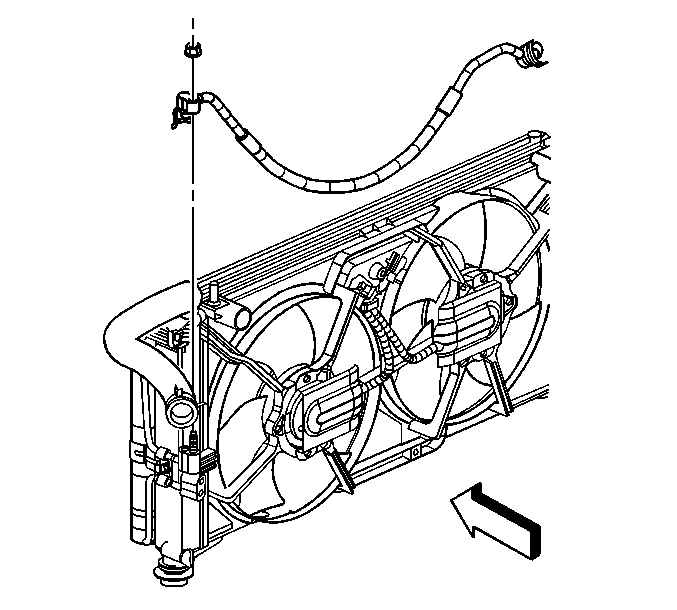
- Remove the cooling fans with the cooling fan shroud. Refer to Engine Cooling Fan Replacement .
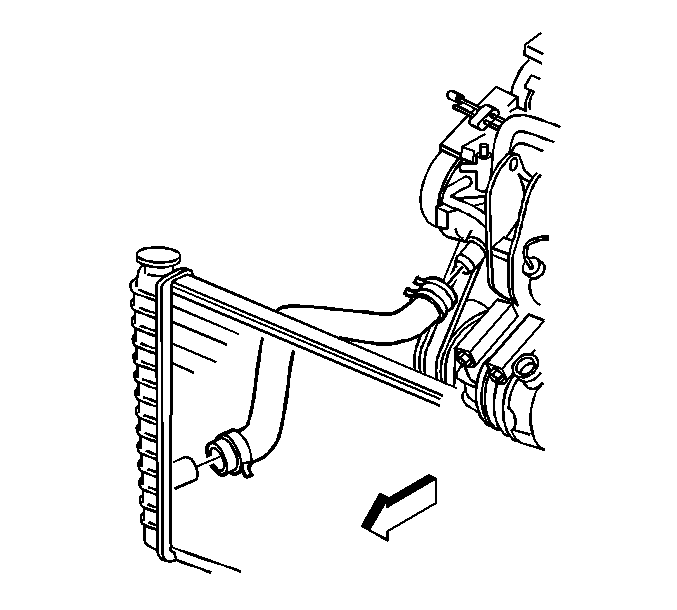
- Reposition the hose clamp at the water pump housing using the J 38185 .
- Disconnect the radiator outlet hose from the water pump housing.
- Raise the vehicle. Refer to Lifting and Jacking the Vehicle .
- Reposition the hose clamp at the radiator using the J 38185 .
- Disconnect the radiator outlet hose from the radiator.
- Remove the radiator outlet hose.
- Disconnect the lower TOC line from the radiator. Refer to Transmission Fluid Cooler Hose/Pipe Quick-Connect Fitting Disconnection and Connection .
- Lower the vehicle.
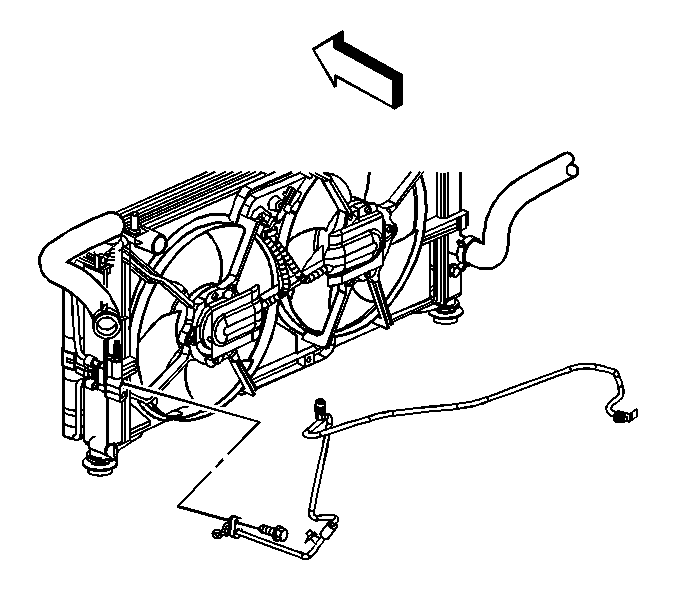
- Remove the nut which secures the A/C discharge hose to the condenser block.
- Disconnect the A/C discharge hose from the condenser block.
- Remove and discard the sealing washer.
- Cap or tape off the A/C discharge hose.
- Remove the bolt which secures the evaporator inlet tube to the condenser block.
- Disconnect the evaporator inlet tube from the condenser block.
- Cap or tape off the evaporator inlet tube.
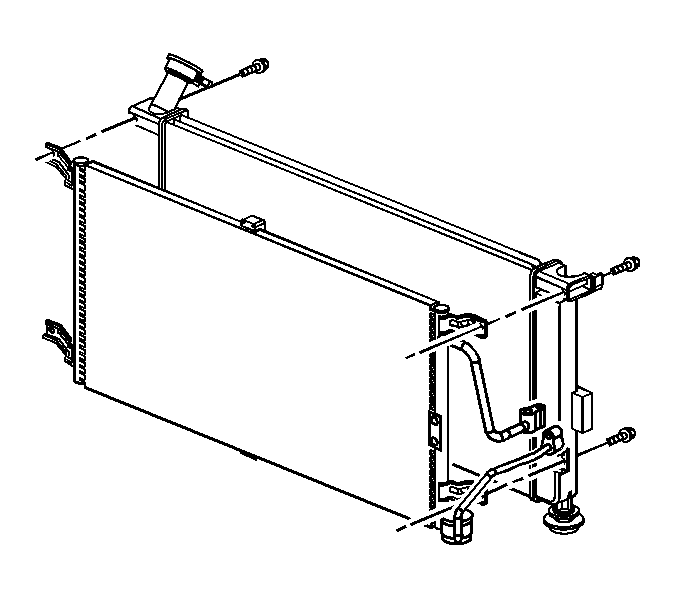
- Remove the radiator and condenser assembly.
- Remove the condenser tube clip bolt.
- Remove the condenser mounting bolts.
- Remove the condenser from the radiator.


Important: Cap or tape off the open A/C hose immediately to prevent system contamination.


Installation Procedure
- Install the condenser to the radiator.
- Install the mounting bolts that secure the condenser to the radiator.
- Install the condenser tube clip bolt.
- Install the radiator and condenser assembly.
- Remove the cap or the tape from the evaporator inlet tube.
- Install a new seal washer to the evaporator inlet tube. Refer to Sealing Washer Replacement .
- Install the evaporator inlet tube and the bolt to the condenser block.
- Remove the cap or the tape from the A/C discharge hose.
- Install a new sealing washer to the A/C discharge hose. Refer to Sealing Washer Replacement .
- Install the A/C discharge hose and the nut to the condenser block.
- Raise the vehicle.
- Connect the lower TOC line to the radiator. Refer to Transmission Fluid Cooler Hose/Pipe Quick-Connect Fitting Disconnection and Connection .
- Install the radiator outlet hose.
- Connect the radiator outlet hose to the radiator.
- Reposition the hose clamp at the radiator to secure the hose using the J 38185 .
- Lower the vehicle.
- Connect the radiator outlet hose to the water pump housing.
- Reposition the hose clamp at the water pump housing to secure the hose using the J 38185 .
- Install the cooling fans with the cooling fan shroud. Refer to Engine Cooling Fan Replacement .
- Fill the cooling system. Refer to Cooling System Draining and Filling .
- Evacuate and recharge the A/C system. Refer to Refrigerant Recovery and Recharging .
- Leak test the fittings of the component using the J 39400-A .
- Inspect the transmission fluid level. Refer to Transmission Fluid Check .

Notice: Refer to Fastener Notice in the Preface section.
Tighten
Tighten the bolts to 6 N·m (53 lb in).
Tighten
Tighten the bolt to 2.5 N·m (22 lb in).

Tighten
Tighten bolt to 16 N·m (12 lb ft).

Tighten
Tighten the nut to 16 N·m (12 lb ft).

