For 1990-2009 cars only
Removal Procedure
- Remove the engine mount strut. Refer to Engine Mount Strut Replacement - Right Side .
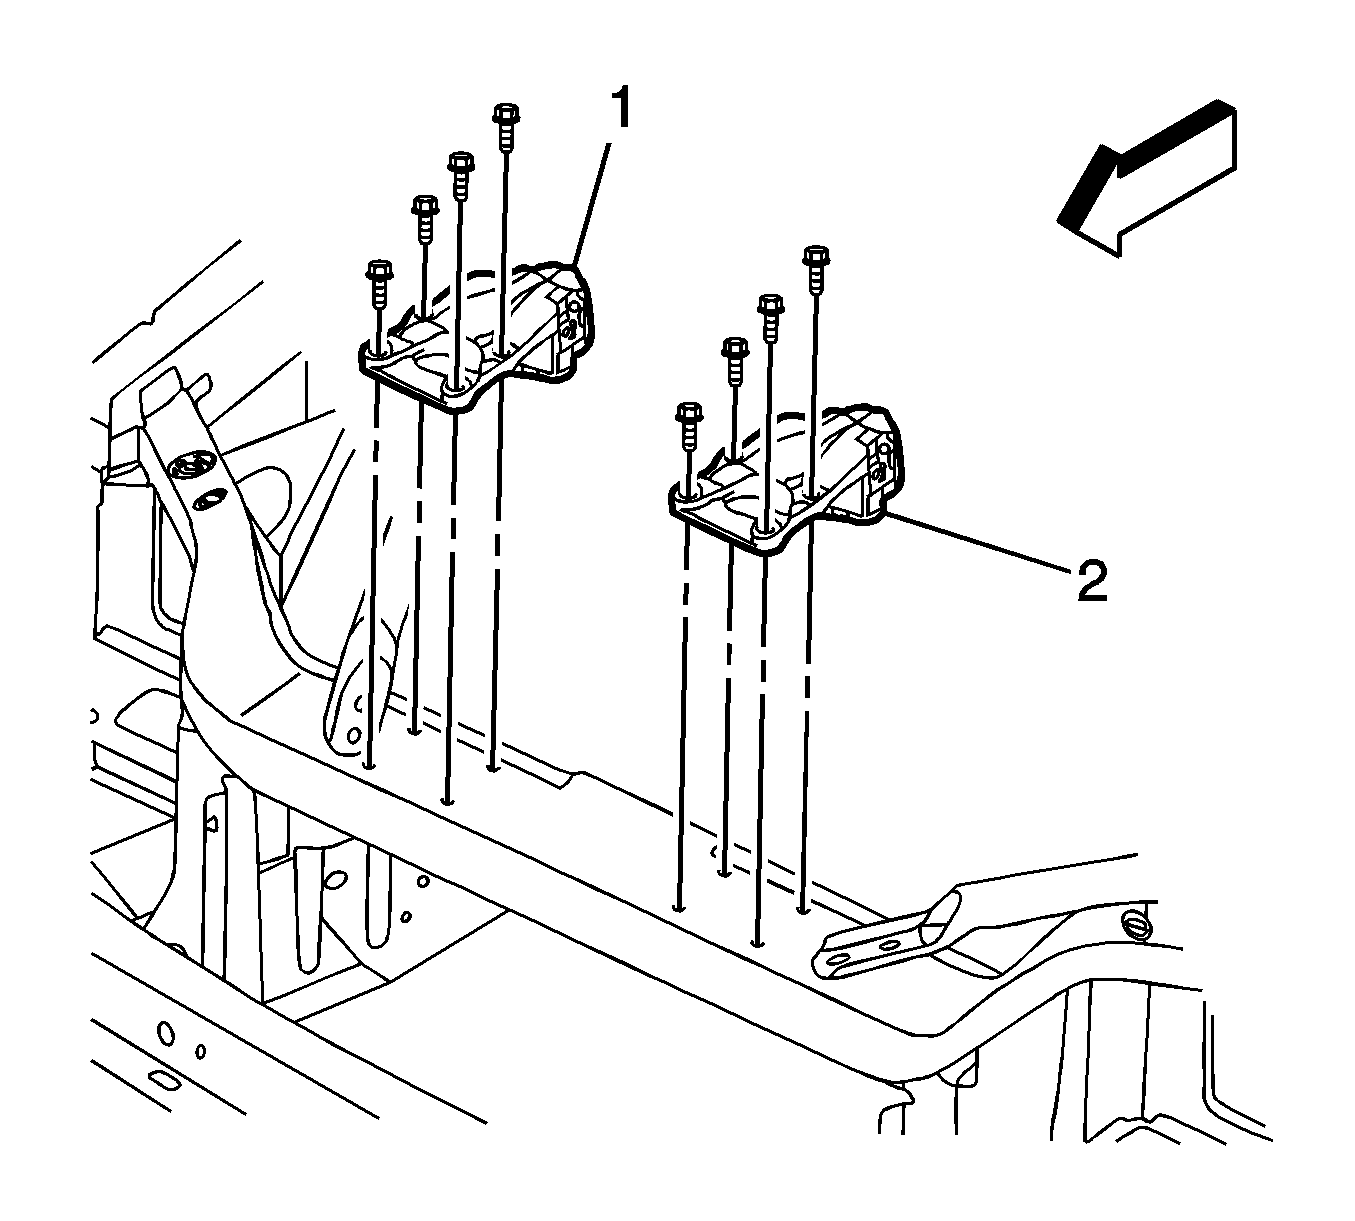
- Remove the engine mount strut bracket bolts from the radiator support, if required.
- Remove the engine mount strut bracket, if required.
- If removal of the engine mount strut/air conditioning (AC) compressor bracket is required, perform the following steps.
- Remove the drive belt. Refer to Drive Belt Replacement .
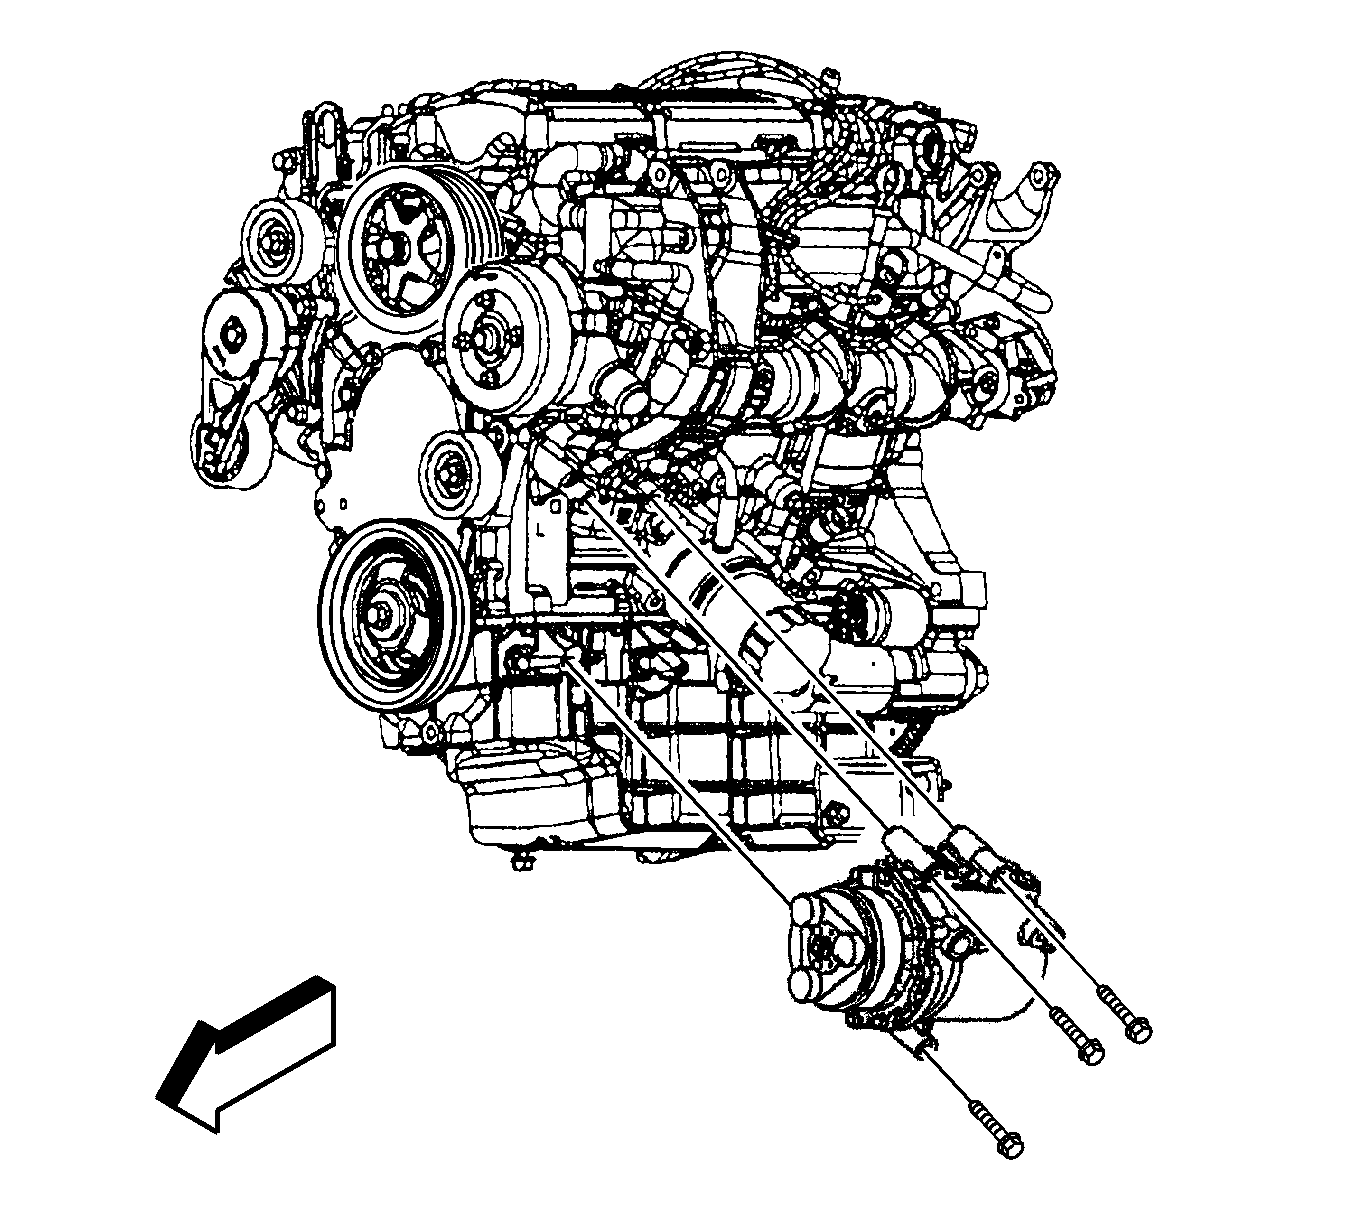
- Remove the AC compressor bolts.
- Remove and set the AC compressor aside.
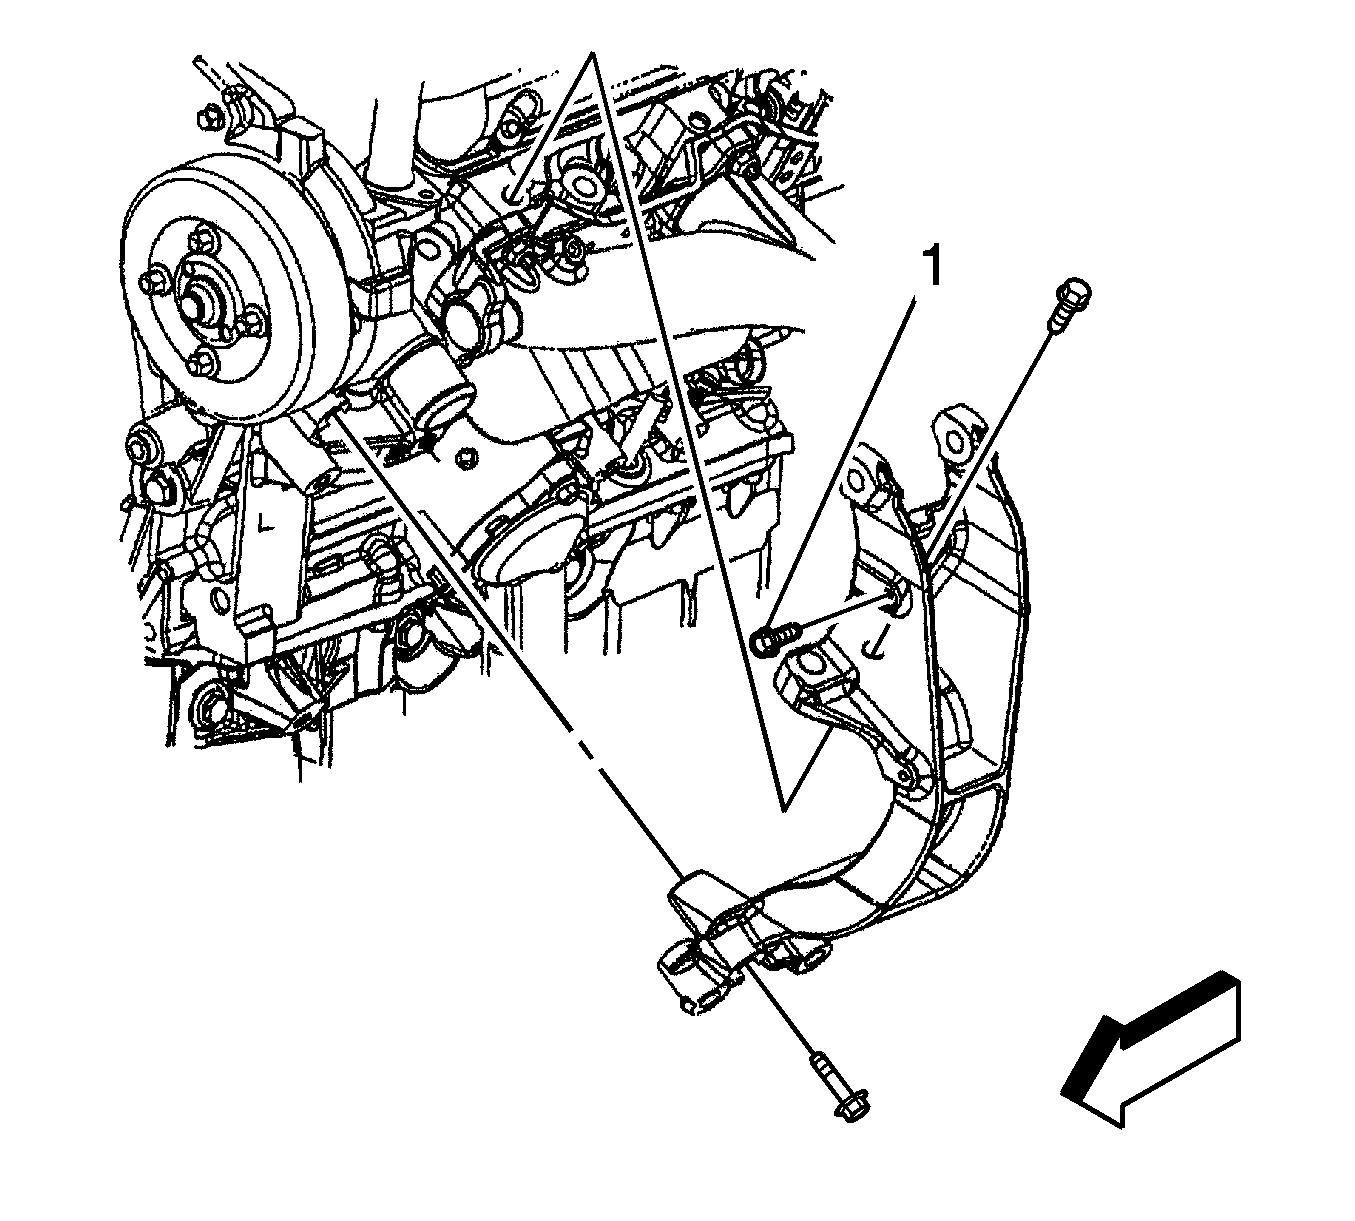
- Remove the engine oil cooler pipe bolt (1), if equipped.
- Remove the engine mount strut/AC compressor bracket bolts.
- Remove the engine mount strut/AC compressor bracket.


Installation Procedure
- Install the engine mount strut/AC compressor bracket.
- Install the engine mount strut/AC compressor bracket bolts.
- Install the engine oil cooler pipe bolt (1), if equipped.
- Position the AC compressor aside.
- Install the AC compressor bolts.
- Install the drive belt. Refer to Drive Belt Replacement .
- Install the engine mount strut bracket, if required.
- Install the engine mount strut bracket bolts to the radiator support, if required.
- Install the engine mount strut. Refer to Engine Mount Strut Replacement - Right Side .

Notice: Refer to Fastener Notice in the Preface section.
Tighten
Tighten the bolts to 50 N·m (37 lb ft).
Tighten
Tighten the bolt to 10 N·m (89 lb in).

Tighten
Tighten the bolts to 50 N·m (32 lb ft).

Tighten
Tighten the bolts to 50 N·m (32 lb ft).
