Radiator Hose Replacement for Buick Roadmaster 1996
Removal Procedure
- Disconnect the negative battery cable. Refer to
Caution: Unless directed otherwise, the ignition and start switch must be in the OFF or LOCK position, and all electrical loads must be OFF before servicing any electrical component. Disconnect the negative battery cable to prevent an electrical spark should a tool or equipment come in contact with an exposed electrical terminal. Failure to follow these precautions may result in personal injury and/or damage to the vehicle or its components.
in General Information. - Drain the coolant to a level below the hose being removed. Refer to Cooling System Draining and Filling .
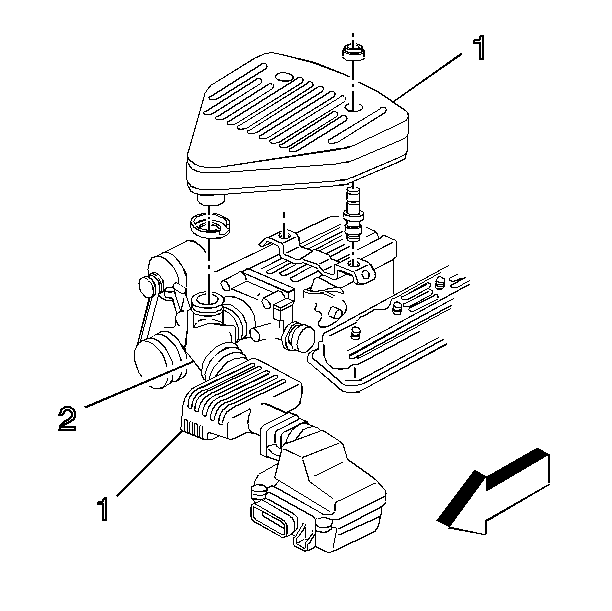
- Remove the air cleaner rear resonator (1).
- Disconnect the Intake Air Temperature (IAT) sensor electrical connector.
- Loosen the clamps on the rear intake duct at the engine, and on the air cleaner front resonator at the Mass Air Flow (MAF) sensor.
- Remove the rear intake duct and the air cleaner front resonator pump.
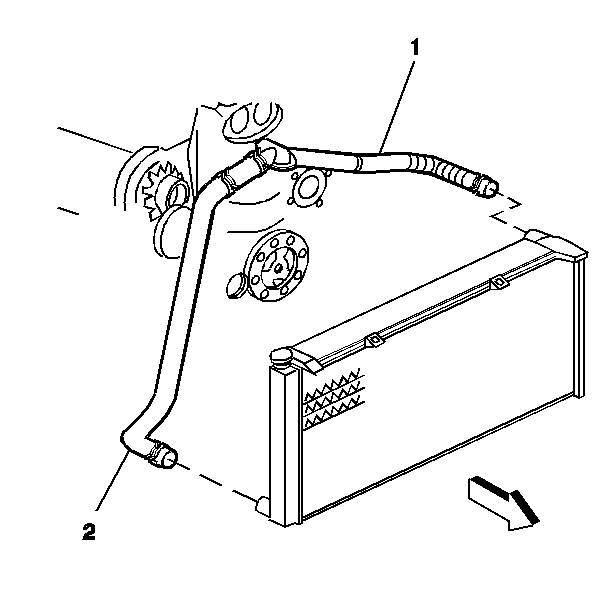
- Remove the radiator inlet hose (1) at the radiator and the coolant pump.
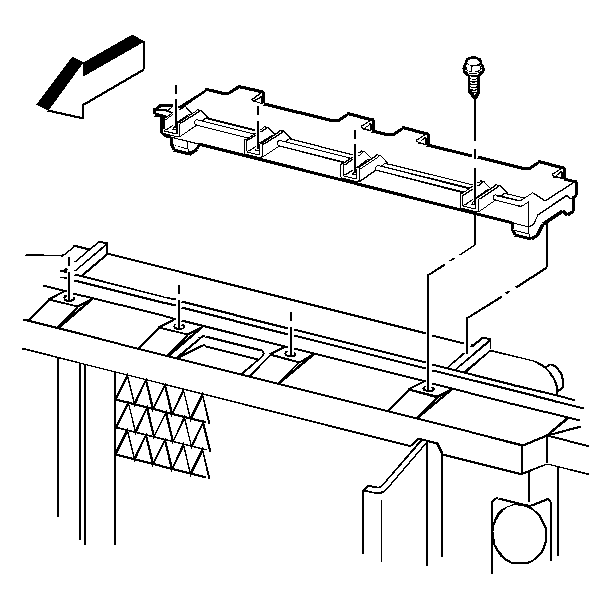
- Remove the radiator upper mounting panel (base cooling system or RPO VO3 cooling system),
- Remove the radiator fan upper shroud (RPO VO8 cooling system only) Refer to Fan Shroud Replacement .
- Remove the nuts that fasten the radiator outlet hose bracket to the air conditioning compressor studs (RPO VO8 cooling system only).
- Remove the radiator outlet hose (2) at the coolant pump inlet.
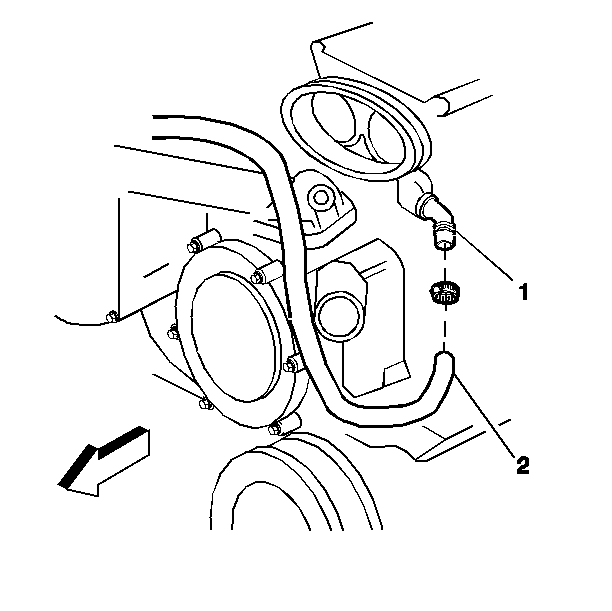
- Remove the coolant recovery reservoir front hose (2) at the reservoir and the throttle body tube (1).
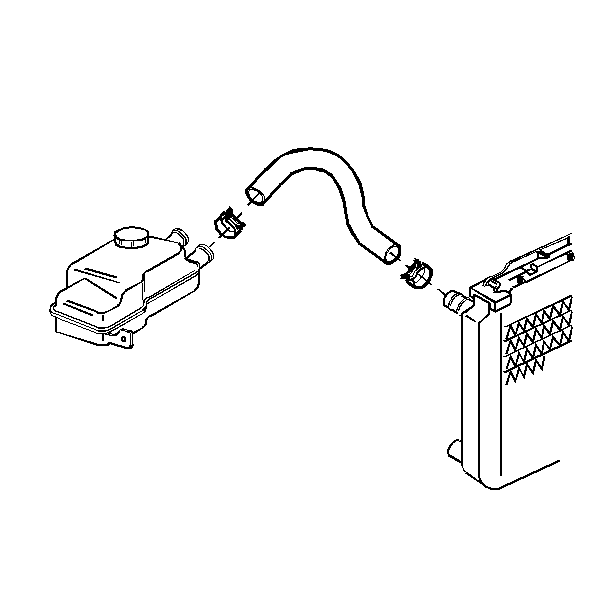
- Remove the coolant recovery reservoir rear hose at the reservoir and the radiator.
- Raise the vehicle. Suitably support the vehicle.
- Remove the radiator outlet hose (2) from the radiator.
Notice: When adding coolant, it is important that you use GM Goodwrench DEX-COOL™ coolant. If coolant other than DEX-COOL™ is added to the system, the engine coolant will require change sooner: at 50 000 km (30,000 miles) or 24 months.
Installation Procedure
- Install the radiator outlet hose (2) at the radiator.
- Lower the vehicle.
- Install the coolant recovery reservoir rear hose at the reservoir and the radiator.
- Install the coolant recovery reservoir front hose (2) at the reservoir and the throttle body tube (1). Make sure that the front hose routes underneath the rear hose.
- Install the radiator outlet hose (2) at the thermostat housing.
- Install the radiator outlet hose bracket to the air conditioner compressor studs (RPO VO8 cooling system only).
- Install the air conditioning compressor stud nuts (RPO VO8 cooling system only).
- Install the radiator upper mounting panel (base and RPO VO3 cooling system).
- Install the radiator fan upper shroud (RPO VO8 cooling system only). Refer to Fan Shroud Replacement .
- Install the radiator inlet hose (1) at the radiator and the coolant pump.
- Install the rear air intake duct and the air cleaner front resonator as a unit.
- Tighten the clamps snugly on the rear air intake duct at the engine, and on the air cleaner front resonator at the Mass Air Flow (MAF) sensor.
- Install the Intake Air Temperature (IAT) sensor electrical connector.
- Install the air cleaner rear resonator. Insert the front part of the rear reservoir into the top of the previously installed rear intake duct. Snugly tighten the clamp.
- Connect the negative battery cable.
- Refill the coolant. Refer to Cooling System Draining and Filling .
Notice: Do not replace the radiator outlet hose with an ordinary rubber hose on vehicles that are equipped with the heavy-duty cooling option (RPO V08). The V08 hose contains a metal section that protects the hose from damage by the engine-driven cooling fan blades.
Important: Make sure that the radiator outlet hose routes underneath the coolant recovery reservoir front hose.
Tighten
Tighten the air conditioning compressor stud nuts to 16 N·m
(12 lb ft).
Notice: Use the correct fastener in the correct location. Replacement fasteners must be the correct part number for that application. Fasteners requiring replacement or fasteners requiring the use of thread locking compound or sealant are identified in the service procedure. Do not use paints, lubricants, or corrosion inhibitors on fasteners or fastener joint surfaces unless specified. These coatings affect fastener torque and joint clamping force and may damage the fastener. Use the correct tightening sequence and specifications when installing fasteners in order to avoid damage to parts and systems.
Tighten
Tighten the upper mounting panel bolts to 6 N·m (53 lb in).
Tighten
Tighten the negative battery cable bolt to 17 N·m (13 lb ft).
