WATER LEAK THROUGH HEATER VENT SYSTEM - NON A/C

MODELS AFFECTED: 1982-86 SKYHAWK NON A/C VEHICLES
Water intrusion through the left dash panel vent outlet and heater outlet has been noted on some 1982-86 Skyhawk cars without air conditioning. This condition my occur while the car is going through automatic car washes that use high volumes of water at the prewash spray bar. As a result, the rapid water build-up in the plenum causes the water to overflow into the left vent and/or heater outlet.
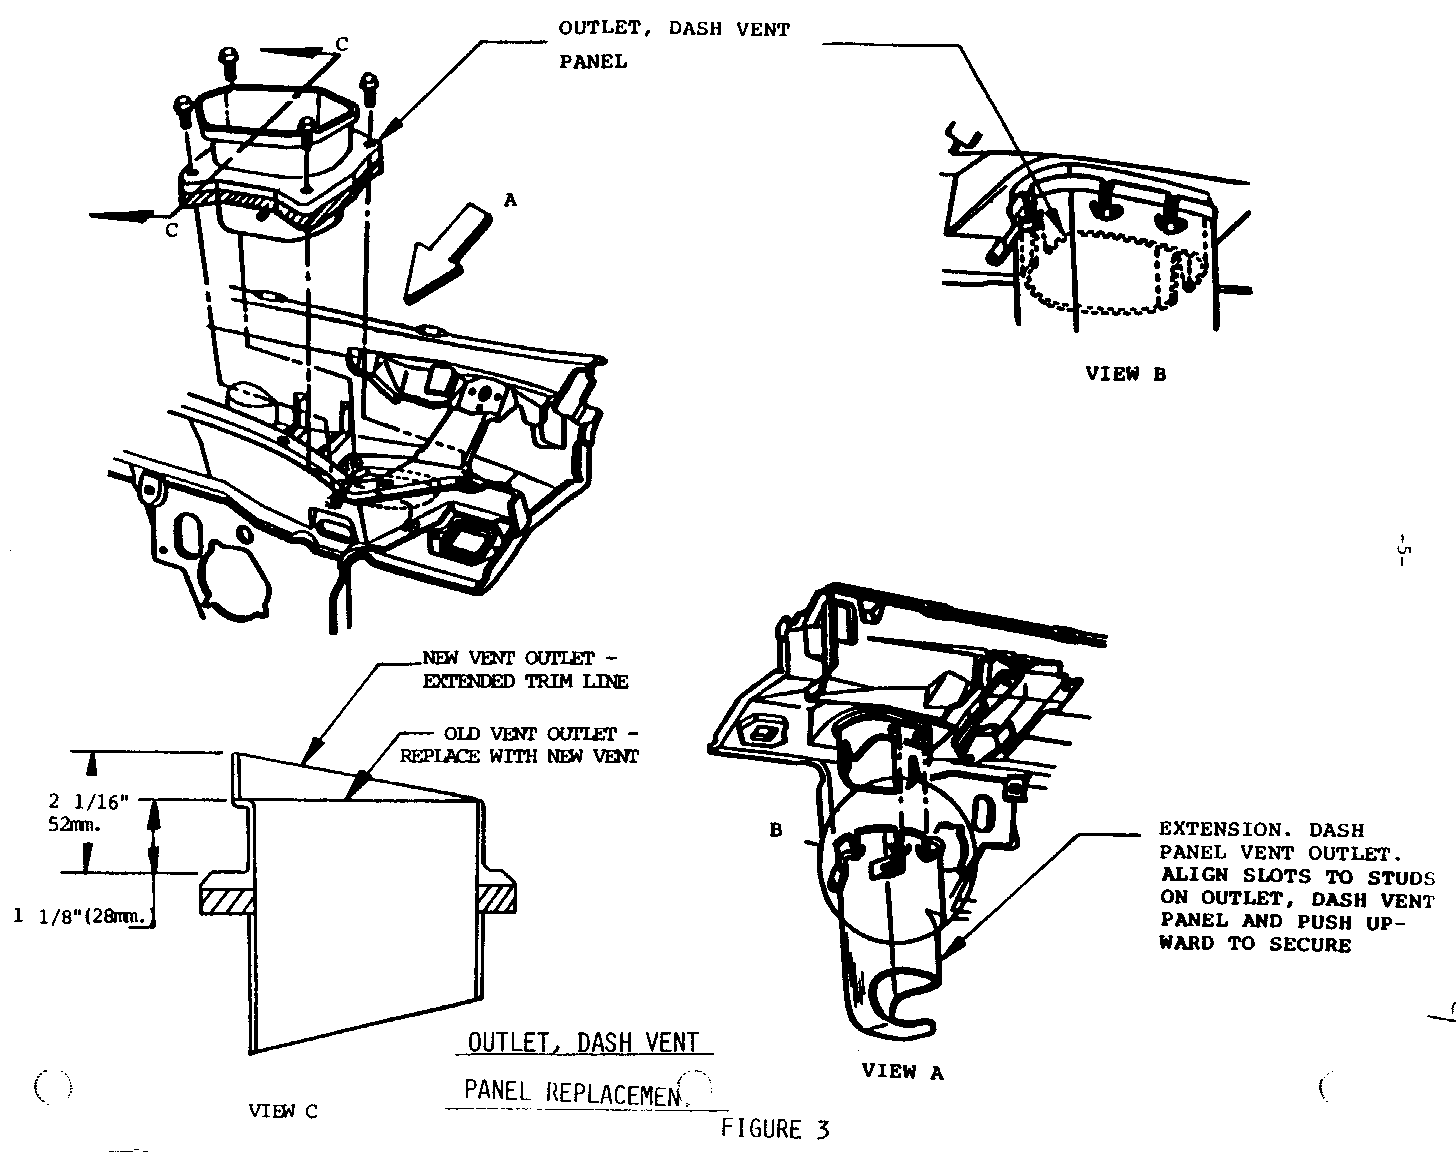
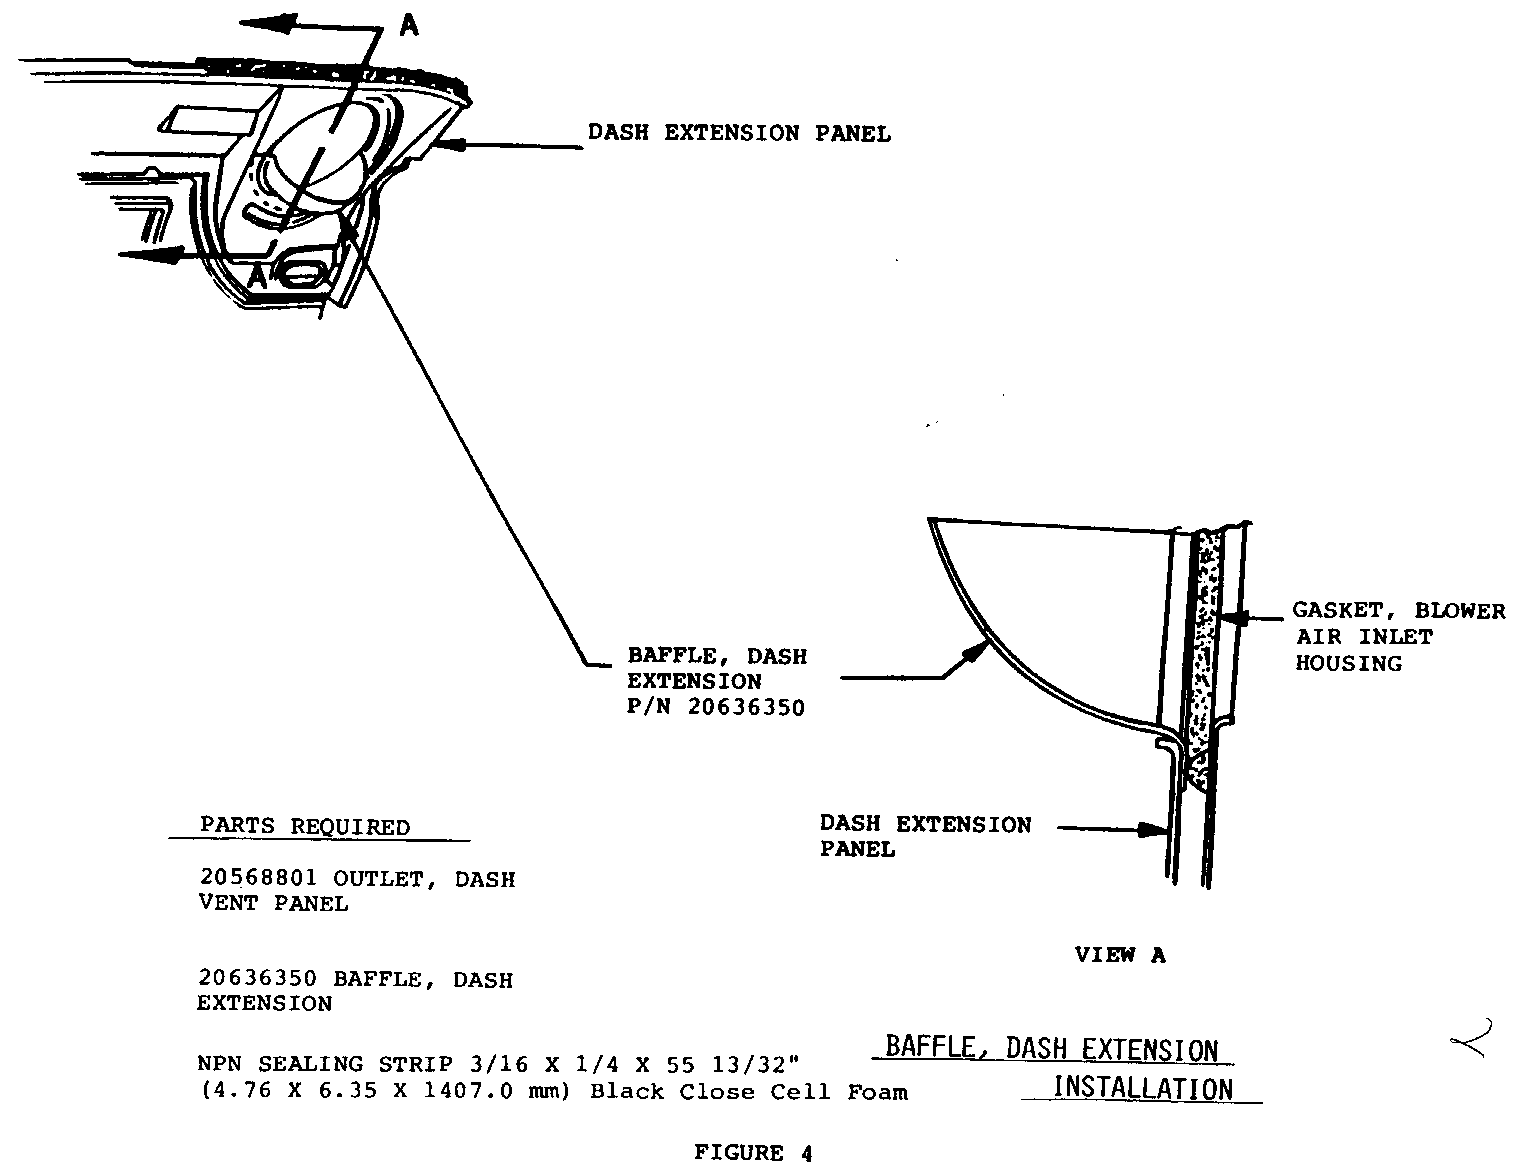
On late 1985 vehicles, the left vent outlet upper trim line was raised to prevent water entry. When correcting this condition on 1982-84 and early 1985 vehicles, the revised vent outlet should be installed (see Figure 3). Water entry through the heater outlet can be corrected by installing a plastic dash extension baffle (see Figure 4).
The procedures that follow provide detailed instructions on how to correct these conditions.
Prior to attempting any corrective action, the drain system should be checked to insure that water drain off is unrestricted. The car should then be driven through the type car wash indicated above. If water entry is obvious through either the early type vent outlet or heater outlet, the repair procedure for both cases should be applied. If water entry is noted through the heater outlet only, install a baffle and check the vent outlet for an extended trim line. Replace Only The Early Style Vent Outlet.
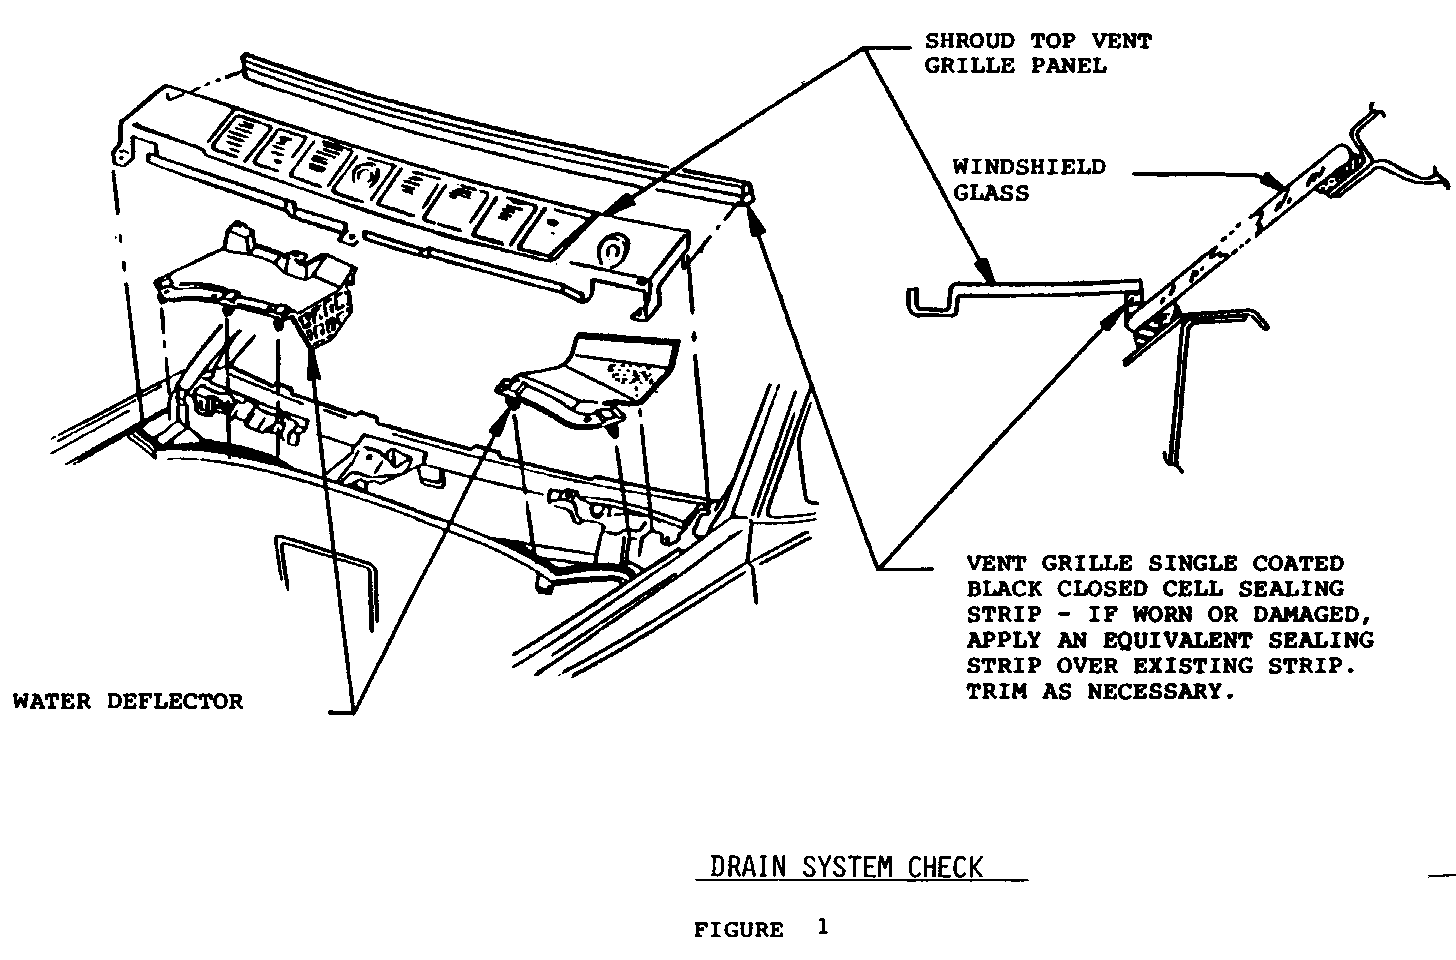
PROCEDURE - DRAIN SYSTEM CHECK (FIGURE NO. 1 AND 2) --------------------------------------------------- 1. Remove windshield wipers and upper shroud panel.
2. Inspect sealing strip at rear of shroud panel. If worn or damaged, apply a 2nd layer of sealing strip (see Figure 1).
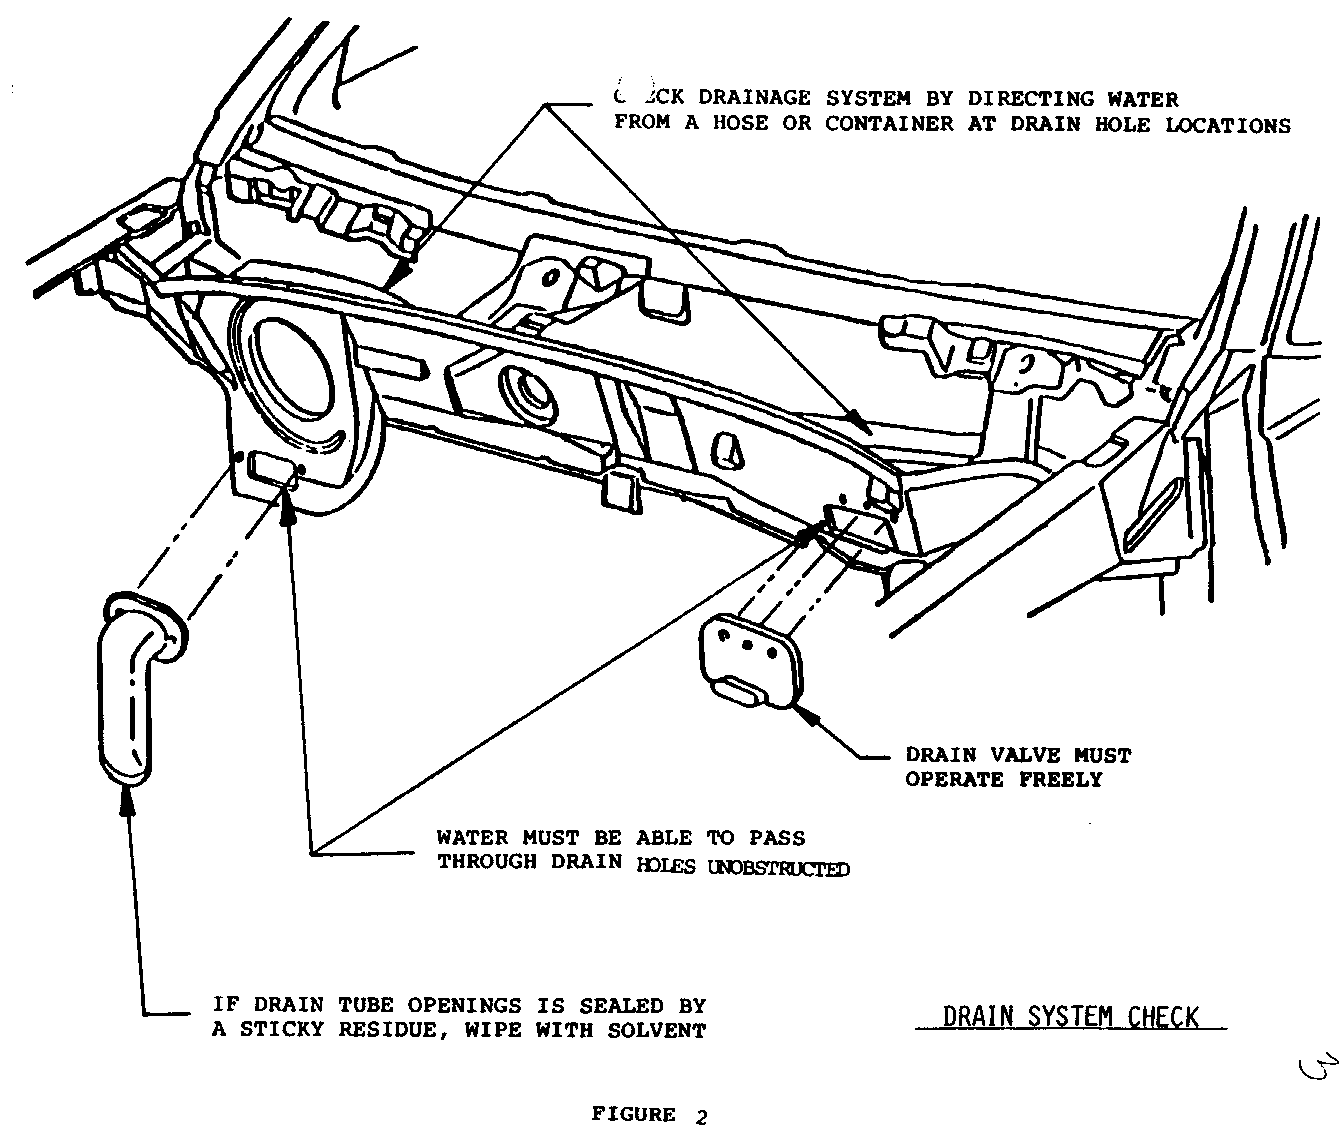
3. Direct water from a hose or container into plenum and observe water flow at drain location (see Figure 2).
NOTICE: The left drain hole must be free of excess sealer and foreign material and the drain valve must operate freely. Also, the right drain tube must be clear.
4. If necessary, remove excess sealer from drain hole with a knife or flat blade tool. This should be done carefully so as not to expose open seams.
5. If the right drain tube opening is sealed by a sticky residue, clean with solvent.
PROCEDURE - OUTLET, DASH VENT PANEL REPLACEMENT (FIGURE NO. 3) -------------------------------------------------------------- 6. Loosen sealing strip on dash extension as required and remove water deflector.
7. Disconnect vent outlet extension from dash panel vent outlet.
8. Remove dash panel vent outlet and install new service replacement.
9. Connect vent outlet extension to dash panel vent outlet.
10. Reinstall sealing strip and water deflector. Care must be taken to engage rear snap-in of water deflector into vent outlet pins.
PROCEDURE - BAFFLE, DASH EXTENSION INSTALLATION (FIGURE NO. 4) ------------------------------------------------------------- 11. Loosen sealing strip on dash panel as required and remove water deflector.
12. Remove two (2) upper blower air inlet housing attaching screws.
13. Using a flat blade tool, such as a screwdriver, pry top portion of blower air inlet housing approximately from dash extension panel.
14. Install baffle flange between dash extension panel and blower air inlet housing gasket. Baffle should be level and in full down position.
15. Reinstall blower air inlet housing attaching screws, sealing strip, water deflector, shroud panel, and wiper arms.
WARRANTY INFORMATION: (Covers Steps 1 through 15) --------------------- Labor Operation Number: T1145 Labor Time: .7 hr. Failure Code: 92


General Motors bulletins are intended for use by professional technicians, not a "do-it-yourselfer". They are written to inform those technicians of conditions that may occur on some vehicles, or to provide information that could assist in the proper service of a vehicle. Properly trained technicians have the equipment, tools, safety instructions and know-how to do a job properly and safely. If a condition is described, do not assume that the bulletin applies to your vehicle, or that your vehicle will have that condition. See a General Motors dealer servicing your brand of General Motors vehicle for information on whether your vehicle may benefit from the information.
