SAGGING HEADLINER REPAIR PROCEDURE

SAGGING HEADLINER REPAIR PROCEDURE
VEHICLES AFFECTED: 1987-1988 J/N CARLINES EXCEPT 37 STYLE -----------------
Some headlining material may separate from the velcro retainers at the front or rear of the roof allowing it to sag. In some cases the headlining may sag due to insufficient support in the front or rear.
The following procedure is recommended to repair both conditions using service package part number 22541347.
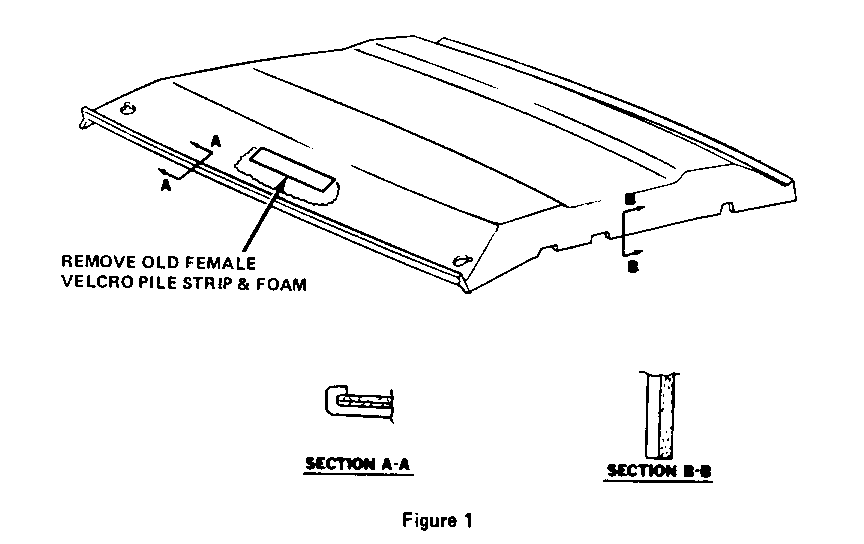
1. Remove the old velcro and the grey foam behind it from the headliner (front and rear center) to obtain a smooth surface. Figure 1.
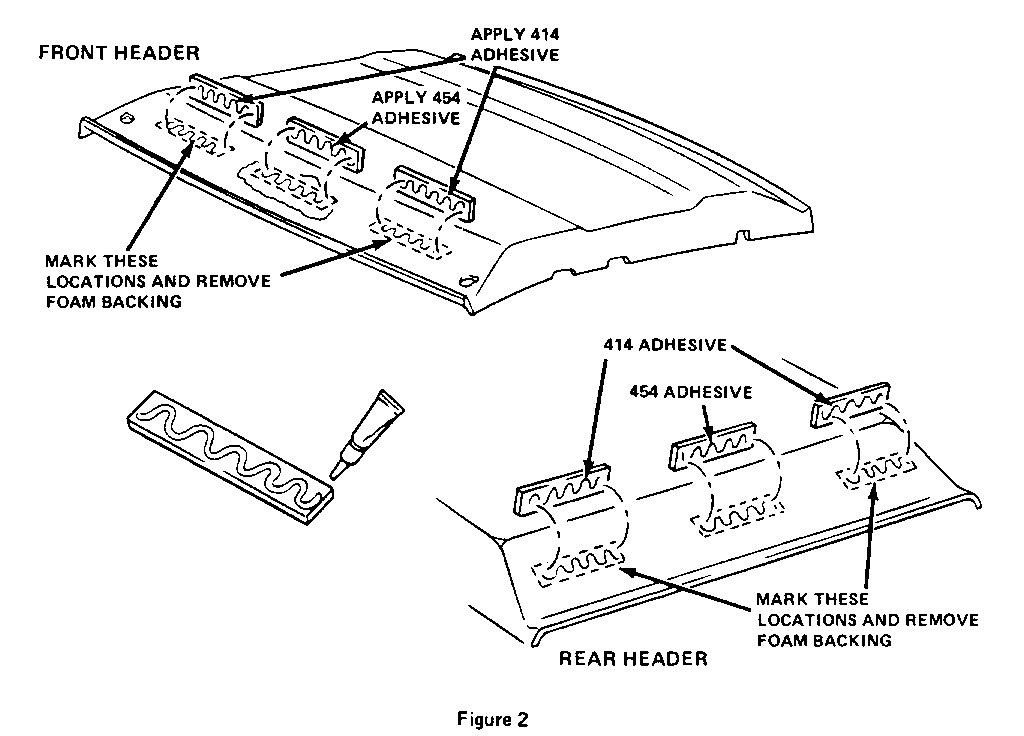
2. Mark the location of the new velcro strips on the headliner and remove the grey foam from those areas to obtain a smooth surface. Figure 2.
3. Attach female velcro strips to the headliner as follows:
A. Apply 414 adhesive (minimum amount) to the entire back side of the new center velcro strips and install on the front and rear of the headliner in the prepared smooth locations.
B. Apply 414 Adhesive to the four remaining female velcro strips (minimum amount) and install on the other prepared smooth areas of the headliner. Figure 2.
C. Allow these to stand for approximately 10 minutes.
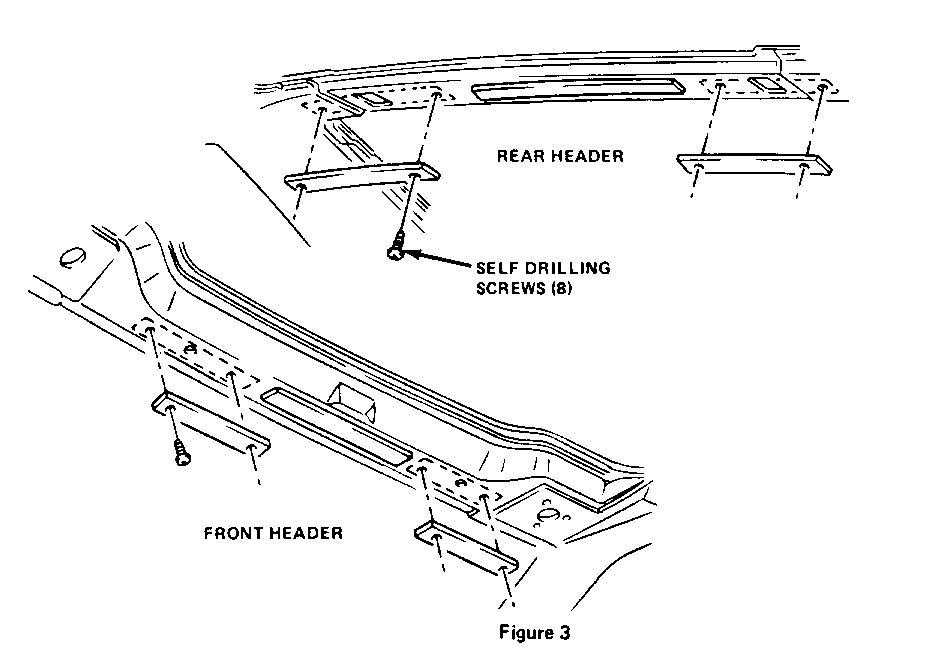
4. Attach the four additional male velcro strips to the front and rear headers as indicated in Figure 3, using the eight (8) self-drilling screws provided.
5. Re-install the headlining.
WARRANTY INFORMATION:
Use the most applicable labour operation from the Canadian Labour Time Guide and claim 1.2 hours.


General Motors bulletins are intended for use by professional technicians, not a "do-it-yourselfer". They are written to inform those technicians of conditions that may occur on some vehicles, or to provide information that could assist in the proper service of a vehicle. Properly trained technicians have the equipment, tools, safety instructions and know-how to do a job properly and safely. If a condition is described, do not assume that the bulletin applies to your vehicle, or that your vehicle will have that condition. See a General Motors dealer servicing your brand of General Motors vehicle for information on whether your vehicle may benefit from the information.
