Cylinder Head Installation Right Side
Tools Required
J 36660-A Torque Angle Meter
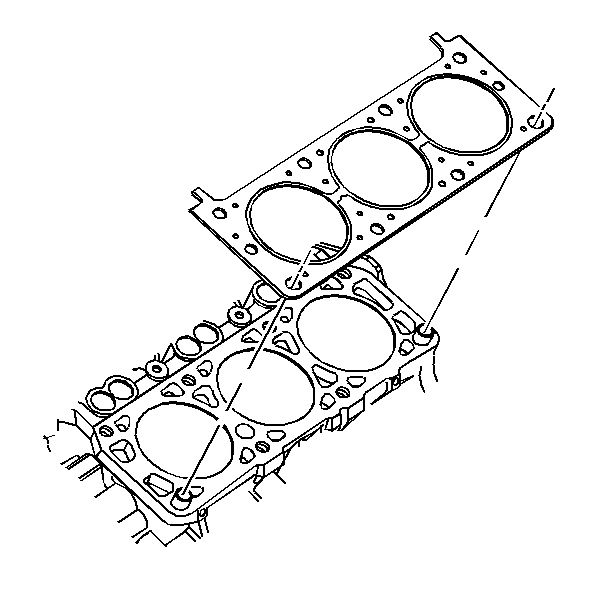
- Install the cylinder head gasket.
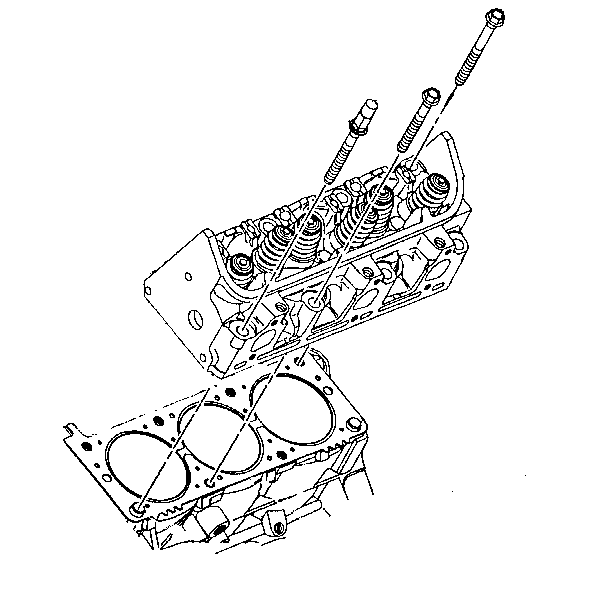
- Install the cylinder head assembly.
- Install the NEW cylinder head bolts.


Notice: This component uses torque-to-yield bolts. When servicing this component do not reuse the bolts, New torque-to-yield bolts must be installed. Reusing used torque-to-yield bolts will not provide proper bolt torque and clamp load. Failure to install NEW torque-to-yield bolts may lead to engine damage.
Notice: Use the correct fastener in the correct location. Replacement fasteners must be the correct part number for that application. Fasteners requiring replacement or fasteners requiring the use of thread locking compound or sealant are identified in the service procedure. Do not use paints, lubricants, or corrosion inhibitors on fasteners or fastener joint surfaces unless specified. These coatings affect fastener torque and joint clamping force and may damage the fastener. Use the correct tightening sequence and specifications when installing fasteners in order to avoid damage to parts and systems.
Tighten
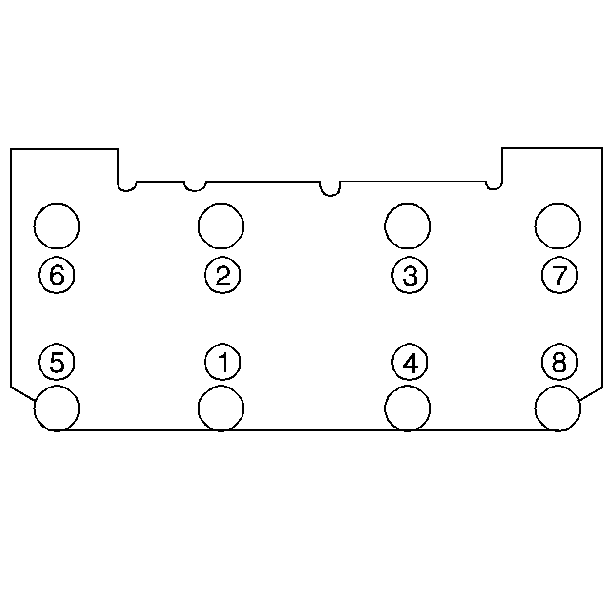
Tighten the NEW cylinder head bolts to 60 N·m (44 lb ft) in the order shown. Use the
J 36660-A
in order to rotate the cylinder head bolts an additional
95 degrees.
Cylinder Head Installation Left Side
Tools Required
J 36660-A Torque Angle Meter
- Install the left cylinder head gasket.
- Install the left cylinder head assembly.
- Install the NEW left cylinder head bolts.
- Tighten the NEW cylinder head bolts to 60 N·m (44 lb ft) in the order shown.
- Use the J 36660-A in order to rotate the cylinder head bolts an additional 95 degrees.
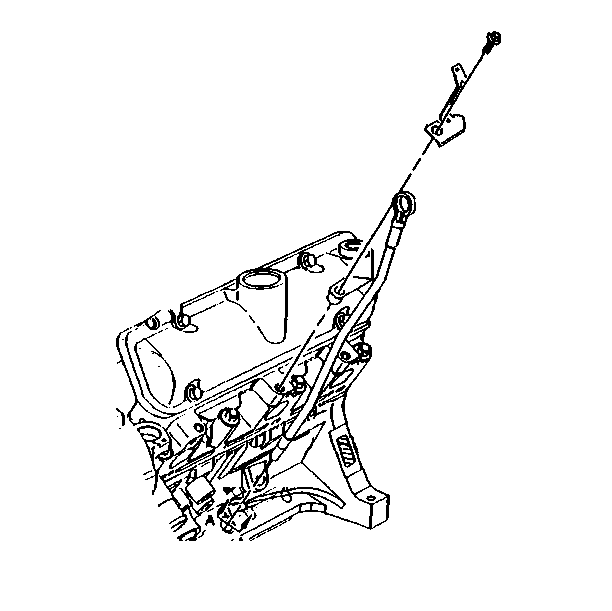
- Apply sealant GM P/N 12345739 to the area of the oil level indicator tube that is to be pressed into engine block.
- Install the oil level indicator assembly.
- Install the oil level indicator assembly retaining bolt.


Notice: This component uses torque-to-yield bolts. When servicing this component do not reuse the bolts, New torque-to-yield bolts must be installed. Reusing used torque-to-yield bolts will not provide proper bolt torque and clamp load. Failure to install NEW torque-to-yield bolts may lead to engine damage.
Notice: Use the correct fastener in the correct location. Replacement fasteners must be the correct part number for that application. Fasteners requiring replacement or fasteners requiring the use of thread locking compound or sealant are identified in the service procedure. Do not use paints, lubricants, or corrosion inhibitors on fasteners or fastener joint surfaces unless specified. These coatings affect fastener torque and joint clamping force and may damage the fastener. Use the correct tightening sequence and specifications when installing fasteners in order to avoid damage to parts and systems.
Tighten

Tighten
Tighten the oil level indicator assembly retaining bolt to 25 N·m (18 lb ft).
