Removal Procedure
Tools Required
J 28467-360 Engine
Support Fixture
- Disconnect the negative battery cable. Refer to
Caution: Unless directed otherwise, the ignition and start switch must be in the OFF or LOCK position, and all electrical loads must be OFF before servicing
any electrical component. Disconnect the negative battery cable to prevent an electrical spark should a tool or equipment come in contact with an exposed electrical terminal. Failure to follow these precautions may result in personal injury and/or damage to
the vehicle or its components.
in General Information.
- Depressurize the fuel system. Refer to Fuel System Pressure Relief
in Engine Fuel.
- Remove the top half of the air cleaner assembly.
- Drain and recover the cooling system. Refer to Draining, Flushing
and Filling the Cooling System in Cooling and Radiator.

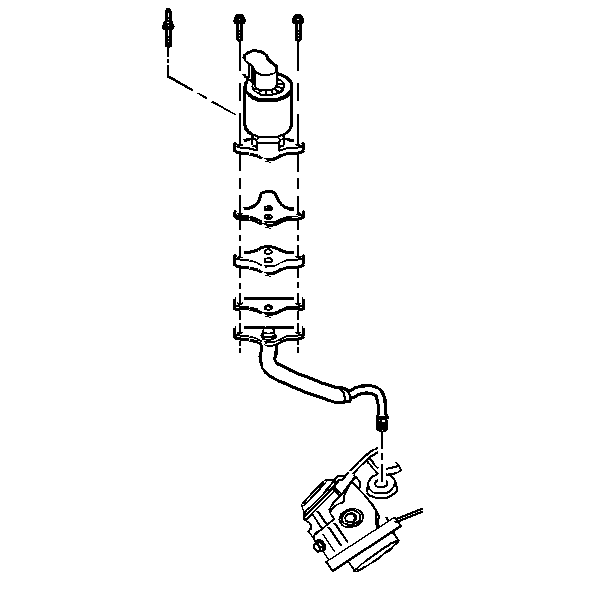
- Remove the EGR pipe from the exhaust manifold.
- Remove the drive belt. Refer to
Drive Belt Replacement
.
- Remove the brake vacuum pipe at the plenum.
- Remove the power steering lines at the generator bracket.
- Remove the generator. Refer to Generator in Charging System.

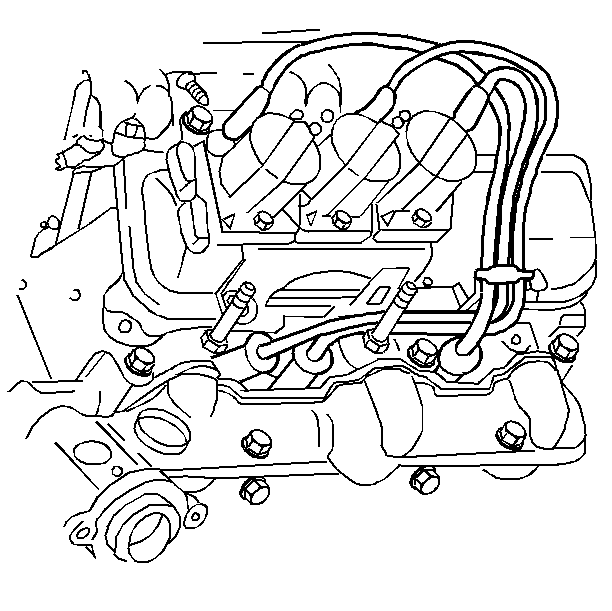
- Remove the secondary ignition wires from the spark plugs.
Remove the secondary ignition wires from the harness at the plenum.
- Next, remove the following components at the same time:
| • | Electronic ignition coil and module assembly |
| • | EVAP canister purge solenoid |
- Remove the following upper engine wiring connectors:
| • | Throttle Position (TP) sensor |
| • | Engine Coolant Temperature (ECT) sensor |
| • | Camshaft Position (CMP) sensor |
- Remove the following vacuum lines:
| • | Fuel Pressure Regulator |
- Remove the MAP sensor from the upper intake manifold.

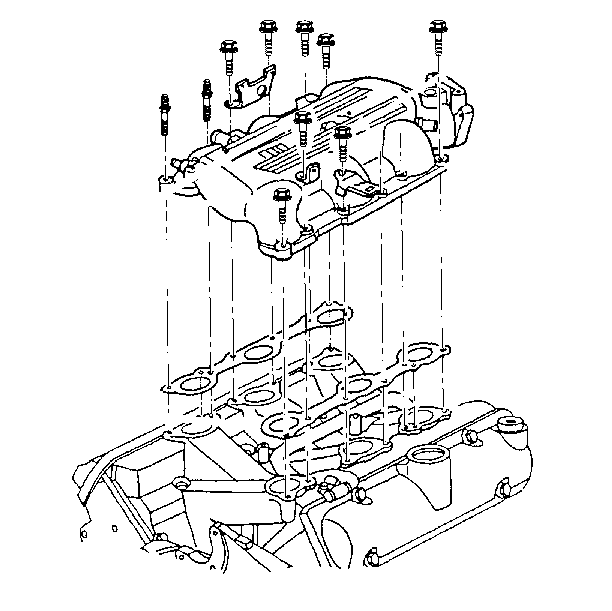
- Remove the upper intake manifold bolts.
- Remove the upper intake manifold.
Installation Procedure

- Install the upper intake manifold.
- Install the upper intake manifold bolts.
Tighten
Tighten the bolts to 25 N·m (18 lb ft).
- Install the MAP sensor.
- Connect the following vacuum lines:
| • | Fuel Pressure Regulator |
- Install the following upper engine wiring connectors:
| • | Throttle Position (TP) sensor |
| • | Engine Coolant Temperature (ECT) sensor |
| • | Camshaft Position (CMP) sensor |
- Install the following components:
| • | EVAP canister purge solenoid |
| • | Electronic ignition coil and module assembly |
- Install the generator. Refer to Generator in Charging System.
- Install the power steering line at the generator bracket.
- Install the drive belt. Refer to
Drive Belt Replacement
.

- Install the secondary ignition
wires to the spark plugs.
- Install the secondary ignition wires to the harness at the plenum.

- Install the EGR pipe to the exhaust manifold.
- Install the following items to the throttle body:
- Install the top half of the air cleaner assembly.
- Install the brake vacuum pipe.
- Install the cables to the throttle body.
- Fill the cooling system. Refer to Draining, Flushing and Filling
the Cooling System in Cooling and Radiator.
- Connect the negative battery cable.
- Inspect for proper fluid levels.
- Check for leaks.


