Removal Procedure
- Remove the left sound insulator panel. Refer to Closeout/Insulator Panel Replacement in Instrument Panel, Gauges and Console.
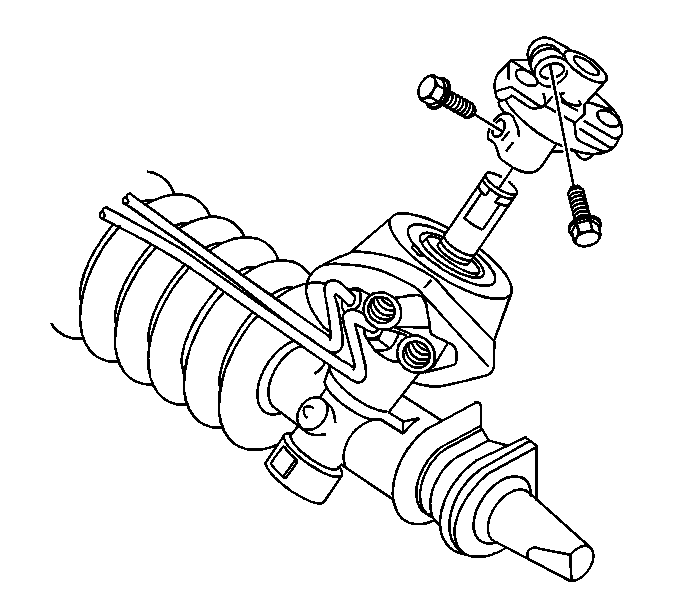
- Remove the upper pinch bolt on the steering shaft coupling assembly.
- Remove the line retainer, if necessary.
- Remove the power brake booster. Refer to Power Vacuum Brake Booster Replacement in Hydraulic Brakes.
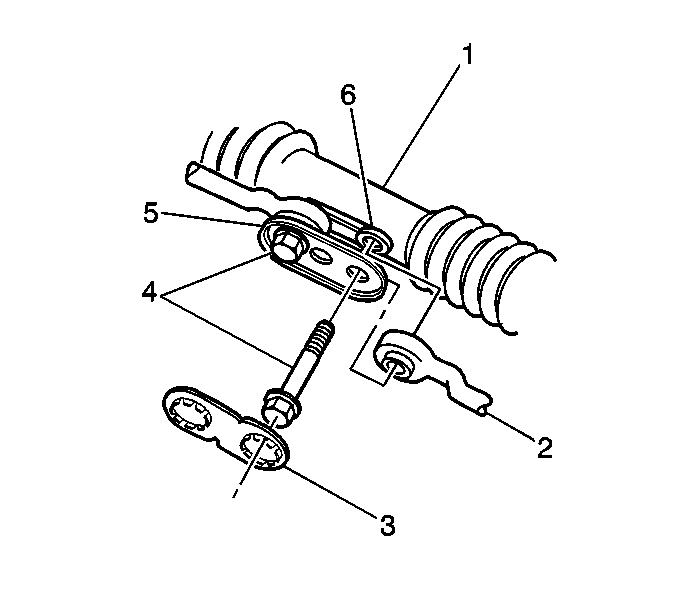
- Remove the following components from the steering gear:
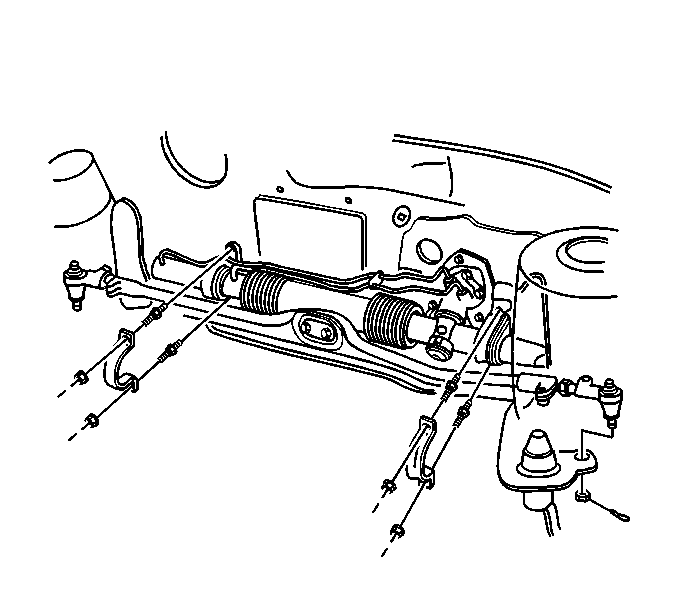
- Remove the nuts retaining the left and the right mounting clamps to the cowl.
- Remove the left and the right mounting clamps from the steering gear.
- Remove the back of the steering gear away from the cowl.
- Remove both the inlet and the outlet pipe/hose assemblies from the steering gear.
- Plug the open ends of the inlet and the outlet pipe/hose assemblies.
- Move the steering gear assembly forward.
- Remove the lower pinch bolt from the flexible coupling.
- Remove the flexible coupling from the steering gear.
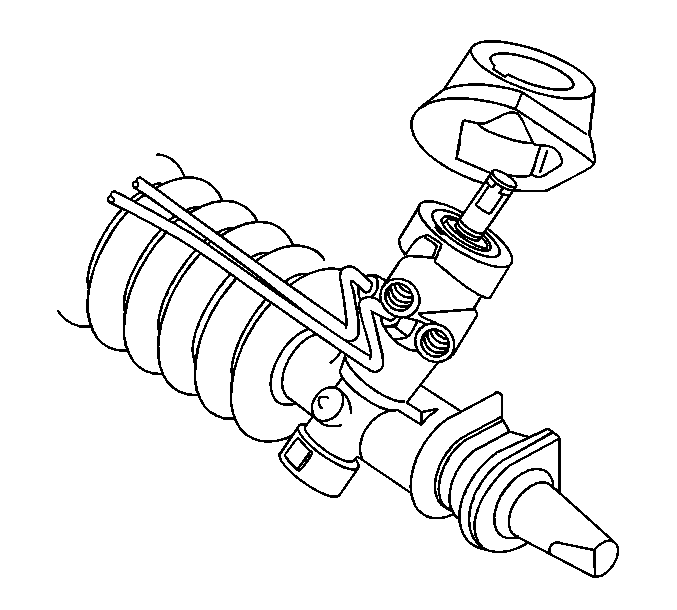
- Remove the steering column seal from the steering gear.
- Remove the steering gear from under the hood.


| • | The inner tie rod bolts (4). |
| • | The lock plate (3). |
| • | The bolt support plate (5). |
| • | The center housing cover washers (6). |


Installation Procedure
Important: If the studs were removed during removal of the mounting clamps, follow these steps:
- Reinstall the studs into the front of the cowl.
- Tighten the studs until fully seated against the cowl. Do not exceed the tightening specification.
- If reusing the studs a second time, use thread locking kit GM P/N 1052624 or equivalent.
- Install the steering gear under the hood.
- Install the steering column seal onto the steering gear assembly.
- Move the steering gear assembly forward.
- Install the flexible coupling on the steering gear.
- Install the lower pinch bolt to the flexible coupling.
- Remove the plugs from the inlet and the outlet pipe/hose assemblies.
- Install the gear inlet and the outlet pipe/hose assemblies to the steering gear.
- Hand start the mounting clamp nuts.
- Tighten the left side mounting clamp nuts first. Then tighten the right side mounting clamp nuts.
- Install the following components to the steering gear:
- Install the line retainer, if necessary.
- Install the upper pinch bolt to the steering shaft coupling assembly.
- Install the power brake booster. Refer to Power Vacuum Brake Booster Replacement in Hydraulic Brakes.
- Install the left sound insulator panel. Refer to Closeout/Insulator Panel Replacement in Instrument Panel, Gauges and Console.
- Fill the power steering reservoir with fluid. Refer to Checking and Adding Power Steering Fluid .
- Bleed the air from the power steering system. Refer to Power Steering System Bleeding .
- Inspect the power steering system for leaks.
Notice: Use the correct fastener in the correct location. Replacement fasteners must be the correct part number for that application. Fasteners requiring replacement or fasteners requiring the use of thread locking compound or sealant are identified in the service procedure. Do not use paints, lubricants, or corrosion inhibitors on fasteners or fastener joint surfaces unless specified. These coatings affect fastener torque and joint clamping force and may damage the fastener. Use the correct tightening sequence and specifications when installing fasteners in order to avoid damage to parts and systems.
Tighten
Tighten the studs to 20 N·m (15 lb ft).


Tighten
Tighten the lower pinch bolt to 41 N·m (30 lb ft).
Tighten
Tighten the power steering lines to 27 N·m (20 lb ft).

Tighten
Tighten both the left and the right mounting clamp nuts to 30 N·m
(22 lb ft).

| • | The center housing cover washers (6). |
| • | The bolt support plate (5). |
| • | The lock plate (3). |
| • | The inner tie rod bolts (4). |
Tighten
Tighten the inner tie rod bolts to 90 N·m (65 lb ft).

Tighten
Tighten the upper pinch bolt to 41 N·m (30 lb ft).
