Exhaust Manifold Replacement - Right Side RPO LX9
Removal Procedure
- Remove the throttle body air inlet duct. Refer to Air Cleaner Inlet Duct Replacement .
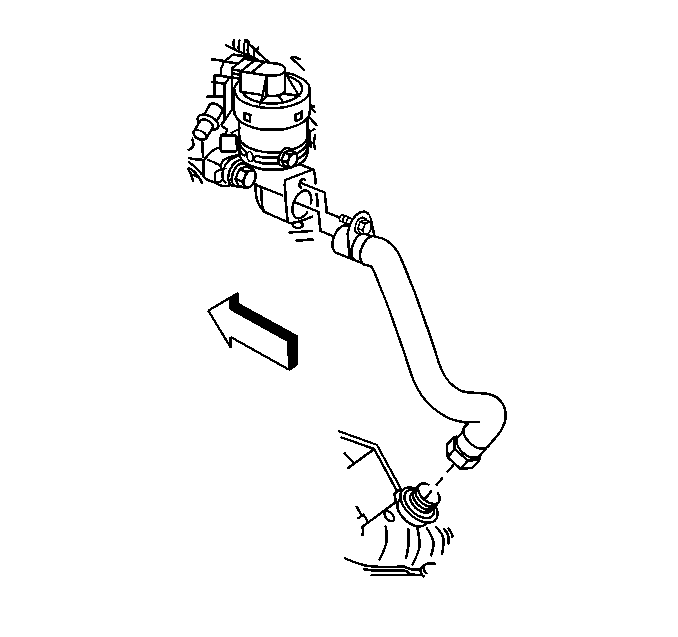
- Disconnect the exhaust gas recirculation (EGR) pipe at the EGR valve.
- Disconnect the oxygen sensor electrical connector.
- Remove the exhaust crossover pipe nuts/studs from the engine right bank exhaust manifold. Refer to Exhaust Crossover Pipe Replacement .
- Raise and support the vehicle. Refer to Lifting and Jacking the Vehicle .
- Remove the catalytic converter. Refer to Catalytic Converter Replacement .
- Remove the EGR pipe from the exhaust manifold and remove from the vehicle.
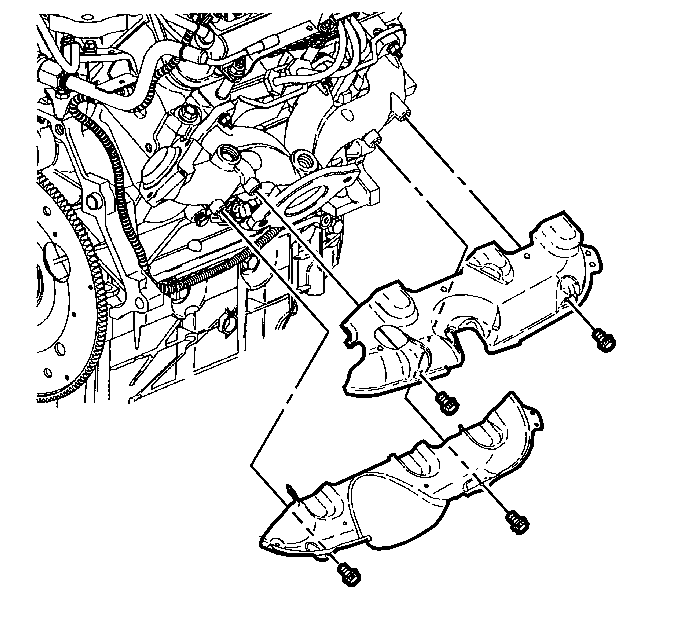
- Remove the exhaust manifold heat shield bolts.
- Remove the exhaust manifold heat shields.
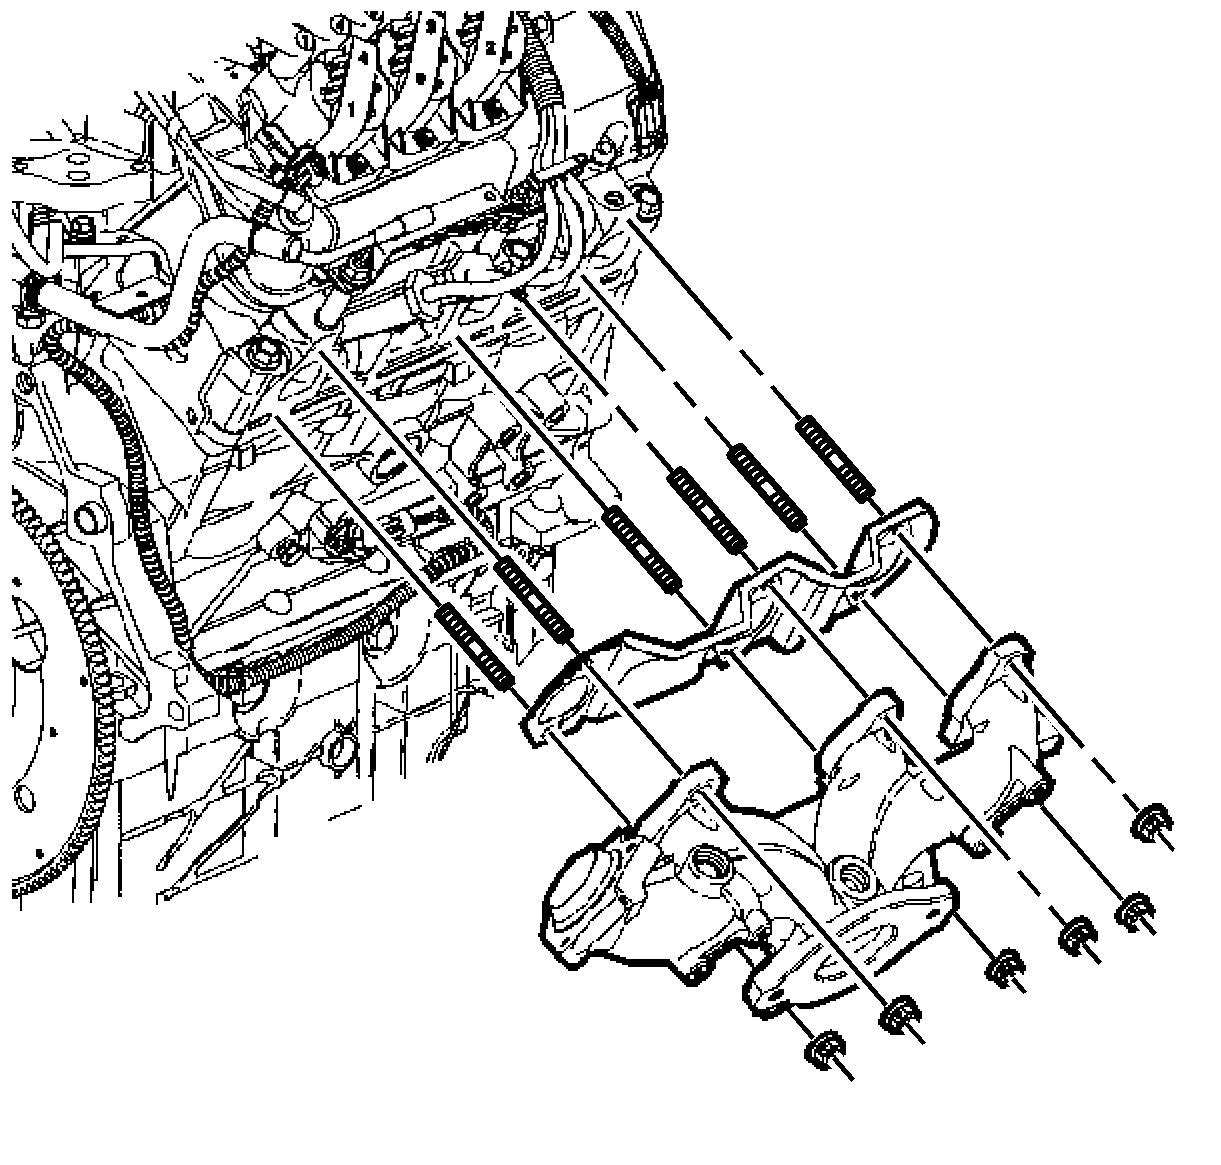
- Remove the exhaust manifold nuts.
- Remove the exhaust manifold.
- Remove the exhaust manifold gasket.
- Clean the engine right side exhaust manifold sealing surfaces and the cylinder head sealing surfaces.
- If you are REPLACING the engine right side exhaust manifold, remove the heated oxygen sensor (HO2S). Refer to Heated Oxygen Sensor 1 Replacement .
Installation Procedure
- If removed, install the HO2S. Refer to Heated Oxygen Sensor 1 Replacement .
- Install the exhaust manifold gasket.
- Install the exhaust manifold.
- Install the exhaust manifold nuts.
- Install the exhaust manifold lower heat shield.
- Install the exhaust manifold upper heat shield.
- Install the exhaust manifold heat shield bolts.
- Install the EGR pipe to the exhaust manifold.
- Install the catalytic converter. Refer to Catalytic Converter Replacement .
- Lower the vehicle.
- Install the exhaust crossover pipe nuts/studs to the engine right side exhaust manifold. Refer to Exhaust Crossover Pipe Replacement .
- Install the exhaust crossover pipe heat shield. Refer to Exhaust Crossover Pipe Replacement .
- Connect the HO2S electrical connector.
- Install the EGR pipe to the EGR valve.
- Install the throttle body air inlet duct. Refer to Air Cleaner Inlet Duct Replacement .

Notice: Refer to Fastener Notice in the Preface section.
Tighten
Tighten the nuts to 16 N·m (12 lb ft).

Tighten
Tighten the bolts to 10 N·m (89 lb in).

Tighten
Tighten the nut to 25 N·m (18 lb ft).
Tighten
Tighten the bolt to 25 N·m (18 lb ft).
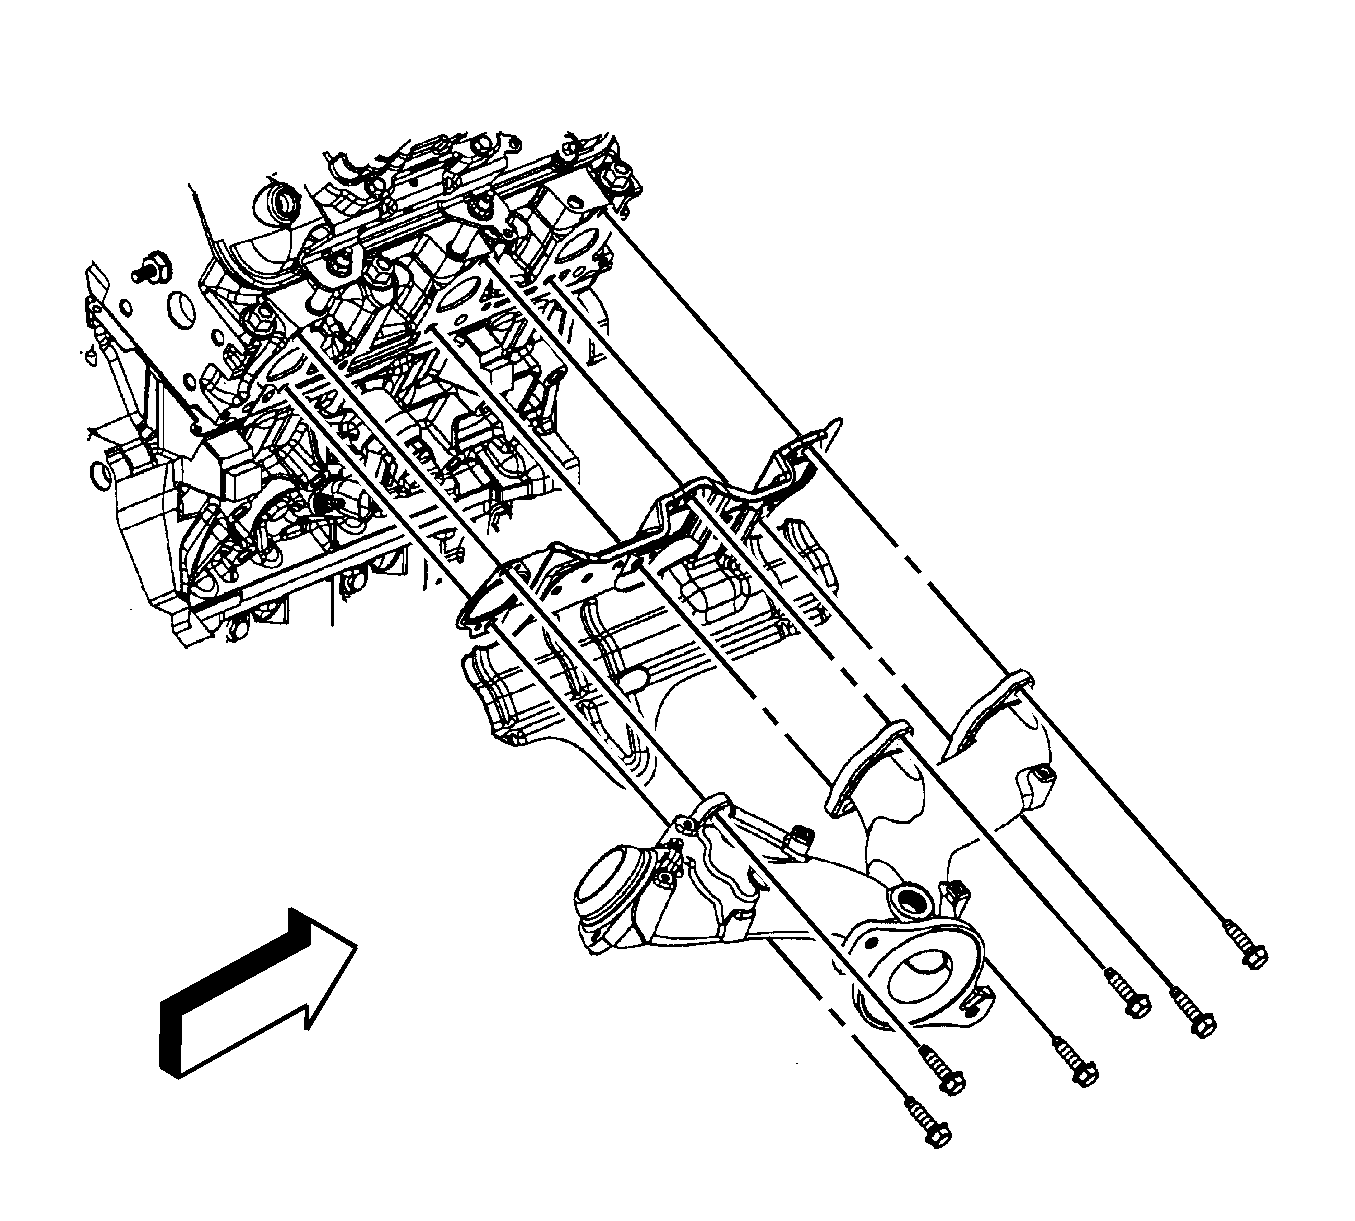
Exhaust Manifold Replacement - Right Side RPO LZ9
Removal Procedure
- Remove the air cleaner outlet duct. Refer to Air Cleaner Outlet Duct Replacement .
- Remove the generator. Refer to Generator Replacement .
- Remove the ignition coil. Refer to Ignition Coil Replacement .
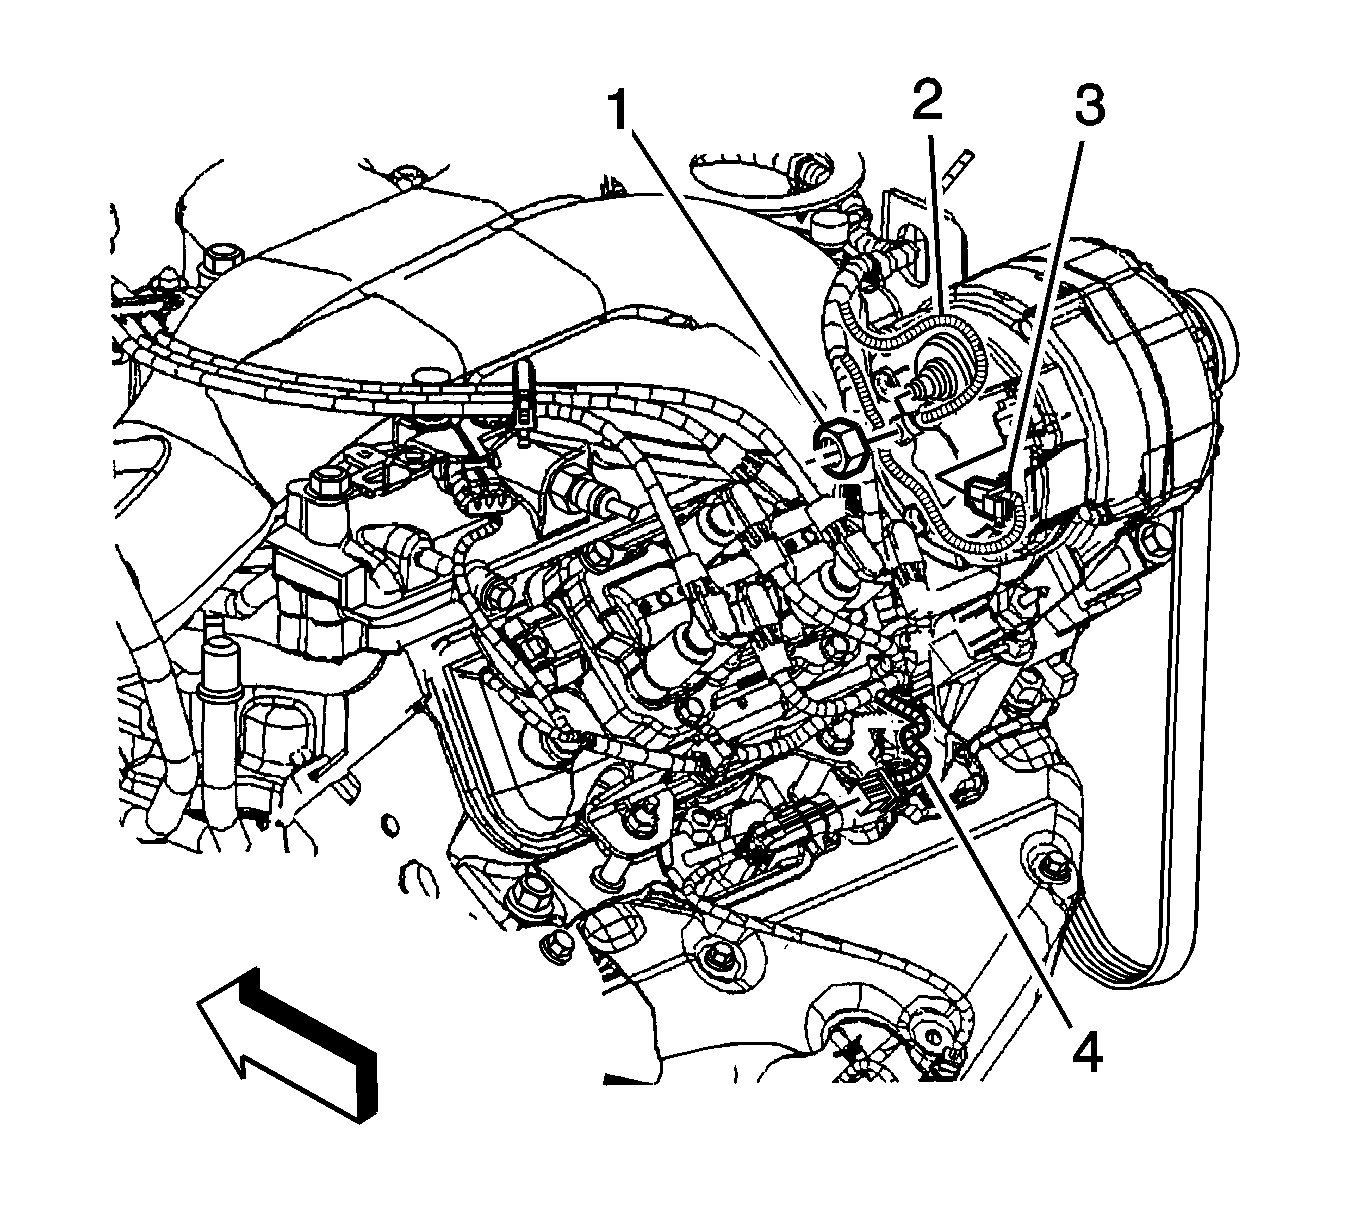
- Disconnect the engine harness electrical connector (4) from the heated oxygen sensor (HO2S).
- Remove the HO2S.
- Disconnect the heater hose from the heater pipes.
- Remove the nuts holding the heater pipes onto the throttle body.
- Position the heater pipes out of the way.
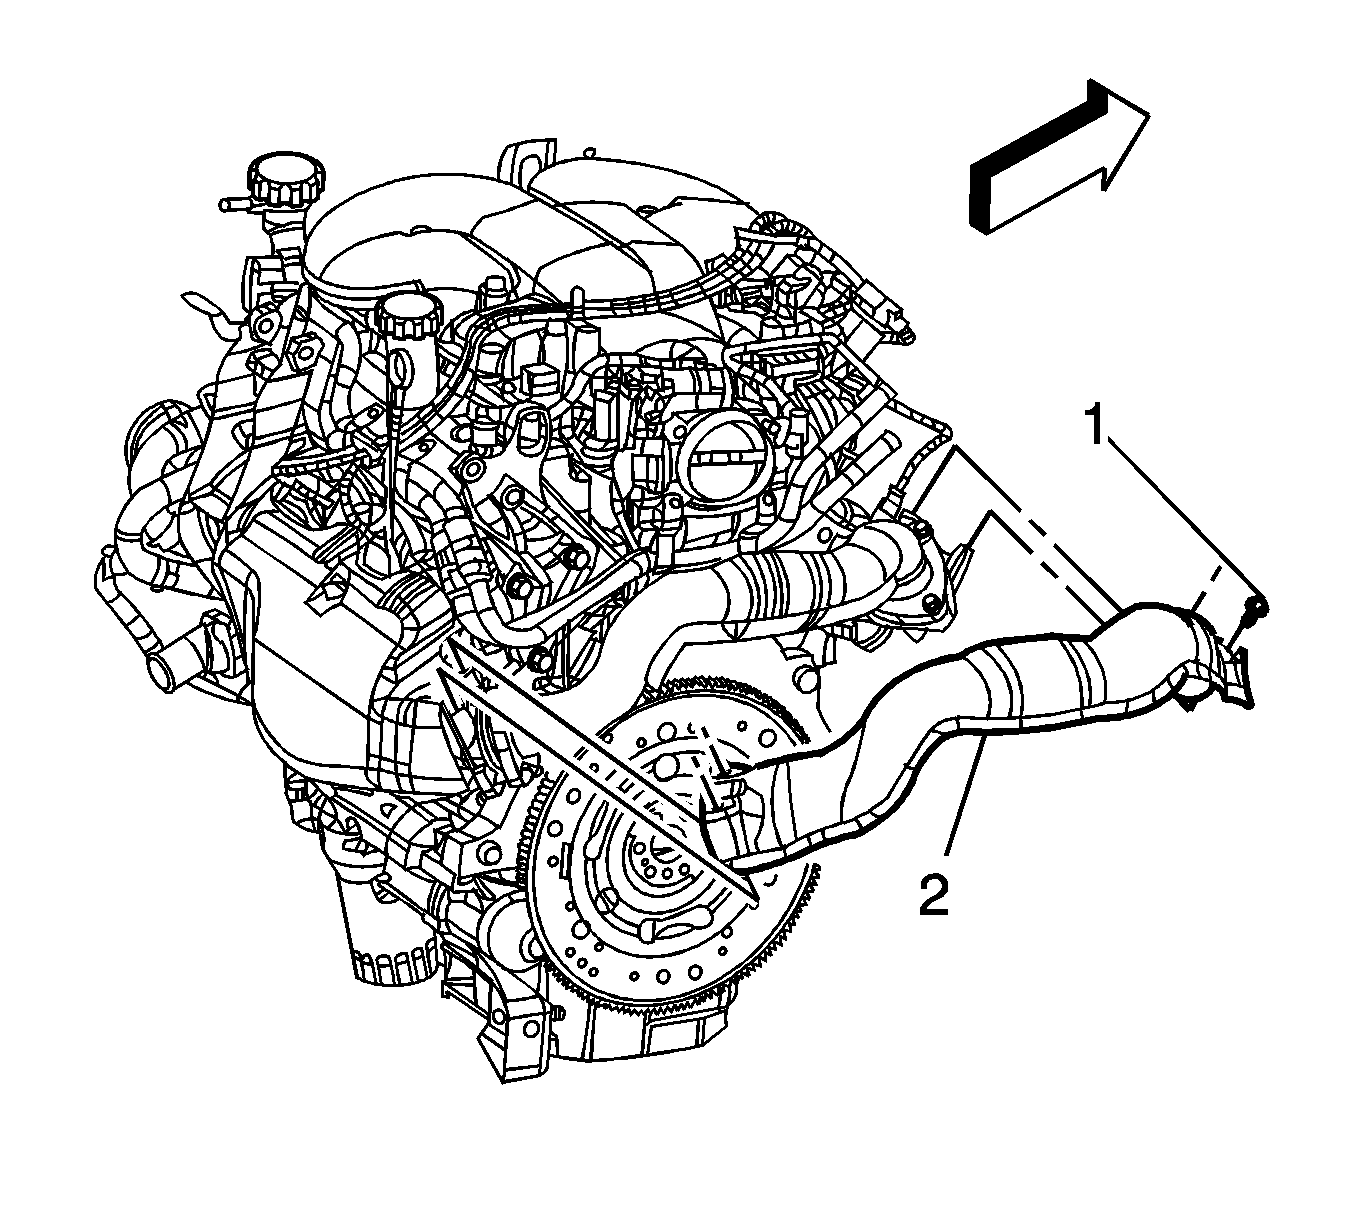
- Remove the exhaust crossover pipe heat shield bolts (1) and shield (2).
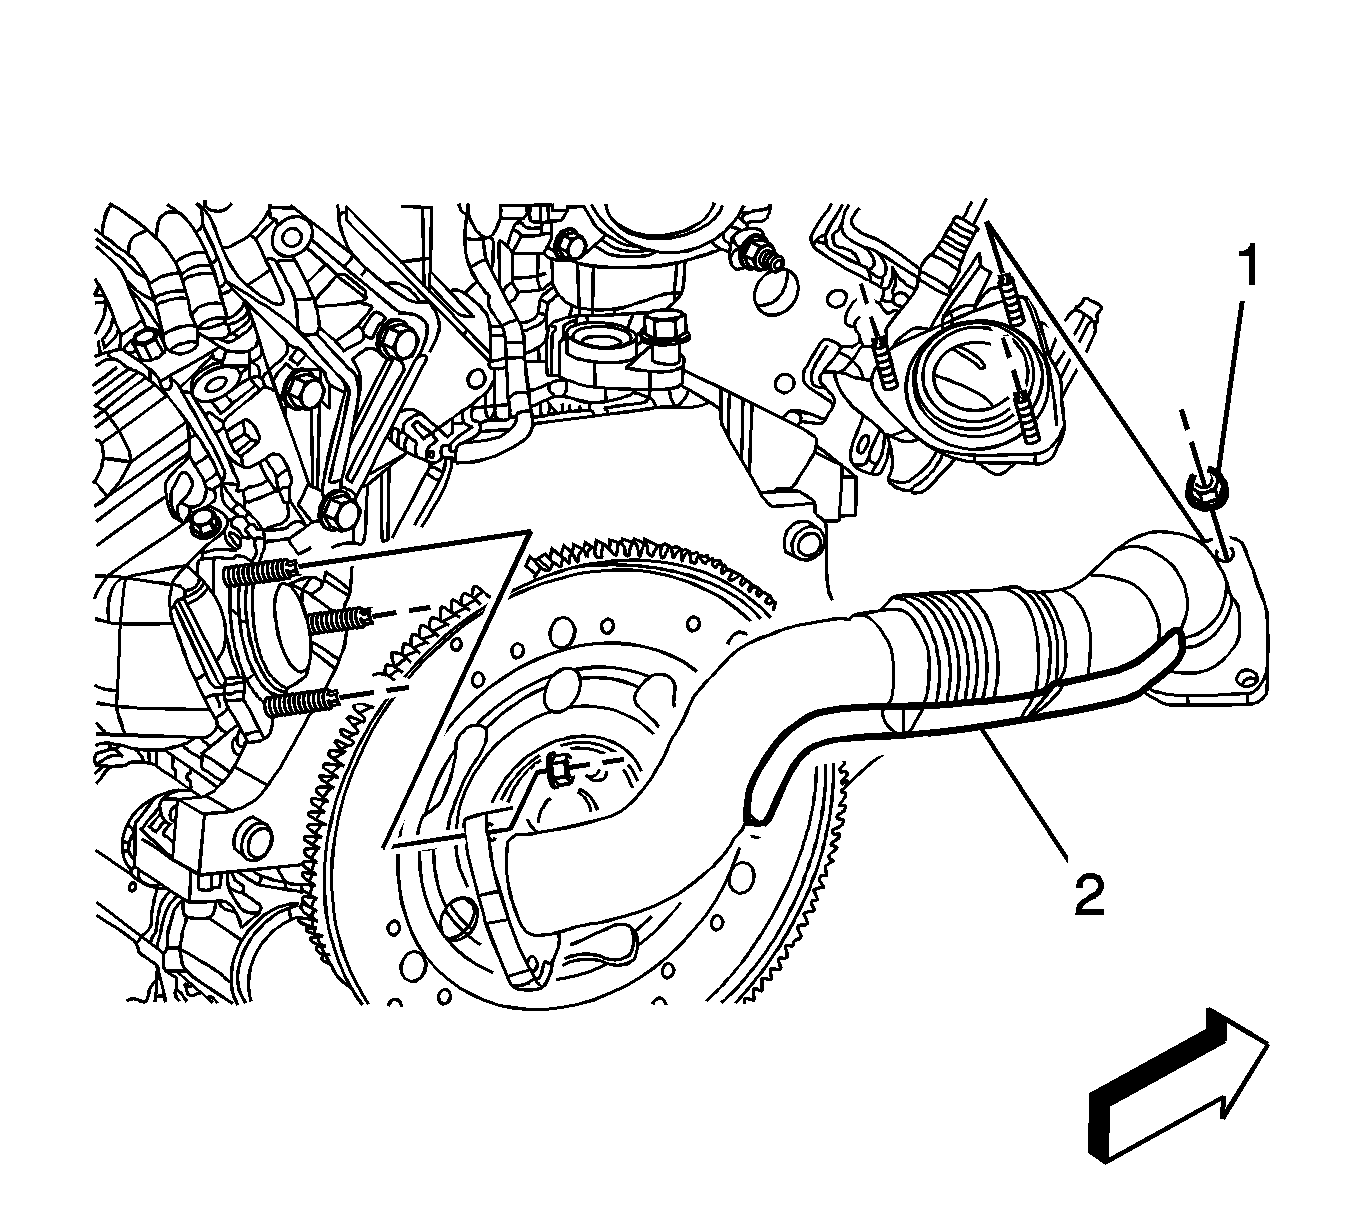
- Remove the exhaust crossover pipe (2) to exhaust manifold nuts (1).
- Remove the catalytic converter. Refer to Catalytic Converter Replacement .
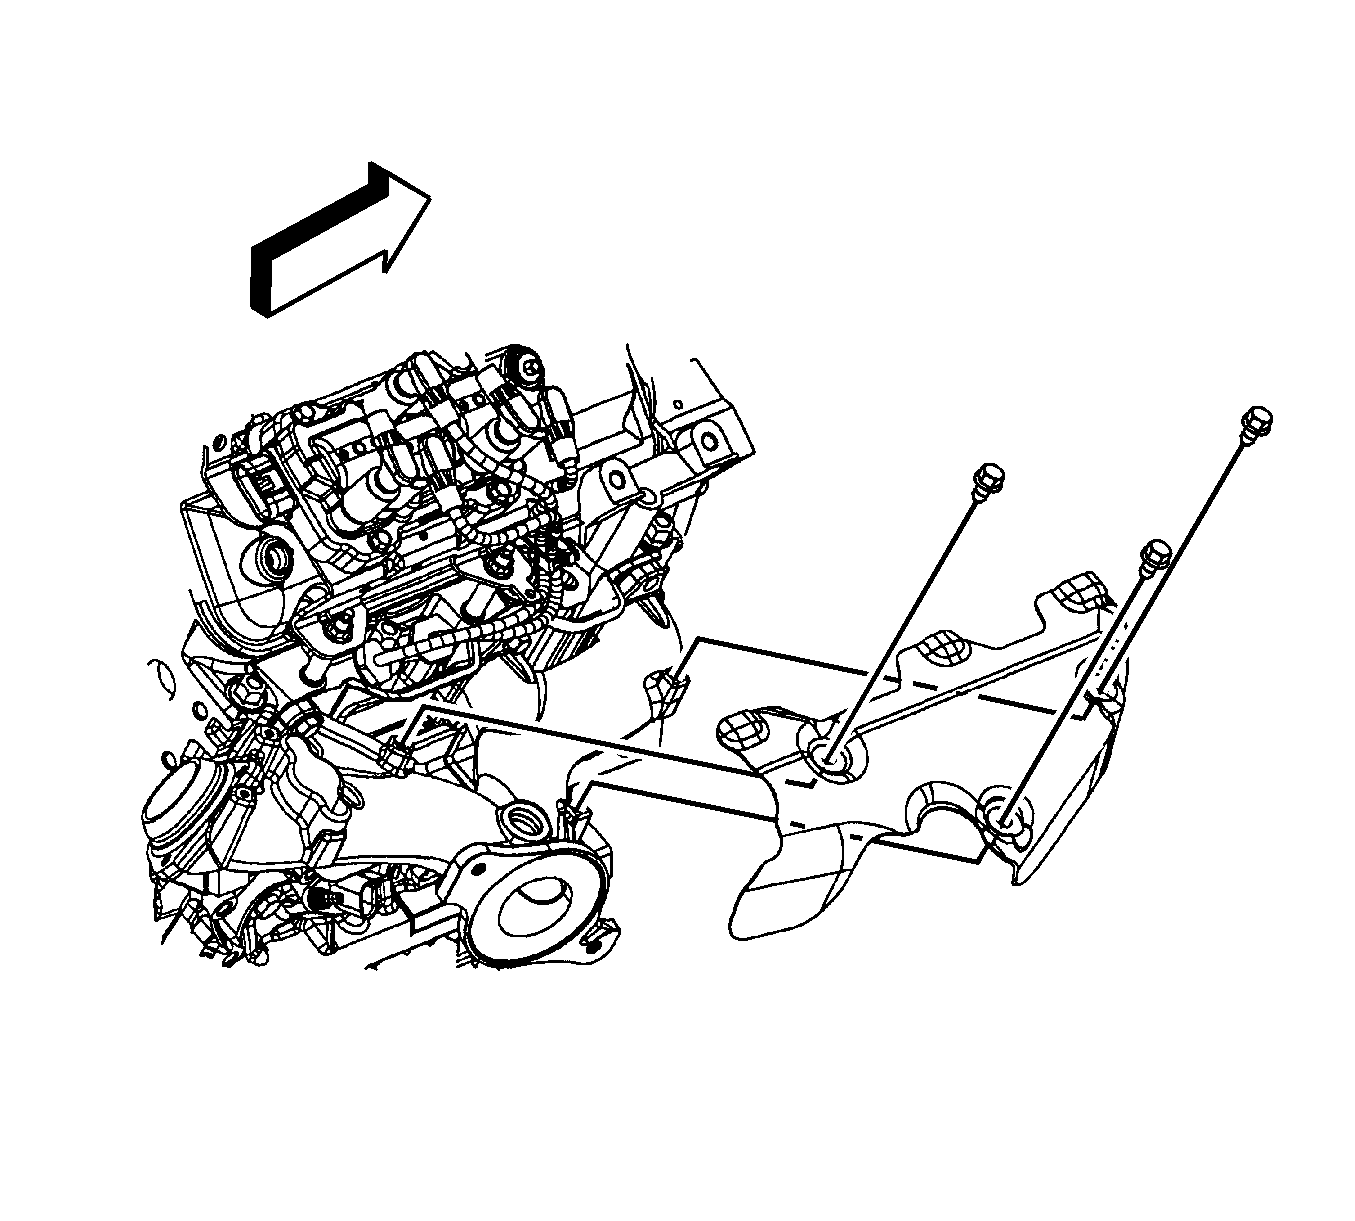
- Remove the exhaust manifold heat shield bolts.
- Remove the exhaust manifold heat shield.
- Remove the exhaust manifold bolts.
- Remove the exhaust manifold.
- Remove the exhaust manifold gasket.
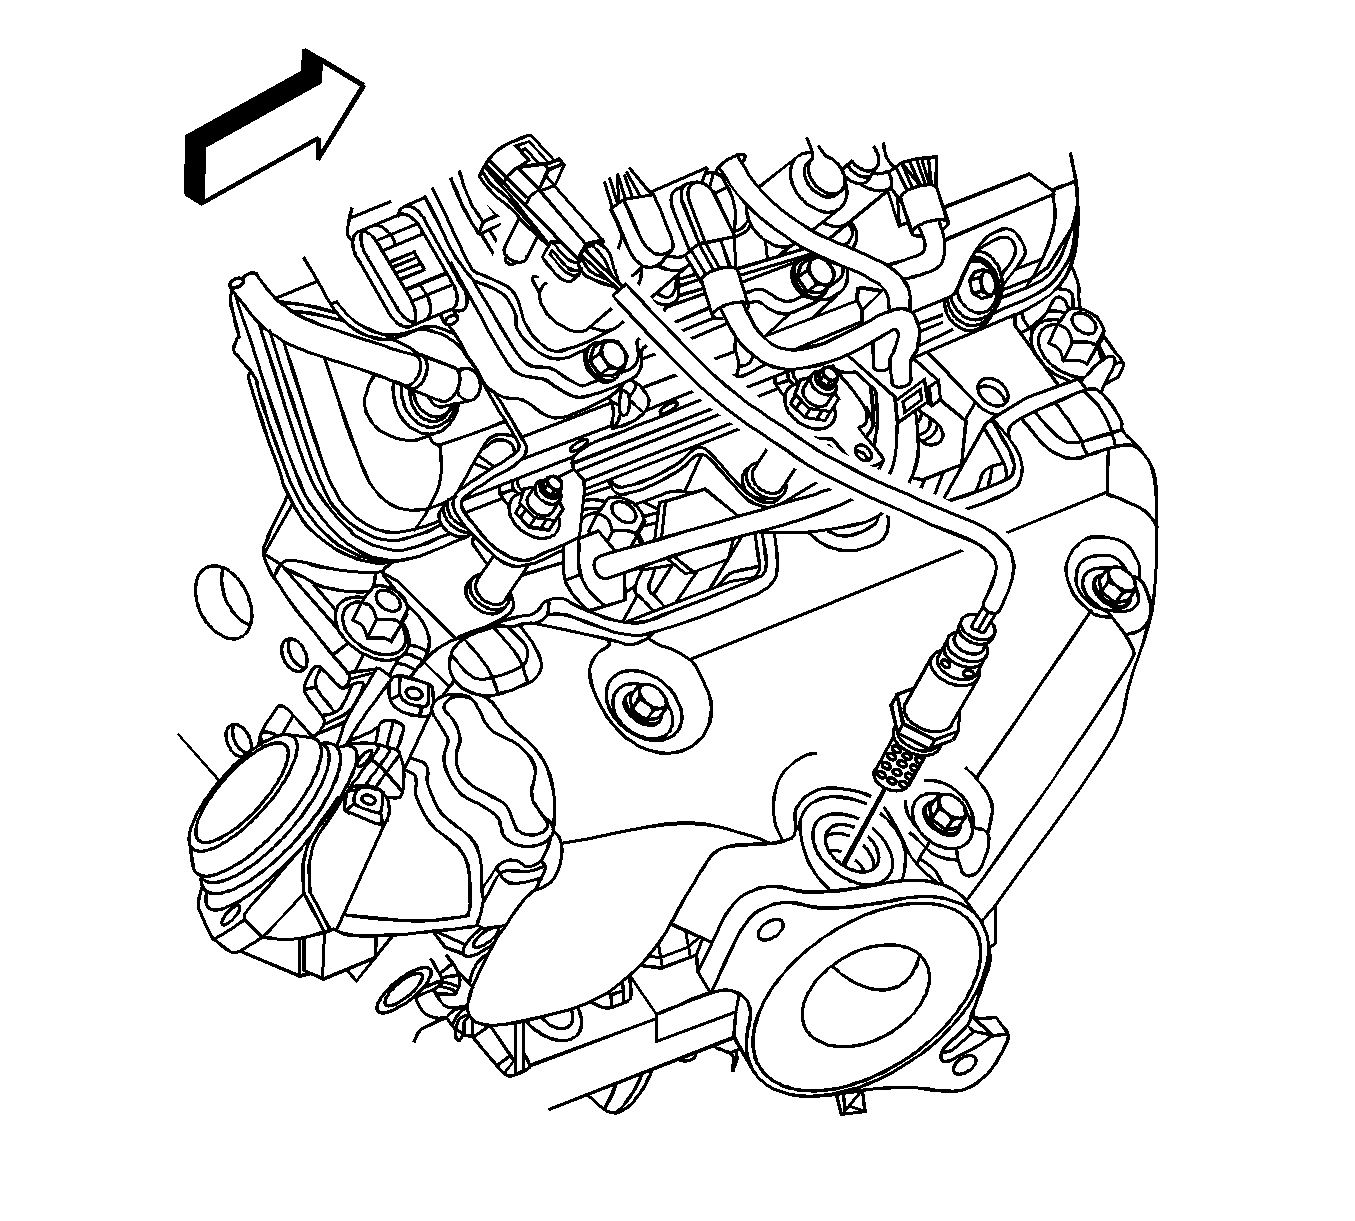
Important: The HO2S uses a permanently attached pigtail and connector. This pigtail should not be removed from the sensor. Damage or removal of the pigtail or connector will affect proper operation of the sensor.
Installation Procedure
- Position a NEW exhaust manifold gasket to the cylinder head.
- Install the exhaust manifold.
- Install the exhaust manifold bolts.
- Install the exhaust manifold heat shield.
- Install the exhaust manifold heat shield bolts.
- Install the catalytic converter. Refer to Catalytic Converter Replacement .
- Install the exhaust crossover pipe (2) to exhaust manifold nuts (1).
- Install the exhaust crossover pipe heat shield (2) and bolts (1).
- Position the heater pipes back to the original position.
- Install the nut holding the heater pipes onto the throttle body.
- Connect the heater hoses to the heater pipes.
- Install the HO2S.
- Connect the engine harness electrical connector (4) to the HO2S.
- Install the ignition coil. Refer to Ignition Coil Replacement .
- Install the generator. Refer to Generator Replacement .
- Install the air cleaner outlet duct. Refer to Air Cleaner Outlet Duct Replacement .

Notice: Refer to Fastener Notice in the Preface section.
Tighten
Tighten the bolts to 20 N·m (15 lb ft).

Tighten
Tighten the bolts to 10 N·m (89 lb in).

Tighten
Tighten the nuts to 20 N·m (15 lb ft).

Tighten
Tighten the bolts to 10 N·m (89 lb in).

Important: Whenever the oxygen sensor is removed, coat the threads with nickel-based anti-seize compound such as GM P/N 5613695 or equivalent.
Tighten
Tighten the sensor to 42 N·m (31 lb ft).

