For 1990-2009 cars only
Tools Required
J 39400-A Halogen Leak Detector
Removal Procedure
- Remove the auxiliary HVAC module assembly. Refer to Auxiliary HVAC Module Replacement .
- Remove the auxiliary thermal expansion valve (TXV) line clamp screws.
- Remove the auxiliary TXV line clamp from the HVAC module assembly.
- Remove the TXV insulation.
- Remove the bolt from the auxiliary TXV line block fitting.
- Disconnect the A/C lines from the auxiliary TXV.
- Remove and discard the sealing washers.
- Cap or tape the A/C lines.
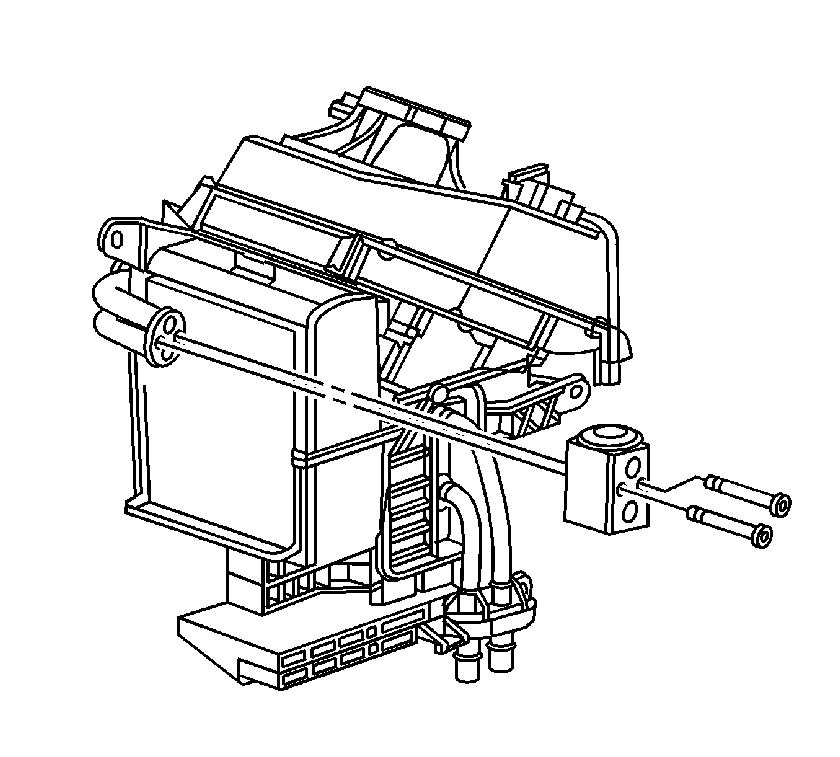
- Remove the auxiliary TXV to auxiliary evaporator core bolts.
- Remove the auxiliary TXV from the auxiliary evaporator core.
- Remove and discard the sealing washers.
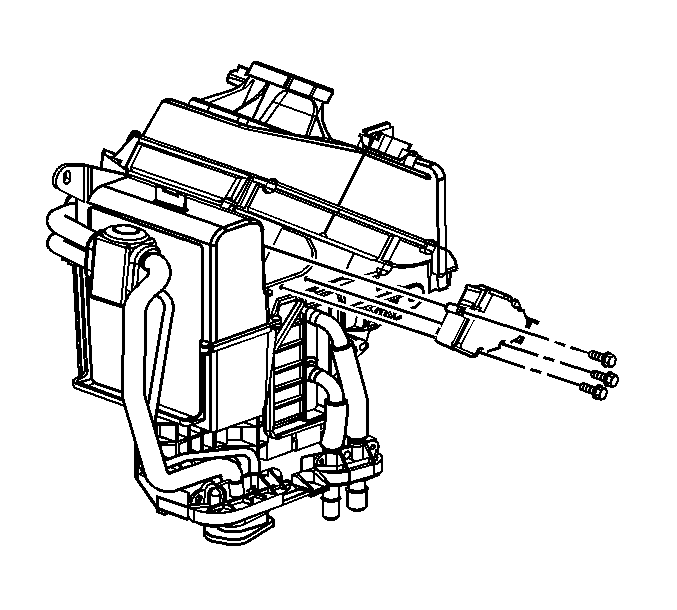
- Remove the auxiliary temperature actuator screws.
- Remove the auxiliary temperature actuator from the auxiliary HVAC module.
- Remove the auxiliary blower motor housing screws.
- Remove the auxiliary blower motor housing from the HVAC module.
- Remove the auxiliary HVAC module case screws.
- Separate the auxiliary HVAC module case halves.
- Remove the auxiliary evaporator core from the lower HVAC module case.
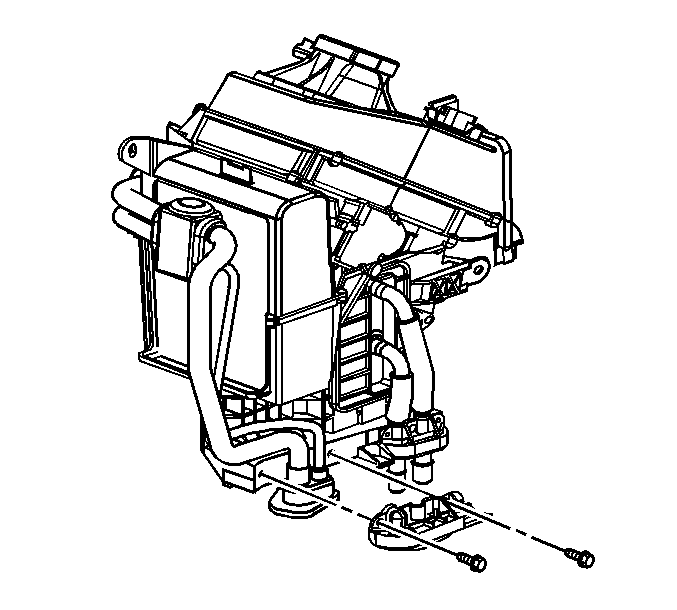
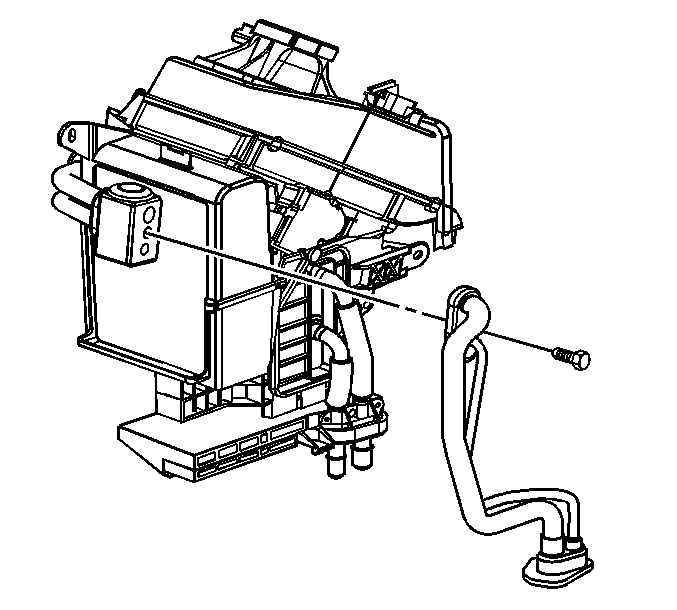
Important: Cap or tape the open A/C lines immediately to prevent system contamination.
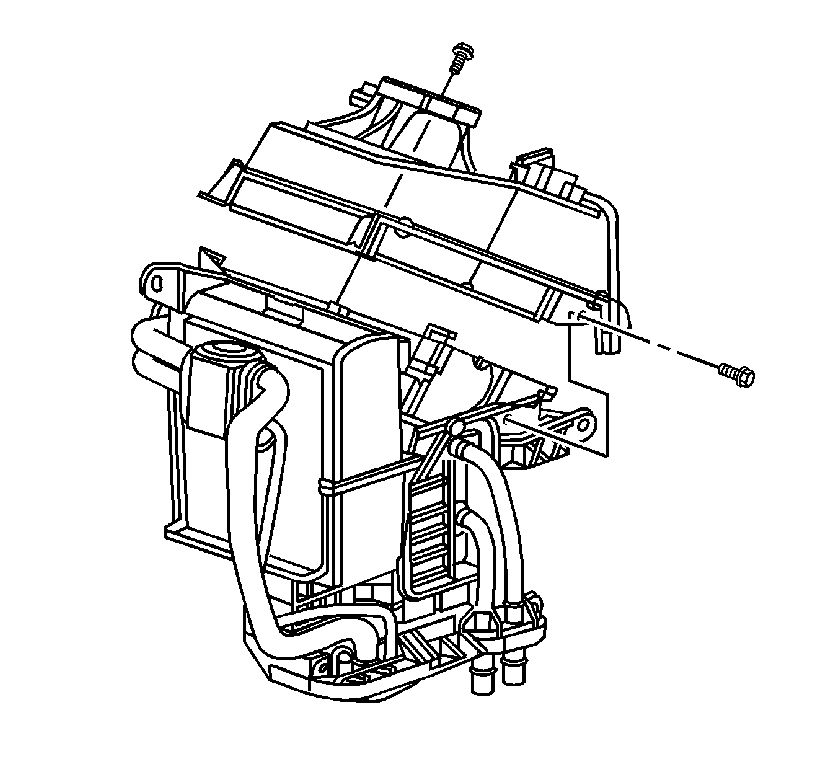
Installation Procedure
- If replacing the auxiliary evaporator core add the specified amount of PAG oil directly to the auxiliary evaporator core. Refer to Refrigerant System Capacities .
- Install the auxiliary evaporator core into the lower HVAC module case.
- Assemble the auxiliary HVAC module case halves.
- Install the auxiliary HVAC module case screws.
- Install the auxiliary blower motor housing to the HVAC module.
- Install the auxiliary blower motor housing screws.
- Install the auxiliary temperature actuator to the auxiliary HVAC module.
- Install the auxiliary temperature actuator screws.
- Install new sealing washers to the auxiliary evaporator core. Refer to Sealing Washer Replacement .
- Remove cap or tape from the A/C lines.
- Install the auxiliary TXV to the auxiliary evaporator core.
- Install the auxiliary TXV to the auxiliary evaporator core mounting bolts.
- Install new sealing washers onto the auxiliary TXV line block fitting. Refer to Sealing Washer Replacement .
- Connect the auxiliary TXV line block fitting to the auxiliary evaporator core.
- Install the auxiliary TXV line block fitting retaining bolt.
- Install the new TXV insulation.
- Install the auxiliary TXV line clamp to the HVAC module assembly.
- Install the auxiliary TXV line clamp screws.
- Install the auxiliary HVAC module assembly. Refer to Auxiliary HVAC Module Replacement .
- Leak test the fittings of the component using J 39400-A .
Notice: Refer to Fastener Notice in the Preface section.
Tighten
Tighten the screws to 1.6 N·m (14 lb in).

Tighten
Tighten the screws to 1.6 N·m (14 lb in).

Tighten
Tighten the screws to 1.6 N·m (14 lb in).

Tighten
Tighten the bolts to 3.5 N·m (31 lb in).

Tighten
Tighten the bolt to 11 N·m (97 lb in).

Tighten
Tighten the screws to 1.6 N·m (14 lb in).
