For 1990-2009 cars only
Removal Procedure
- Open the front door and the sliding side door.
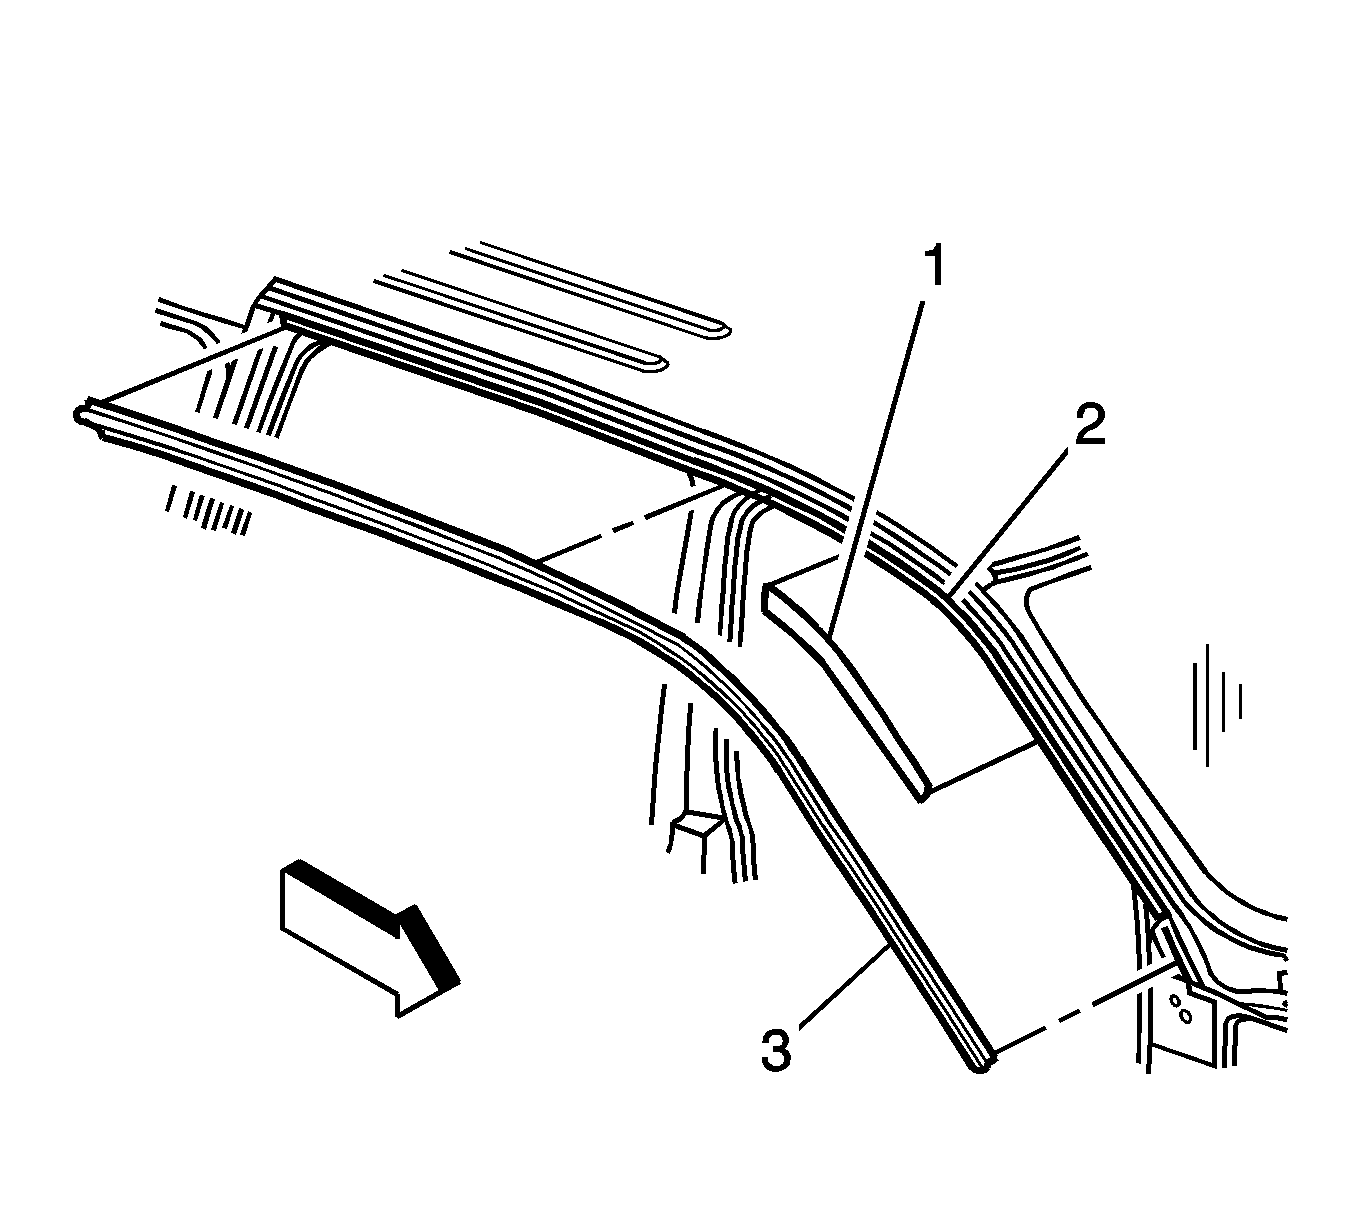
- Pull the front door roof drip rail weatherstrip (3) from the pinchweld flange.
- Clean all of the adhesive from the pinchweld flange using 3M™ P/N 8984 adhesive remover or equivalent.

Installation Procedure
- If the old front door roof drip rail weatherstrip is reused, apply weatherstrip adhesive GM P/N 12345096 (Canadian P/N 993365) or equivalent.
- Ensure the butyl sealing tape (1) is secured to the roof pinchweld flange (2).
- Align the front door roof drip rail weatherstrip to the pinchweld flange at the upper C-pillar.
- Push the weatherstrip (3) onto the pinchweld flange, working it forward and down the A-pillar.
- Position the forward end of the front roof drip rail weatherstrip under the fender.
- Close the front door and the sliding side door.

Important: A mastic/sealer/glue is inside of the new front door opening drip rail weatherstrip. If you are using a new front door opening drip rail weatherstrip, DO NOT use any weatherstrip adhesive.
