For 1990-2009 cars only
Stress Crack In Windshield (Replace Windshield)

| Subject: | Stress Crack In Windshield (Replace Windshield) |
| Models: | 2003 Cadillac CTS |
Condition
Some customers may comment that the windshield has cracks in the left or right upper corners.
Cause
The windshield guide pins may be making hard contact with the upper corners of the windshield guide slots.
Correction
Replace the windshield.
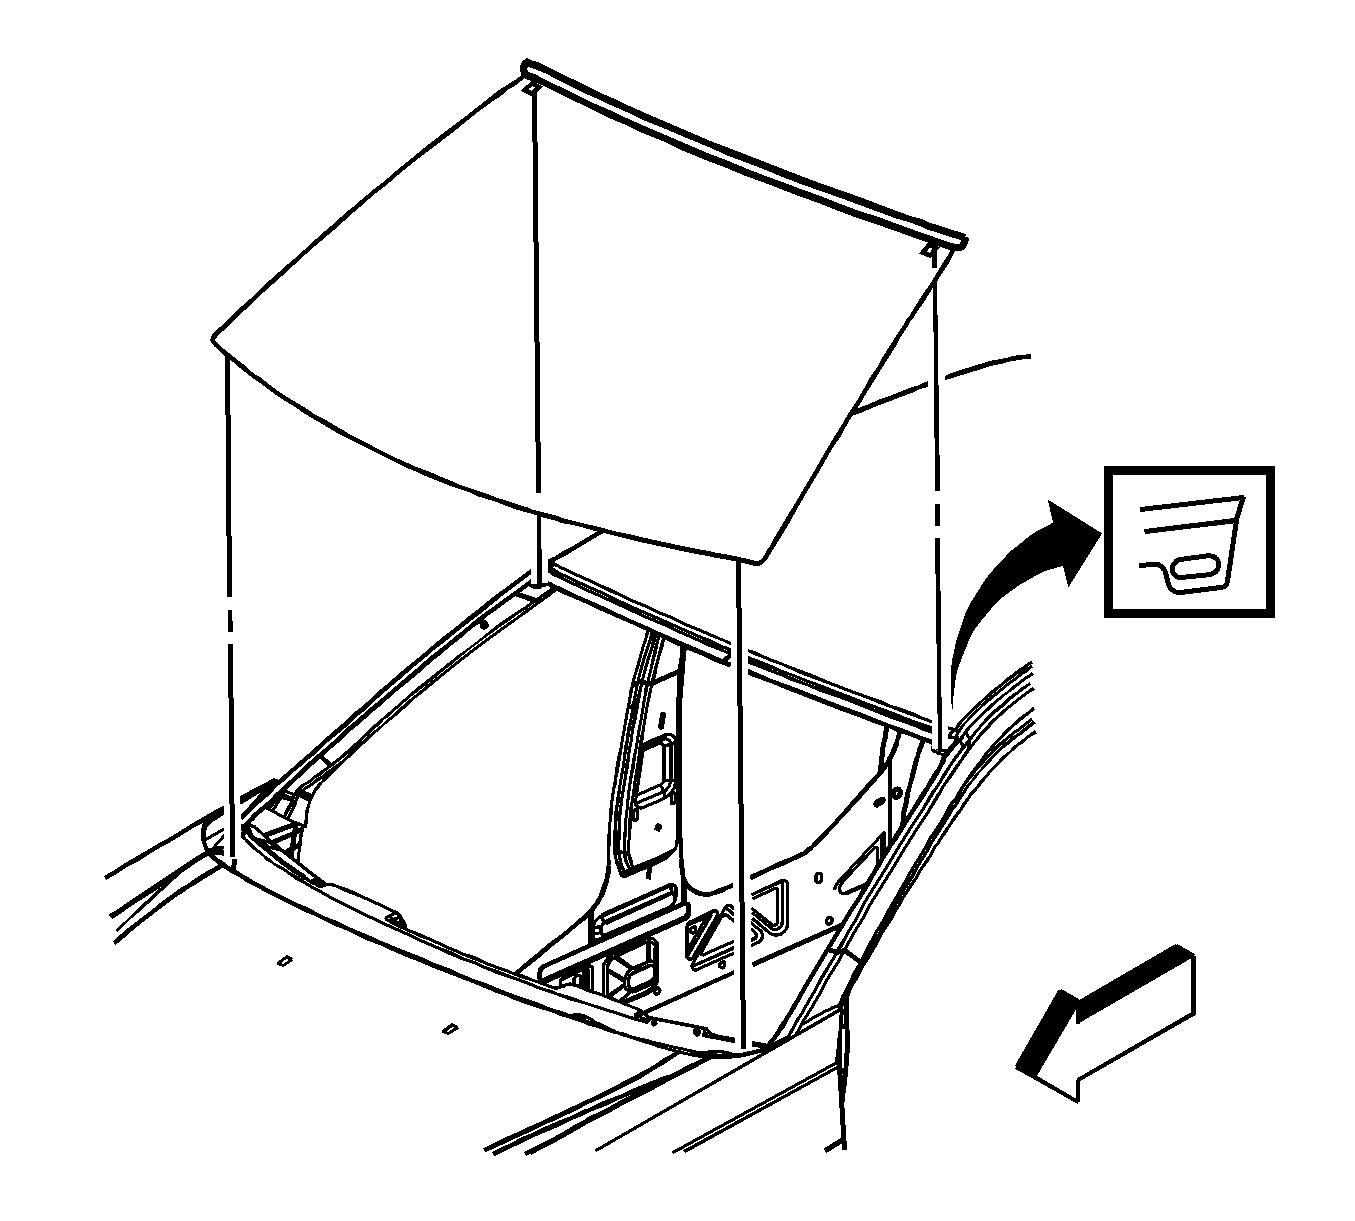
- Remove the outer windshield side reveal moldings.
- Apply a double layer of masking tape around the perimeter of the windshield to prevent damage to the paint.
- Remove the nut covers and nuts that retain the wiper arms; then remove the arms.
- Remove the rear hood seal from the air inlet grille flange.
- Remove the left and right hand air inlet grille panels that are retained by four screws and one nut.
- Remove the left and right interior pillar garnish molding.
- Remove the rearview mirror from the windshield and disconnect the coaxial antenna connector.
- Carefully cut the upper flap of the windshield reveal molding in order to access the urethane adhesive bead.
- Cut the urethane sealer with J-tool J 24402-A , J 39032 or equivalent. The lower part of the windshield is cut out from the inside of the vehicle with a long utility knife or equivalent.
- Remove the windshield from the vehicle with the aid of an assistant.
- Clean the area of loose urethane while leaving a thin base 2 mm of urethane on the pinchweld flange.
- Install the left and right interior garnish molding.
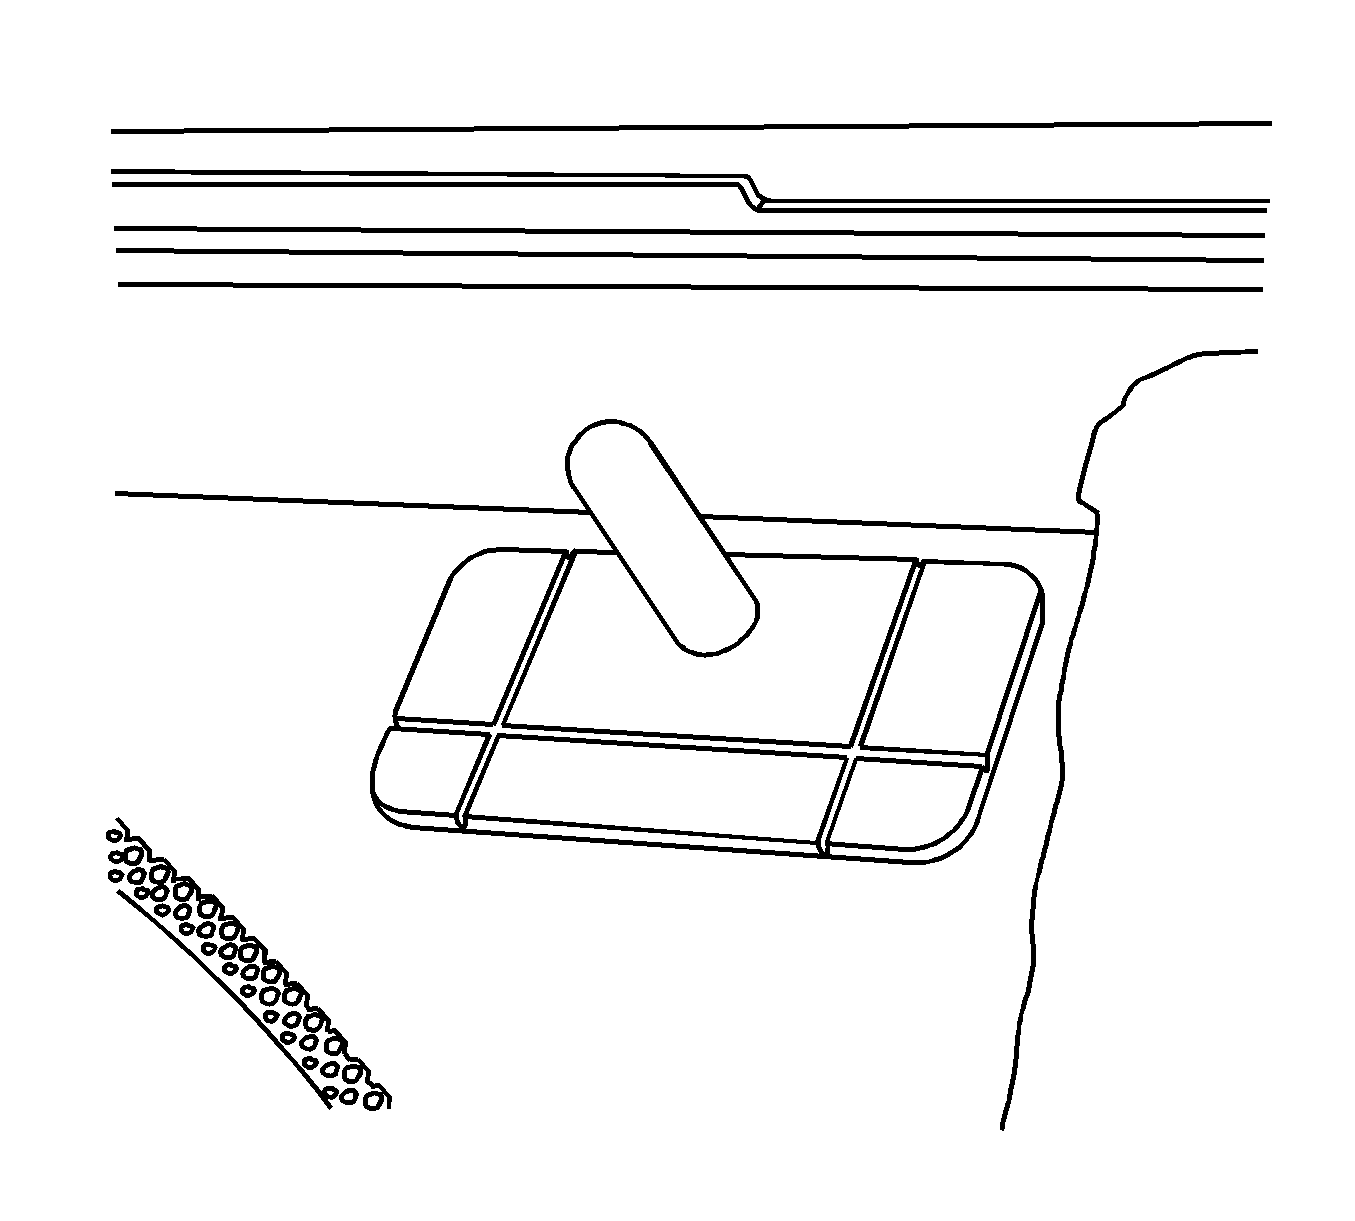
- When prepping the windshield for installation, if the two guide pins are on the windshield, remove the pins using a razor blade scraper.
- Apply three sections of tape to the roof to retain the windshield in place until dried.
- Apply the urethane to the pinchweld flange, GM P/N 12346392 (in Canada, 10953461), or equivalent.
- With the aid of an assistant, install the windshield to the opening, making sure that there are no gaps between the roof and the upper windshield reveal molding. Once the windshield is in place, pull the tape over the windshield for alignment.
- Remove the masking tape from around the perimeter of the windshield after 6 hours.
- Install the left and right side reveal moldings.
- Install the left and right air inlet grille.
- Install the rear hood seal to the air inlet grille flange.
- Install the wiper arm with the marks on the windshield.
- Install the wiper arm nut caps.
- Install the rearview mirror to the bracket and connect the coaxial antenna.
Tighten
Tighten the screws to 6 N·m (53 lb in).
Tighten
Tighten the wiper arm nuts to 35 N·m(26 lb ft).
Parts Information
Part Number | Description | Qty |
|---|---|---|
12346392 (U.S.) 10953461 (Canada) | Urethane Adhesive Kit | 1 |
Parts are currently available from GMSPO.
Warranty Information
For vehicles repaired under warranty, use:
Labor Operation | Description | Labor Time |
|---|---|---|
C0034 | Glass, Windshield Replace | 1.4 hrs |
