For 1990-2009 cars only
Tools Required
| • | J 41476 Front and Rear Cover Alignment (Crankshaft Oil Seal Area) |
| • | J 41478 Crankshaft Front Oil Seal Installer |
Removal Procedure
- Remove the crankshaft balancer. Refer to Crankshaft Balancer Replacement .
- Remove the water pump. Refer to Water Pump Replacement in Engine Cooling.
- Remove the air conditioning belt tensioner. Refer to Drive Belt Tensioner Replacement - Air Conditioning .
- Remove the accessory drive belt idler pulley. Refer to Drive Belt Idler Pulley Replacement - Accessory .
- Remove the generator bracket. Refer to Generator Bracket Replacement in Engine Electrical.
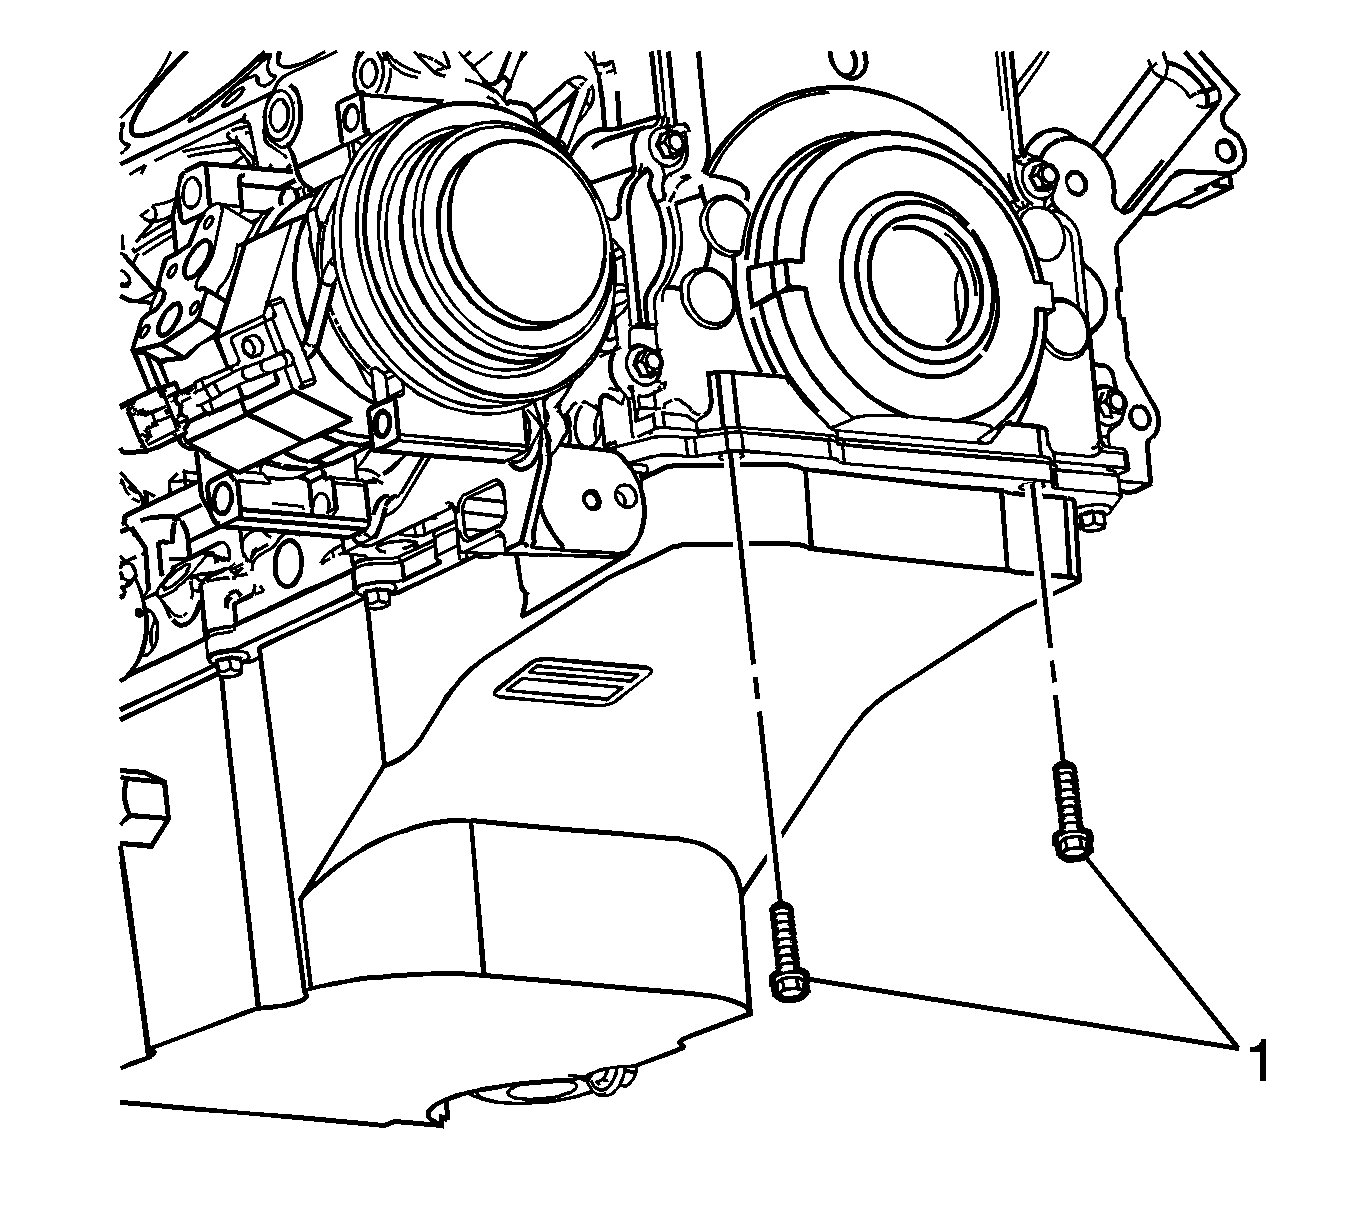
- Remove the oil pan-to-front cover bolts (1).
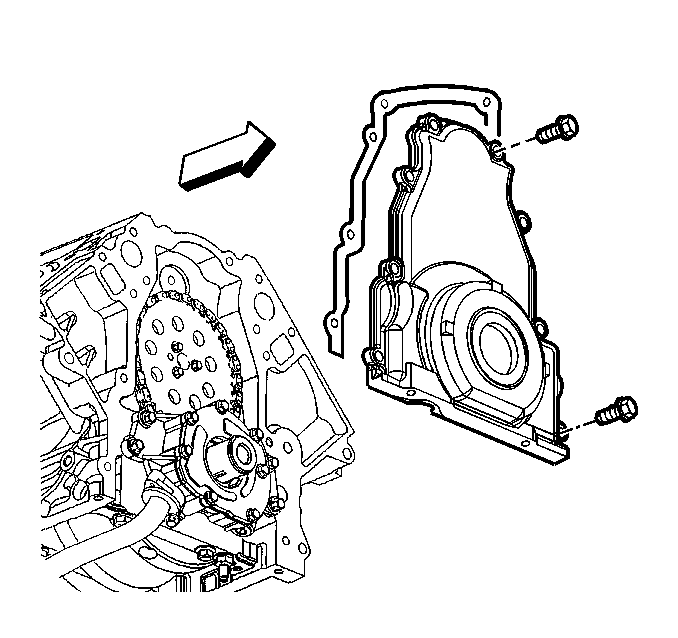
- Remove the front cover bolts.
- Remove the front cover and gasket.
- Discard the front cover gasket.
- Clean and inspect the engine front cover. Refer to Engine Front Cover Cleaning and Inspection .
Installation Procedure
Important:
• Do not reuse the crankshaft oil seal or front cover gasket. • Do not apply any type sealant to the front cover gasket (unless specified). • The special tool in this procedure is used to center the crankshaft front
oil seal. • All gasket surfaces should be free of oil or other foreign material during
assembly. • The crankshaft front oil seal MUST be centered in relation to the crankshaft. • An improperly aligned front cover may cause premature front oil seal
wear and/or engine oil leaks.
- Apply a 5 mm (0.20 in) bead of sealant GM P/N 12378190, or equivalent 20 mm (0.80 in) long to the oil pan to engine block junction.
- Install the front cover gasket and cover.
- Install the front cover bolts until snug. Do not overtighten.
- Install the oil pan-to-front cover bolts (1) until snug. Do not overtighten.
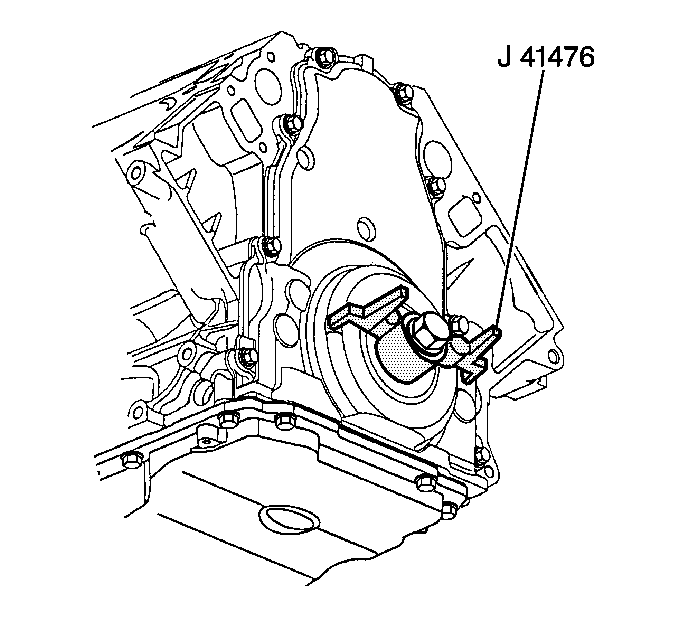
- Install the J 41476 to the front cover.
- Align the tapered legs of the J 41476 with the machined alignment surfaces on the front cover.
- Install the crankshaft balancer bolt until sung. Do not overtighten.
- Tighten the oil pan-to-front cover bolts to 25 N·m (18 lb ft).
- Tighten the engine front cover bolts to 25 N·m (18 lb ft).
- Remove the J 41476 .
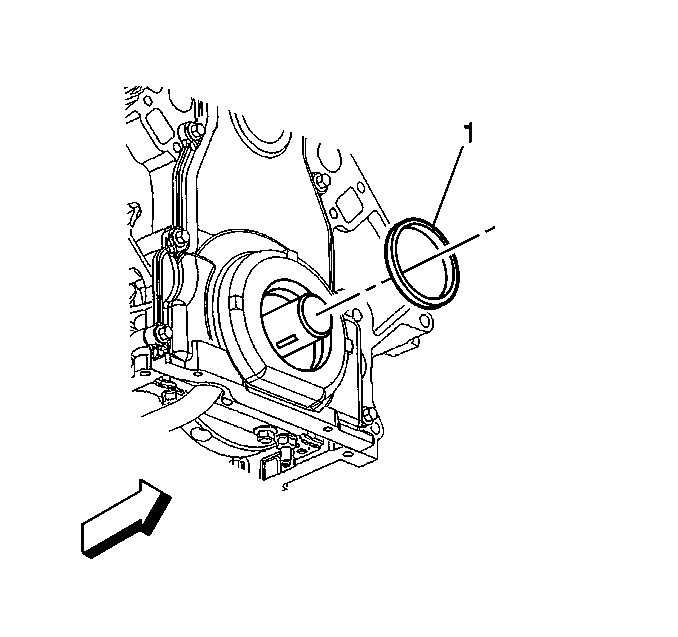
- Lubricate the outer edge of the oil seal (1) with clean engine oil.
- Lubricate the front cover oil seal bore with clean engine oil.
- Install the crankshaft front oil seal into theJ 41478 guide.
- Install the J 41478 threaded rod (with nut, washer, guide, and oil seal) into the end of the crankshaft.
- Use the J 41478 in order to install the oil seal into the cover bore.
- Install the generator bracket. Refer to Generator Bracket Replacement in Engine Electrical.
- Install the accessory drive belt idler pulley. Refer to Drive Belt Idler Pulley Replacement - Accessory .
- Install the air conditioning belt tensioner. Refer to Drive Belt Tensioner Replacement - Air Conditioning .
- Install the water pump. Refer to Water Pump Replacement in Engine Cooling.
- Install the crankshaft balancer. Refer to Crankshaft Balancer Replacement .


Notice: Refer to Fastener Notice in the Preface section.
Tighten
Important:
• Do not lubricate the oil seal sealing surface. • Do not reuse the crankshaft oil seal.
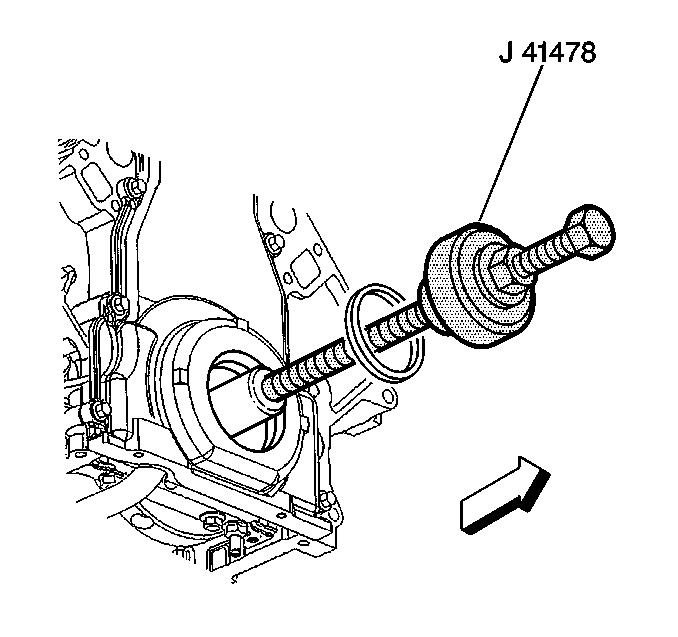
| • | Use a wrench and hold the hex on the installer bolt. |
| • | Use a second wrench and rotate the installer nut clockwise until the seal bottoms in the cover bore. |
| • | Remove the tool. |
| • | Inspect the oil seal for proper installation. The oil seal should be installed evenly and completely into the front cover bore. |
